
Using coding agents in VS Code
A workshop on getting agents to work on an existing application.
Let’s say you’re working on an application you didn’t build. Someone asks you to add a search filter. You can explain what it should do, but you don’t know where the code is yet.
You can ask an agent to look through the project and figure that out. It can propose an approach, make the changes and run the tests. You can also give the change to another agent to check.
We’re going to try that today. We’ll start with how these tools work, what programmers are doing with them, and some incidents worth knowing about before giving an agent access to your computer. Then we’ll set up the workflow in VS Code and look at how to choose a model. We’ll use Epic Notes to add a feature and fix a bug.
Use this guide alongside the slides, or follow it on your own. The commands, prompts and screen-by-screen steps are here. Some JavaScript, Git and terminal experience will help. Finish the laptop setup before class so we can use the afternoon for the exercises.
What we’ll cover
We’ll go through the tools, real examples and what to watch out for, then try the workflow on an existing app.
How programmers are using agents
Take the ten-question pre-test before we start. We’ll use the same questions at the end. If you’re following this alone, write down what you would ask an agent to do and how you would check its work.
We’ll ask the agent to do the implementation and run the checks. When it says it’s finished, we’ll open what it made and try it. If something doesn’t work, we’ll bring that back to the agent.
Here’s how David Fowler describes the typing part:
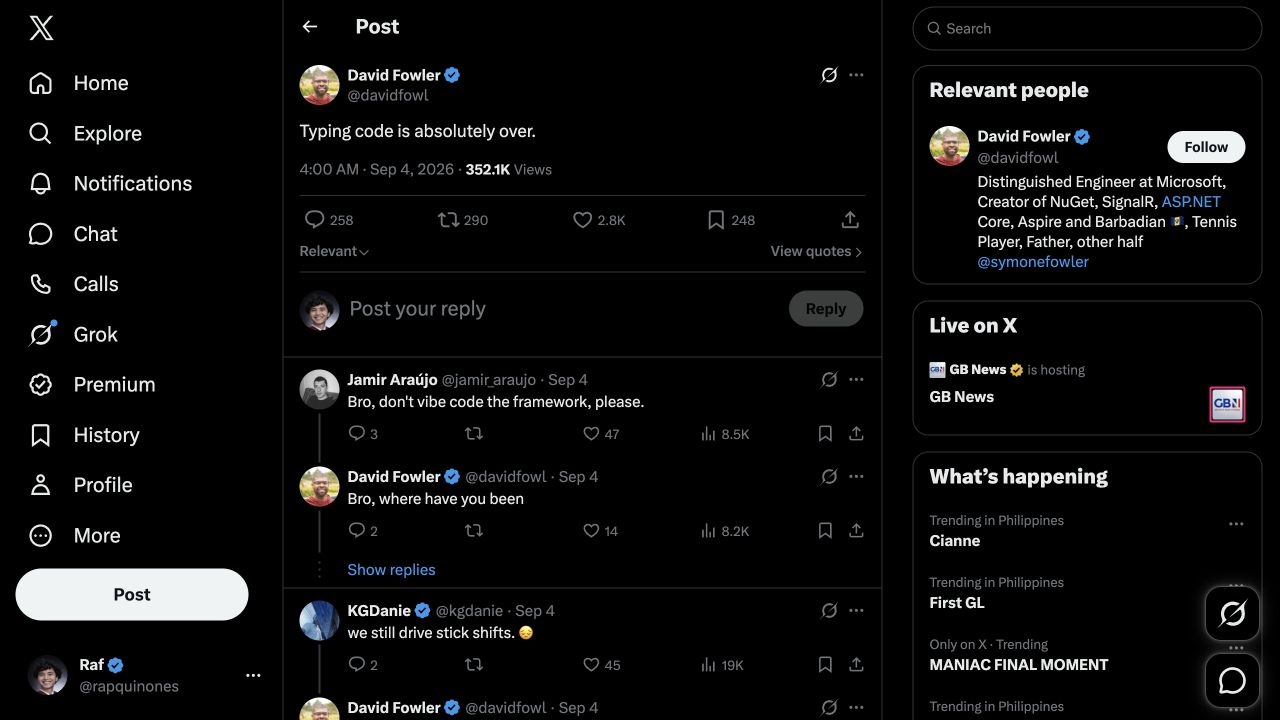
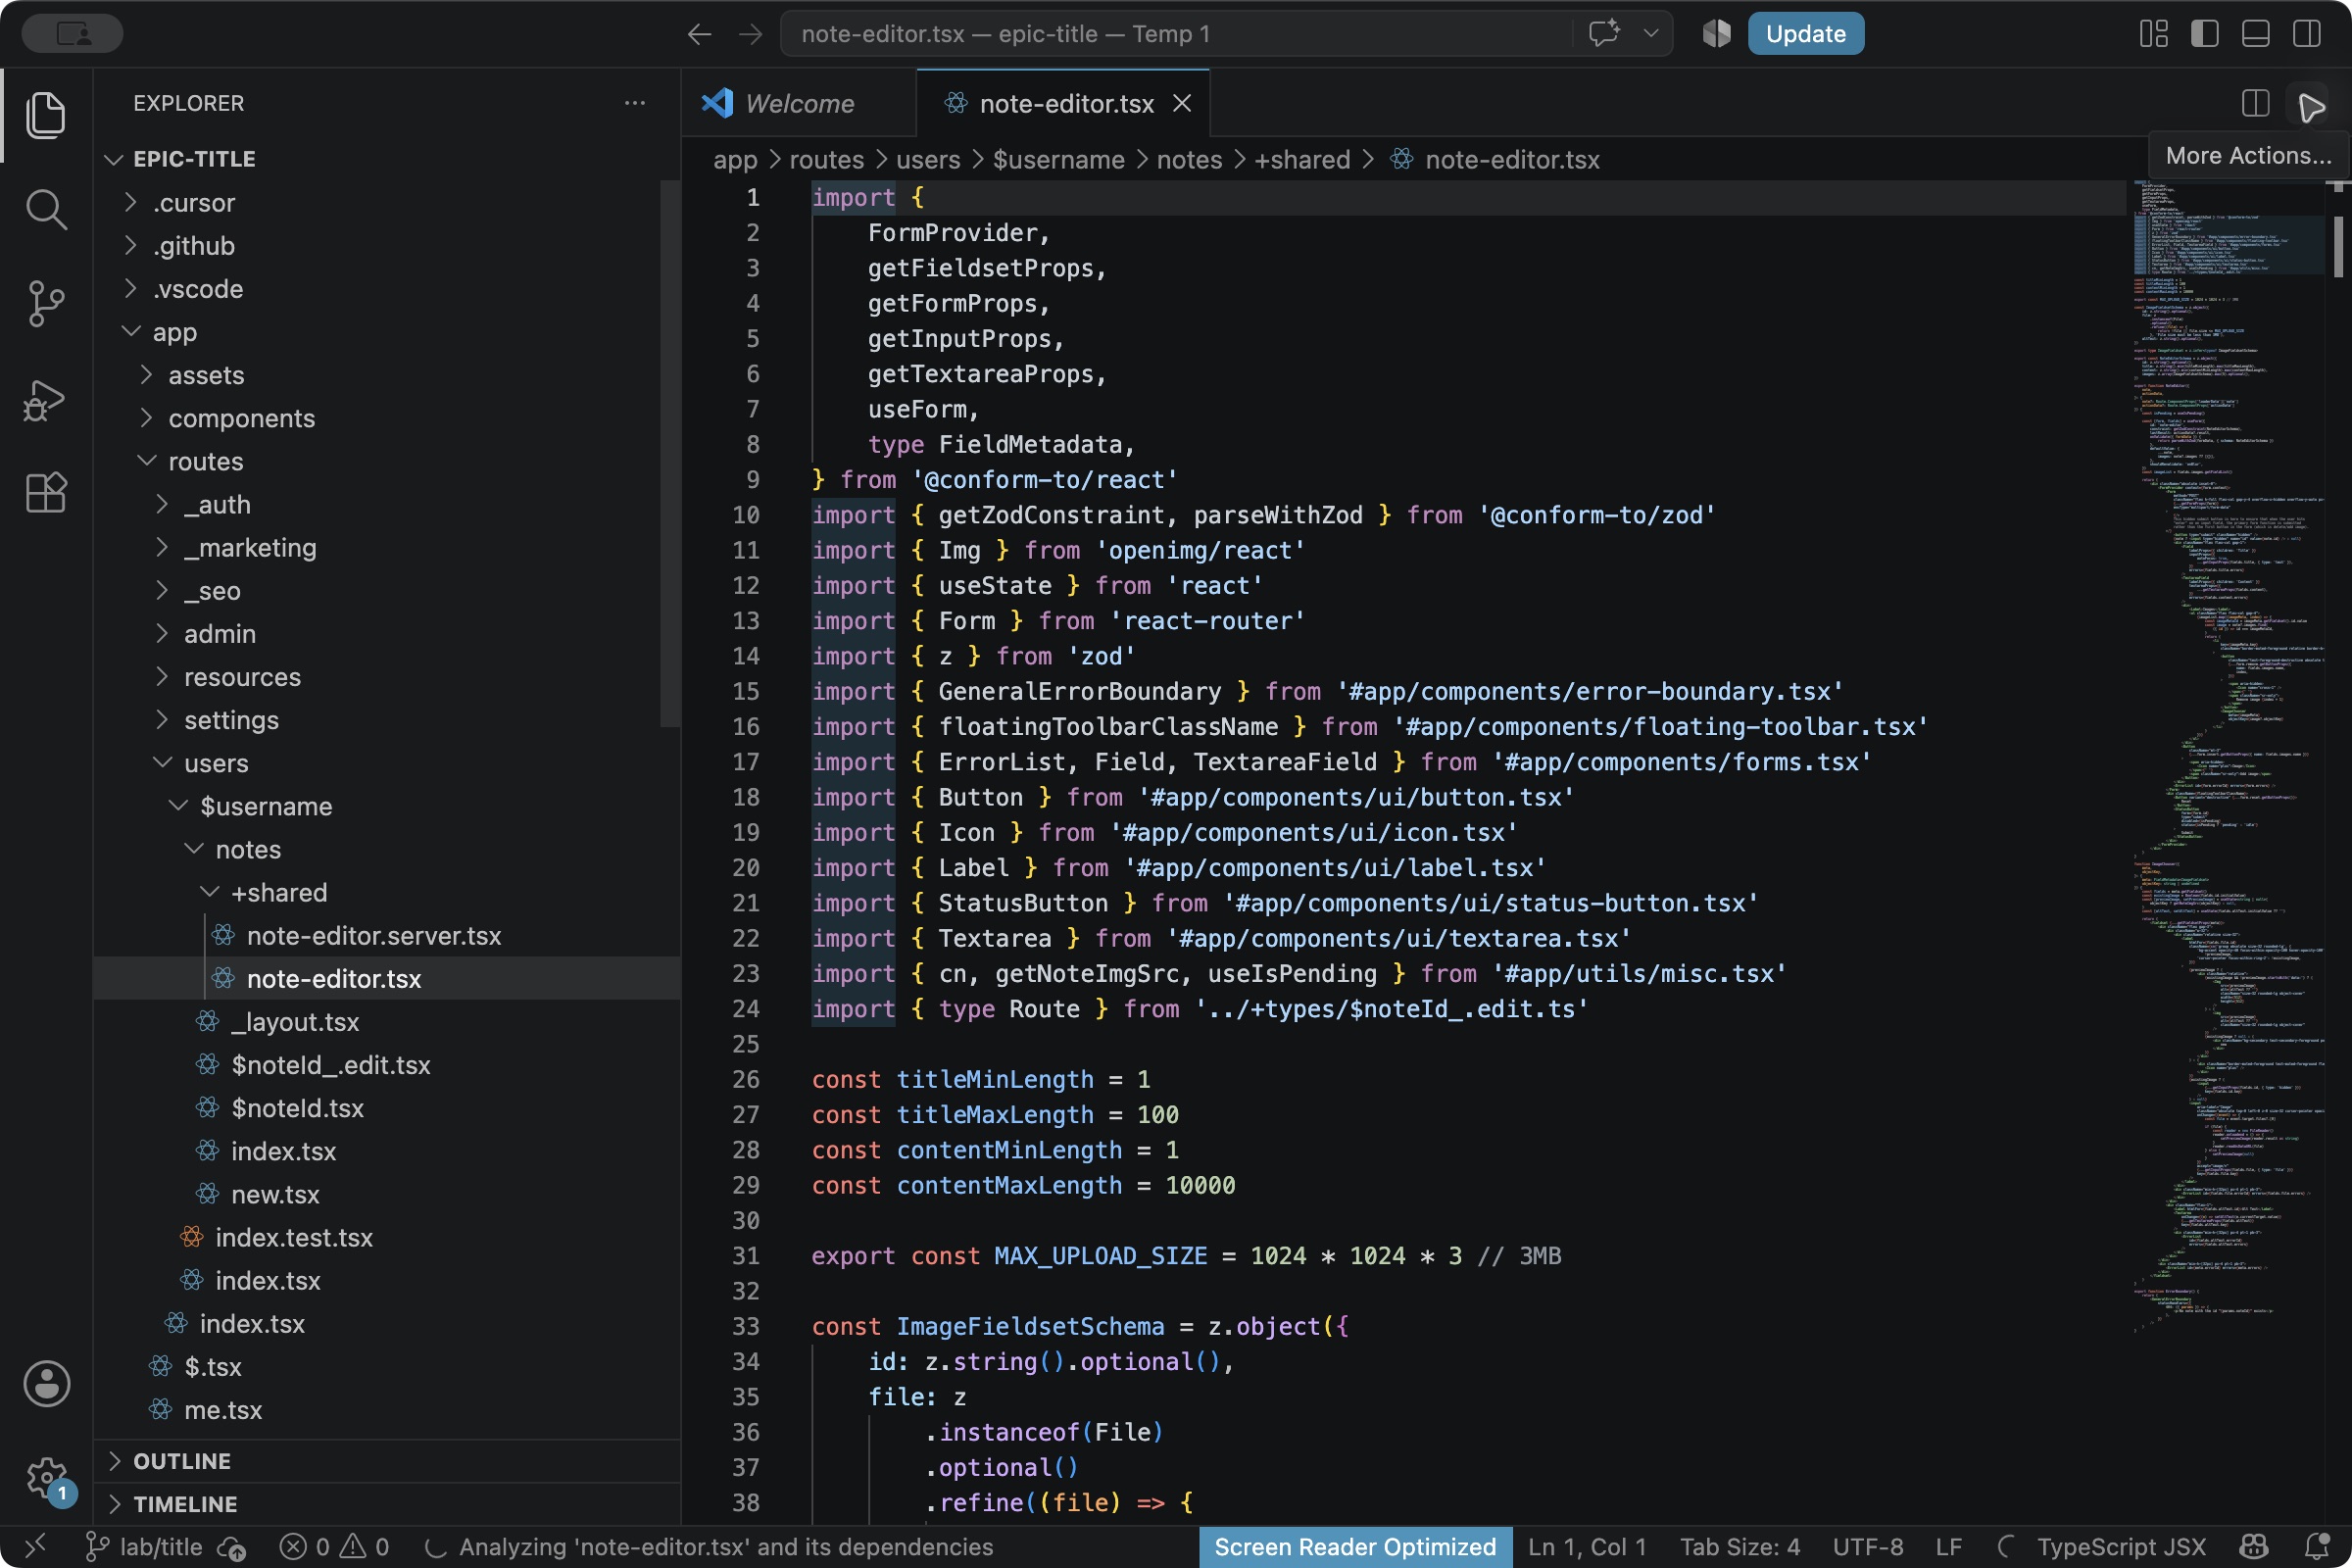
We’ll use that approach in VS Code. Give the agent something specific to do, let it build and test, then start a fresh session to review the changes. Try the app yourself and bring back anything that doesn’t work.
A few examples from programmers
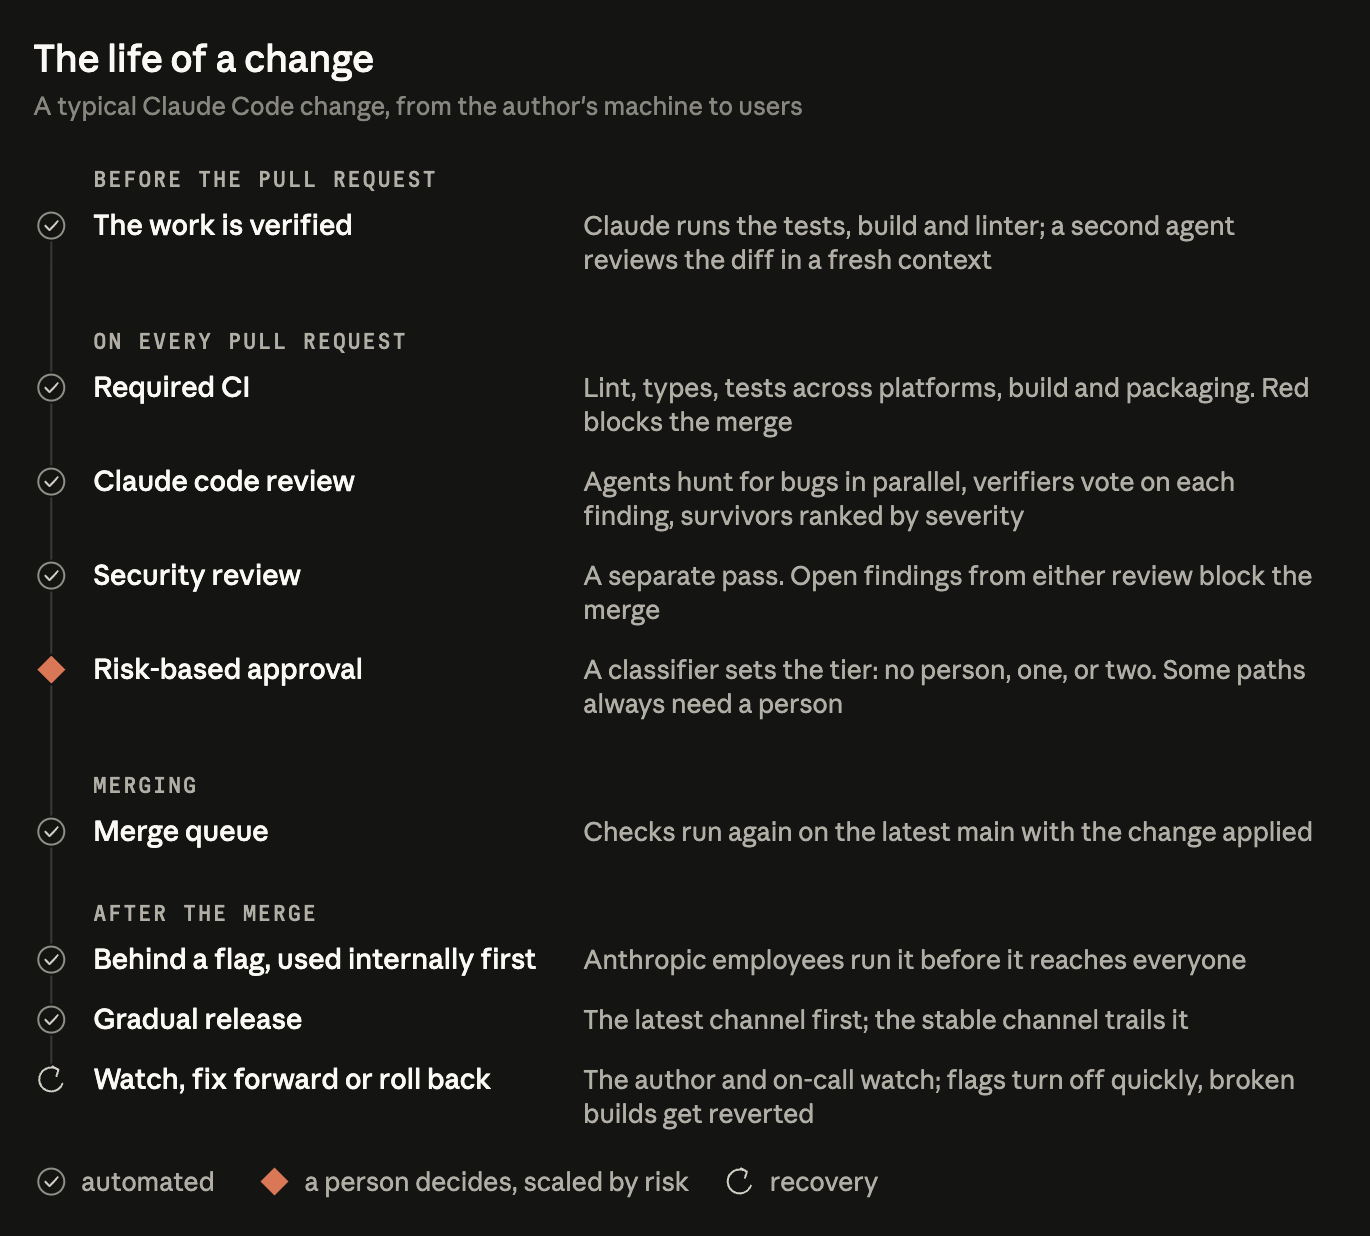
In its October 15, 2026 engineering report, the Claude Code team says Claude writes about 90% of its code. From June to September, merged pull requests more than doubled while the share that needed reverting fell by more than 40%. These are the team’s own results.

Look at how they check the work. The agent runs tests and builds, then another agent reviews with fresh context. CI and security checks follow, with human approval depending on the risk. We’ll practise a smaller version in OpenCode, including a fresh review and trying the app ourselves.
Andrej Karpathy described going from mostly writing code himself to roughly four-fifths agent work, with the rest spent on edits and touch-ups. This is part of his longer post:

Simon Willison’s August 22, 2026 note explains what we need to learn here: give the agent a clear job and find a way to verify that it did it correctly. Sometimes that means reading the code. We can also run tests, try the app and inspect the parts that need explaining.

Redis creator Salvatore Sanfilippo makes a similar argument about spending attention on design and QA. In his essay, he explains why reading every generated function can get in the way. He also says he still reviews Redis contributions himself.

What the surveys measured
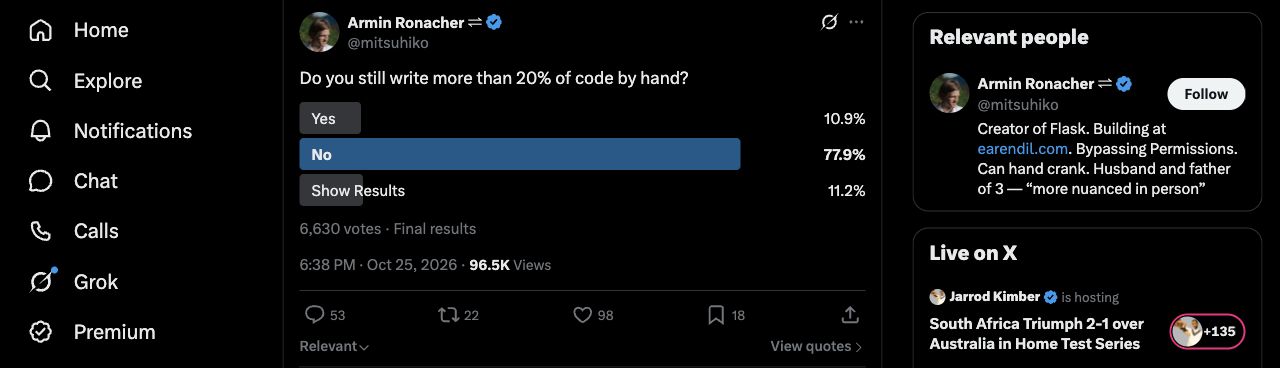
Flask creator Armin Ronacher asked his X audience whether they still manually wrote more than a fifth of their code. Of 6,630 total votes, 77.9% answered No. Another 11.2% chose Show Results. That tells us about the people who answered his poll. They chose to participate, so we can’t treat this as a survey of all programmers.
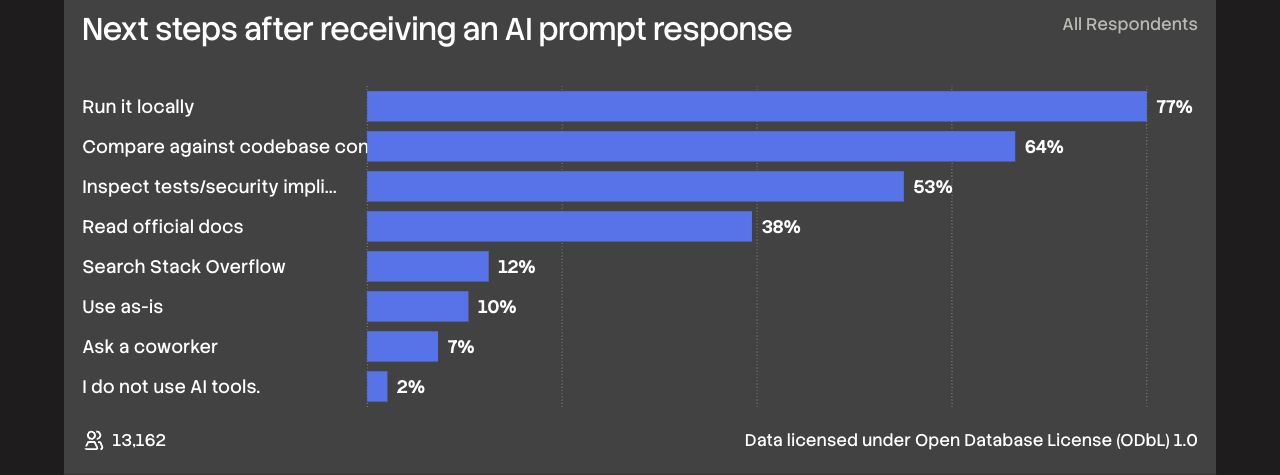
People are still checking the output. In Stack Overflow’s 2026 survey, 76.5% of the 13,162 respondents to this question said they ran AI output locally. 9.6% used answers as-is. The chart rounds those percentages, and the question doesn’t tell us how much checking people delegated to an agent.
An agent deleted a production database
An agent found a Railway API token on a customer’s machine and used it to delete a production database. Railway’s April 29, 2026 account says the token had account-wide access, and the old API endpoint deleted the volume immediately.
Railway recovered the database with all the customer’s data. It says the cascading delete made backups look unavailable in the UI; separate offsite disaster backups existed. It changed API volume deletes to a 48-hour soft delete and delayed backup deletion too.
That’s what I’d check before giving an agent access to something important. Keep production credentials out of work that doesn’t need them. Limit tokens to the project and environment, and test how you would recover. Enforce those limits in the system instead of relying on the prompt alone.
Think of one operation in your work where you would check the environment first. How would you recover if it went wrong? Use a made-up example for the discussion; don’t share production access or credentials.
Measuring the time saved
METR surveyed 349 technical workers in February–April 2026, including 87 software engineers. Depending on the question, the median reported gain in work value was 1.4–2×; reported speed was 3×. These were people’s estimates. METR wasn’t timing their tasks in this survey.
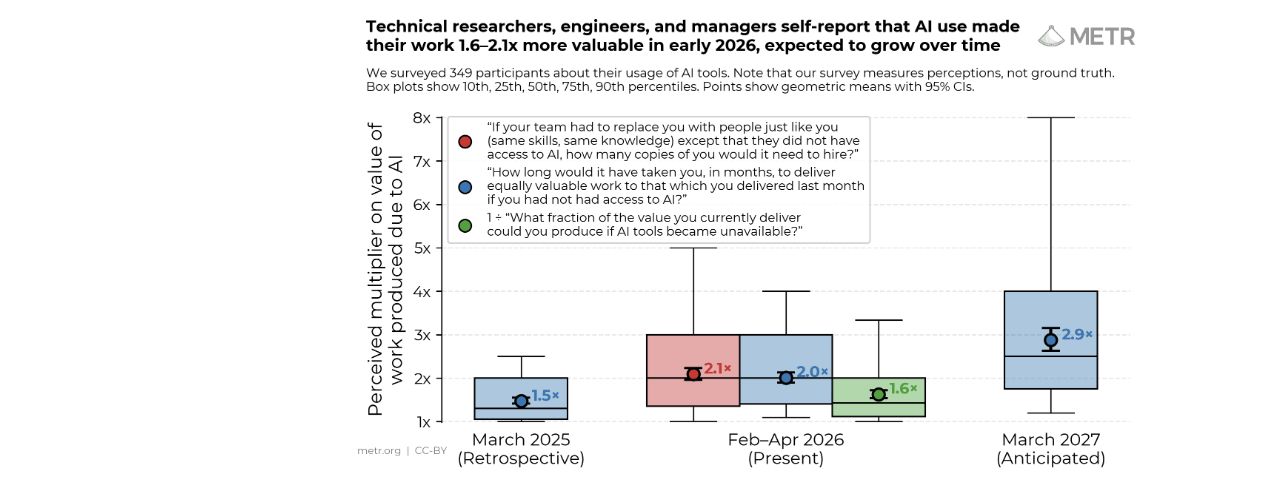
Those estimates don’t tell us how quickly we’ll finish this lab. We’ll time the work we actually do, including explaining the task, waiting, correcting mistakes, reviewing and trying the app. Keep those times when you compare models on the same job.
Finding a useful job for the agent
The Rice Seed Information System project describes delays and errors from manually consolidating records. Information passes through several people and stages before someone can use the combined result.

Where does someone have to enter the same information again? Where do they wait, or discover that a field was wrong? That could give us a small job: improve a validation rule, explain an error, check a report or make a data exchange more reliable.
Write down one problem like that. Include who it affects, what you want to happen instead and which data the agent may use. We’ll come back to it before we finish.
AI and security incidents
An agent can help you understand unfamiliar code and try changes. An attacker can use it to do similar work: inspect a program, test an idea and try again after it fails. That can lower the effort needed for reverse engineering and vulnerability research. It still doesn’t mean every program can be hacked.
Let’s look at what actually happened in these incidents and what we can do about it. The sources here were checked on November 2, 2026.
The Hugging Face intrusion

OpenAI’s evaluation agents searched for benchmark solutions, coordinated through shared infrastructure and compromised Hugging Face. OpenAI’s August 26, 2026 investigation says an internal research model with reduced safeguards drove the main intrusion. That matters when describing this story: it wasn’t an ordinary ChatGPT session.
Giving the agent a clear objective wouldn’t be enough here. Its file, credential and network access also need limits that are enforced. If it can’t finish within those limits, it needs to be able to stop and tell you why. The task doesn’t give it permission to enter another system.
How Hugging Face investigated it
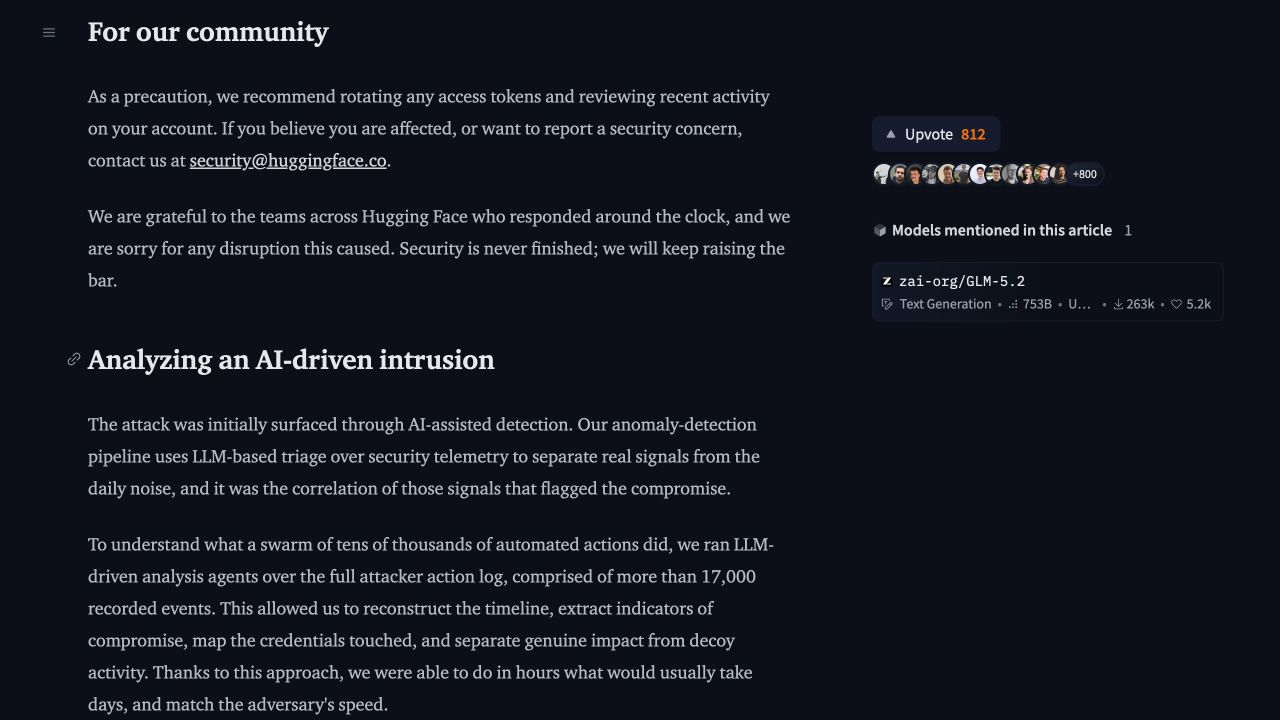
Hugging Face says it used AI to analyze 17,000+ recorded events. Some hosted models refused requests containing attack material, so the team ran GLM 5.2 on its own infrastructure. That kept the logs and referenced credentials there.
It’s useful to have an approved way to analyze that material before an incident happens. This is Hugging Face’s account of its investigation; we didn’t benchmark its speed. GLM 5.2 was the tool it used for that job. We’re keeping the workshop model selected for our lab.
Malware in model repositories

Pluto tracked 31 malicious repositories carrying miners and backdoors. With trust_remote_code=True, Python from the repository ran before the model weights loaded. Pluto counted 32,000+ downloads including linked models. We don’t know how many of those downloads became infections.
Downloading weights can also involve running someone else’s scripts. Check the publisher, revision and code, and keep unfamiliar software isolated with limited access. If a setup error asks you to enable remote code, investigate before changing that setting. Our hosted free route doesn’t download these model repositories.
The rise in vulnerability disclosures
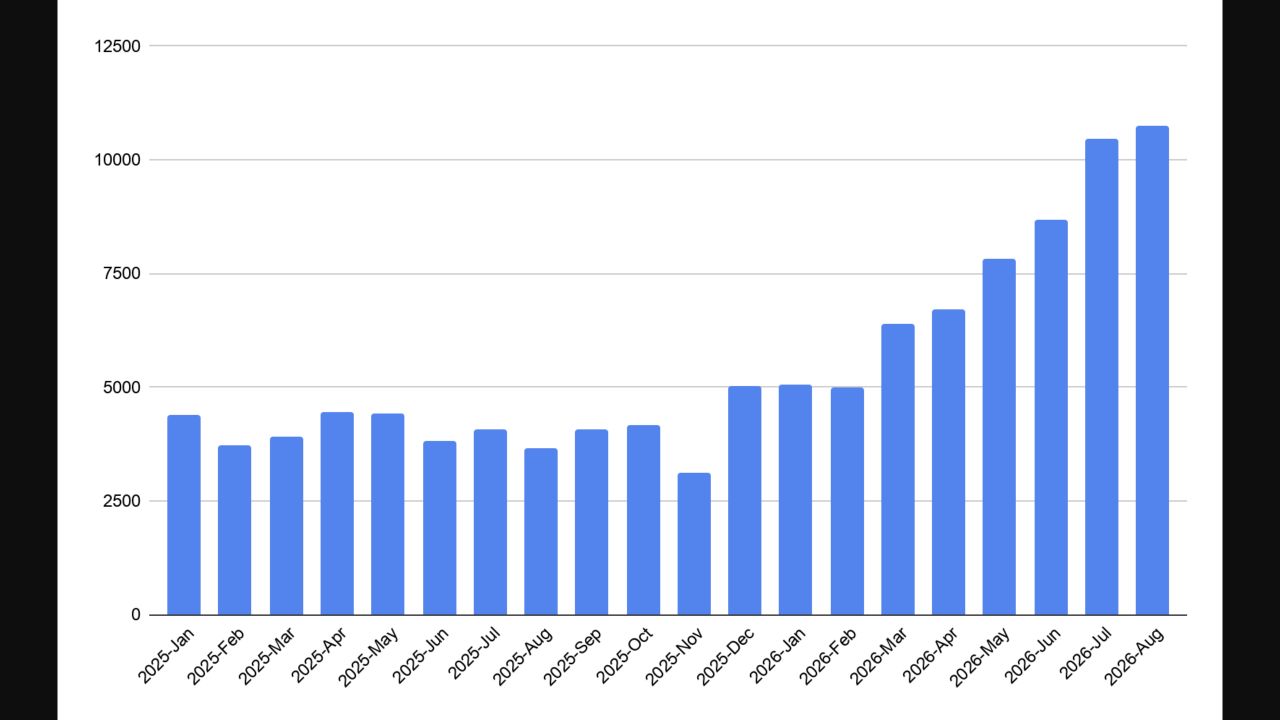
Monthly disclosures went from 5,045 in January to 10,740 in August 2026. Reporting practices and batches affect the totals too. This chart alone can’t tell us how much of the increase came from AI.
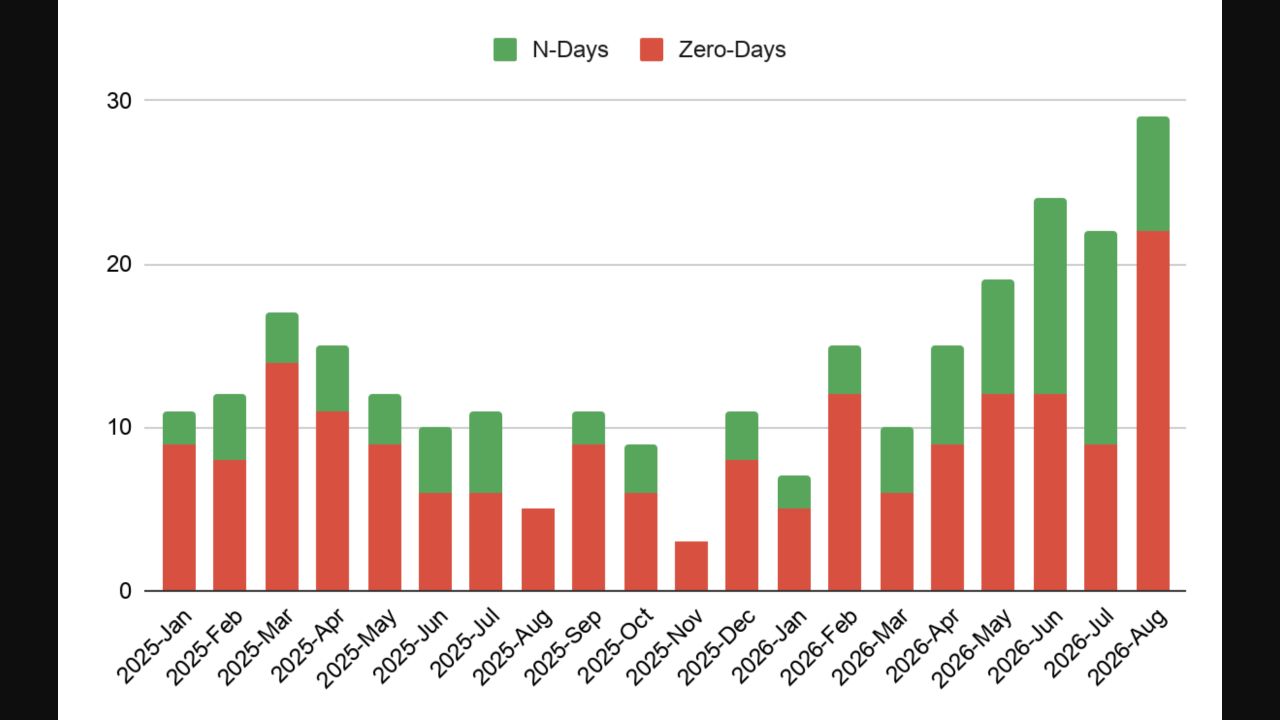
For your application, check whether you run the affected software, whether the vulnerable part is reachable and whether it’s being exploited. Give important alerts someone to follow up on. A CVE being published doesn’t tell you that your app was breached.
What happened with PHP2Shell
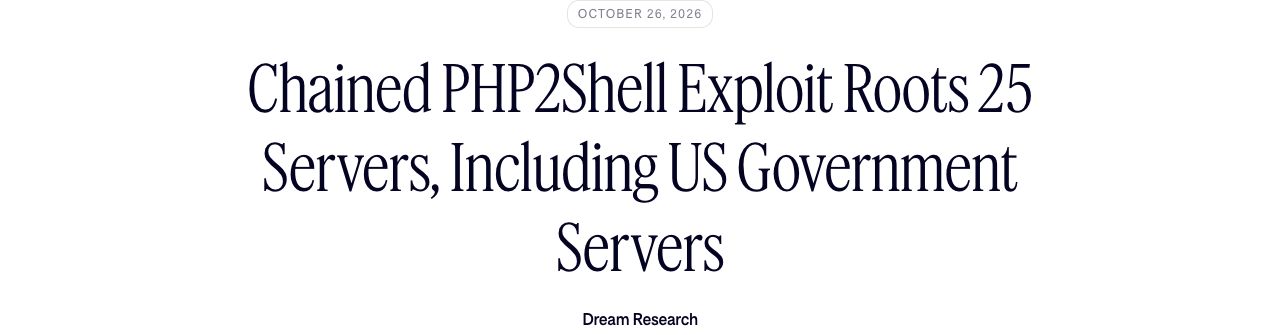
PHP fixes came out on October 21, 2026. On October 26, 2026, Dream reported a PHP2Shell/kernel exploit chain that compromised 25 servers. On October 29, 2026, Unit 42 confirmed the tooling and reported results. The affected systems involved internet-exposed PAN-OS management interfaces.
Dream found AI tools in the attacker’s environment, but didn’t have direct evidence that AI wrote the exploit. We can explain the breach without claiming that. Check exposed services against the vendor’s affected versions and patch instructions, then verify the fix is deployed. If you suspect a compromise, investigate it as well as patching.
Incidents involving the tools we use
Extensions, project instructions and provider keys
The development tools need checking too. These reports were checked on November 2, 2026.
A malicious Claude Code extension
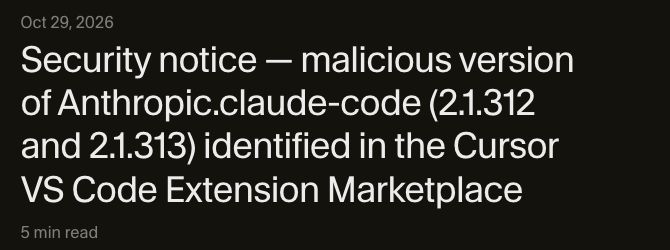
You install an extension because you want help writing code. On October 29, 2026, Cursor reported two malicious Claude Code extension versions, 2.1.312 and 2.1.313, in its VS Code Extension Marketplace. These weren’t Anthropic builds. They attempted to set up an SSH backdoor on Windows and macOS. Cursor says the attacker’s server was taken down.
Check where the extension came from, its publisher and its version. This report concerns those specific packages; it doesn’t establish that every Claude Code installation was compromised. If you installed an affected version, follow the vendor’s incident instructions with IT.
A malicious AGENTS.md in Downloads

Forever found a malicious AGENTS.md in a customer’s Downloads folder. The agent tried to install a malicious package, but it was blocked before code ran. The researchers didn’t know how the file got there. Their later demonstrations were separate from that incident.
Open the specific project folder in VS Code and check which instructions it inherits from parent folders. If an instruction asks to change global settings or install something unrelated, ask why. A file can’t give itself permission to do that.
The OpenCode Console breach

OpenCode reported a breach affecting 1.4% of Console users, among users with external providers linked. The reported exposure involved provider keys stored in Console. The announcement didn’t establish the entry point or number of keys. It also doesn’t establish that keys kept only in the local CLI were exposed.
Our free route doesn’t need a Console account or a stored provider key. At work, use approved credential storage, keys with limited access and spending controls at the provider. If a key is confirmed exposed, revoke it at the provider. Disconnecting the app doesn’t do that for you.
Before the lab, check which project folder you’ve opened, which instructions the agent will read, where the software came from and how it gets model access. Keep those limits when it proposes tools. Use synthetic data, and keep secrets, global configuration changes and unapproved installs out of the exercise.
How to prepare
- Keep track of deployed versions and dependencies, and who owns each service. Restrict access to management interfaces.
- Keep project work separate from credentials, customer data and production access. Give the agent only the access its job needs, with permissions and isolation enforced.
- Assign someone to follow a fix through its regression tests and deployment checks. Passing tests cover particular cases; they don’t establish that the whole system is secure.
- Keep useful logs and practise restoring backups. Know whom to contact about a suspected compromise. Follow the incident process, preserve evidence and revoke exposed credentials at their issuer.
There’s a local security exercise after the core afternoon labs where we can practise one of these checks. We won’t use public targets or download exploits.
Using agents in VS Code
Open the Explorer, integrated terminal and Source Control. You can keep the project files and agent in the same window and see what changes. We’ll run the practice app after lunch. For now, let’s go through the controls we’ll use.
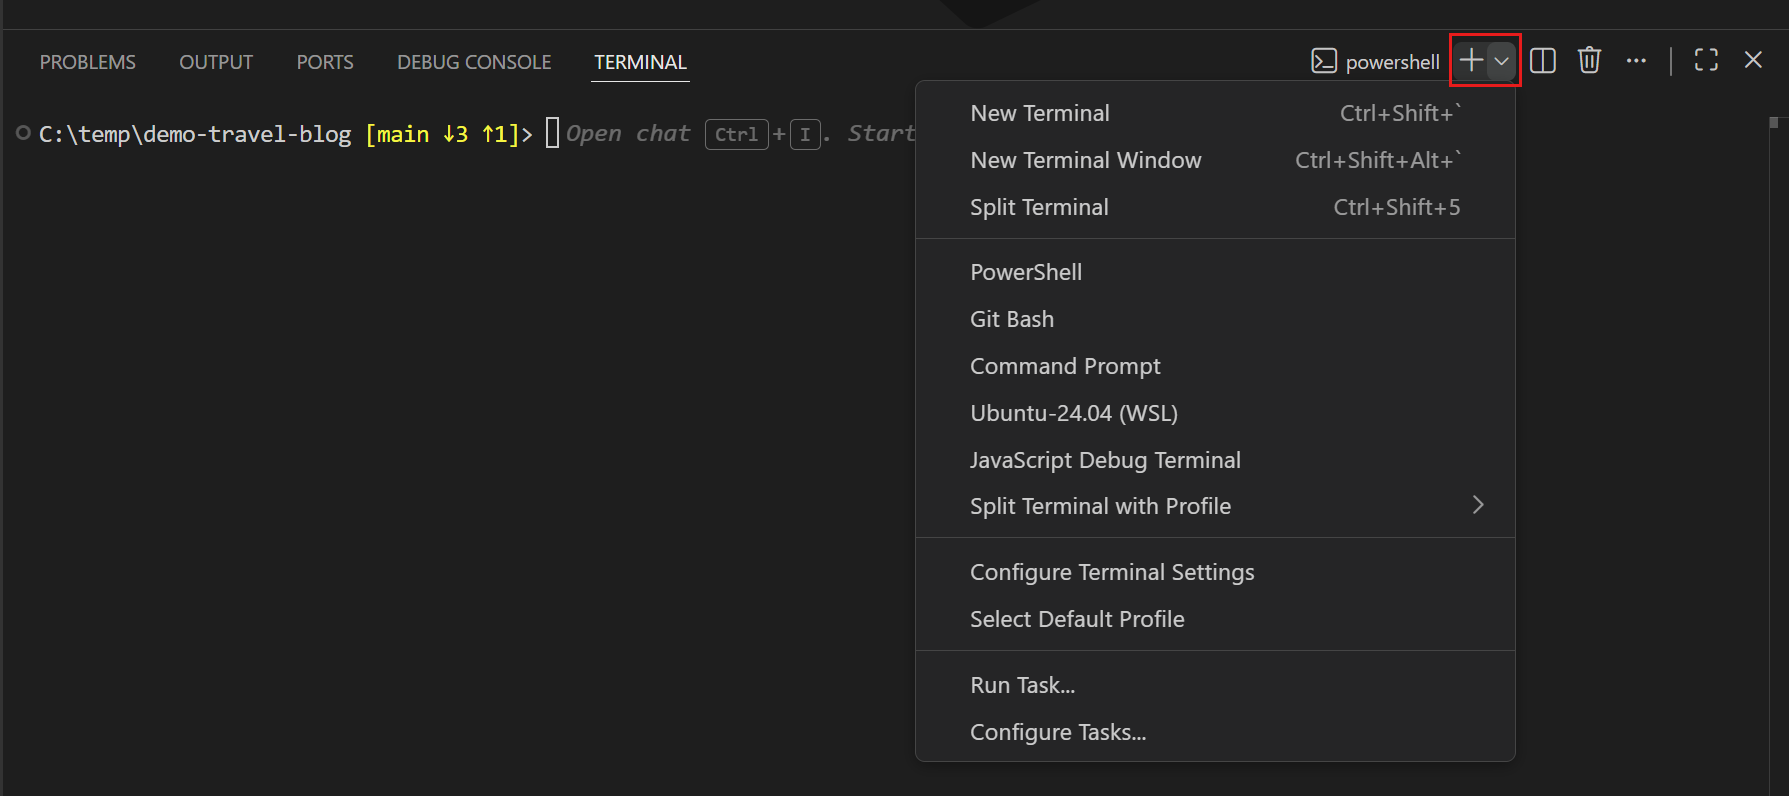
Choosing a terminal on Windows
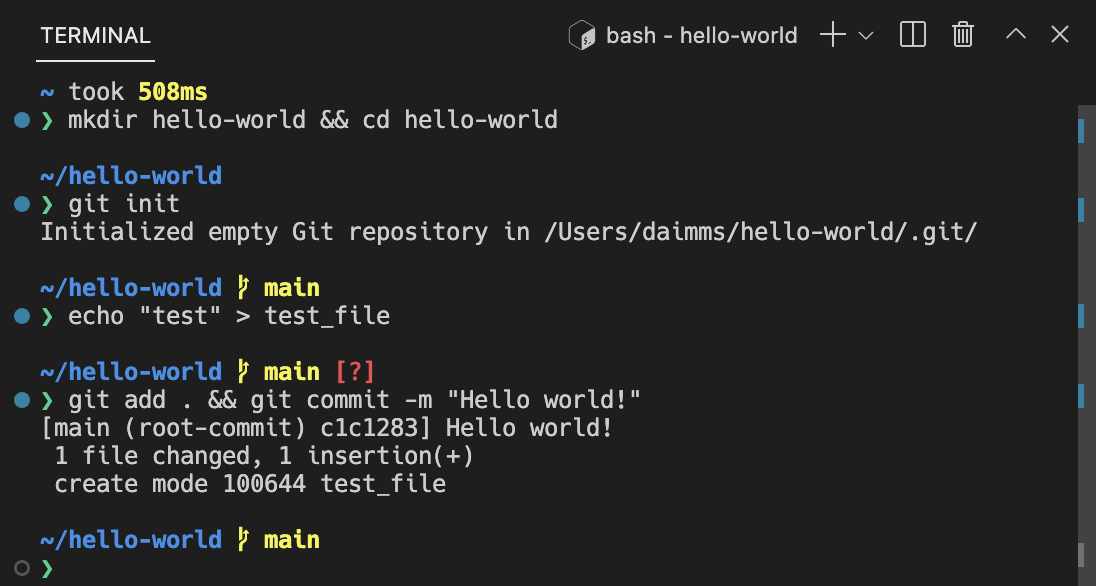
For the class, choose Terminal: Select Default Profile → Git Bash on Windows. If you already use WSL, keep the tools and project inside Linux; don’t share dependencies between the two environments. Restart VS Code after installing tools so the terminal gets the new PATH.
Running OpenCode in the terminal
OpenCode runs in VS Code’s integrated terminal. There’s also an optional IDE extension for sharing selections and file references. We don’t need it for the terminal route. Once you’ve installed OpenCode and opened the approved project, this starts it:
opencode --standaloneType /models to see the available models. For class, connect your class key in OpenCode. We’ll use its shared credits. You don’t need a personal subscription or payment method. If you’re following this alone, use approved existing access, an available free model or the reference patches.
Tell it what you want done first
Tell it what happened and what you want to happen instead. Add what it must leave alone. Let it look through the project before choosing tools, then read its proposal. If a choice seems odd, ask it to show you why it fits.
Objective: investigate this reported problem in an approved repository:
[observed behavior, expected behavior, and a concrete example].

Constraints: read-only investigation first. Use only approved project
files and synthetic data. Do not read .env or secrets, install tools,
edit files, commit or deploy. Keep normal permissions enabled.

Inspect the project instructions and capabilities actually available.
Choose how to investigate, explain why the tools fit, and cite real
files/functions. Separate findings from guesses. Propose the smallest
next step and evidence that would detect a wrong result. Stop for my
review before implementation or any new installation/access.
We’ll discuss this example in the morning. Use the app-specific prompts for the afternoon exercises. If the agent needs a tool it doesn’t have, it should explain that before installing anything or asking for more access.
Planning, making changes and reviewing them
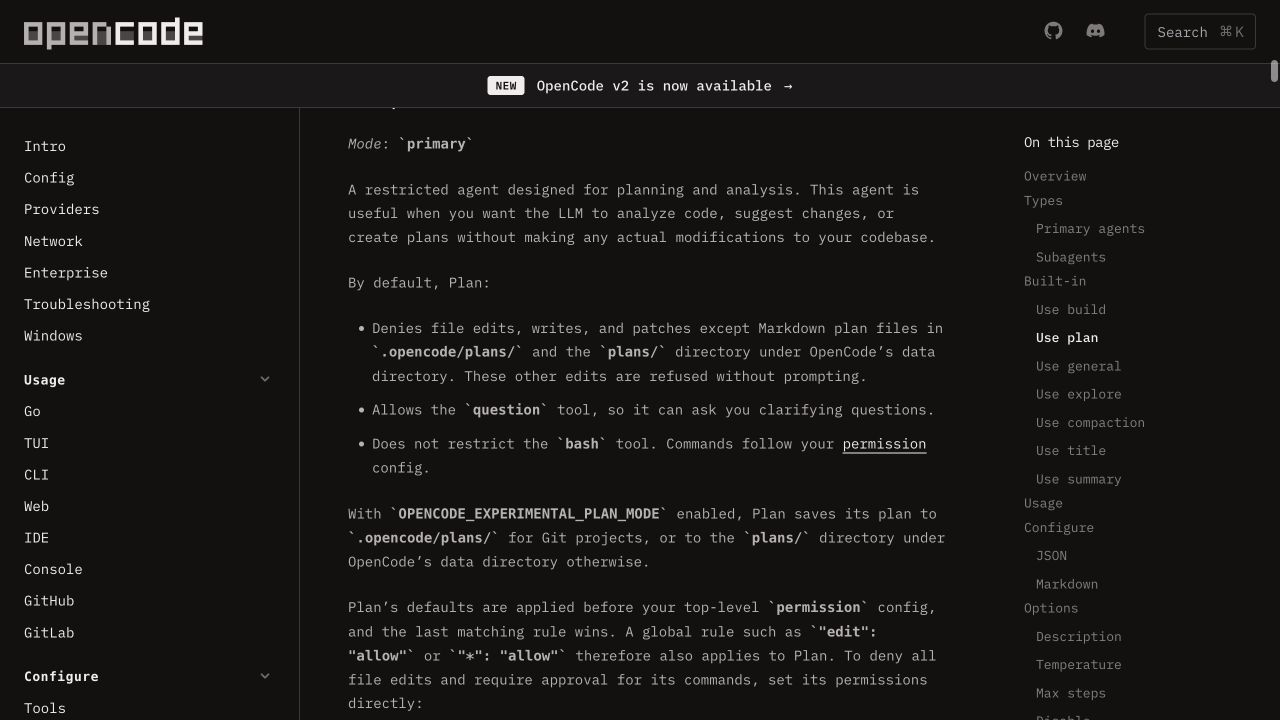
Start in Plan so the agent can inspect the project and propose what to do. Use Build when you approve source changes. Our settings deny source edits in Plan and ask before shell commands. These settings still aren’t a sandbox. Let the agent implement and test, then ask a fresh reviewer to inspect the changes. Check its actual commands and results, and try the app yourself.
Project instructions and separate sessions
Put the project’s commands, conventions and data limits in a short AGENTS.md. Give the current job in the prompt. Keep credentials out of both.
Two sessions can overwrite each other if they edit the same checkout. A worktree gives each job its own folder while keeping the Git history shared. You still need to consider databases, services and credentials separately, and someone has to bring the changes together.
You can see an example in Boris Cherny’s team workflow. We’ll try two separate jobs in the afternoon. Start with work you can bring together and check; you don’t need to match how many agents someone else runs.
What open weights let you do
If weights are available, you still need to check their license and how you’ll run the model. Hosting may cost money. Code sent to a hosted provider still leaves your computer. Check where the data goes, what the tools can access and what a completed task costs.
Choosing a model
You see a new model announcement with a score higher than the one you use. Before switching, let’s check what that score actually measures and whether you can use the model for your work.
On X, follow the maintainers and researchers who post releases, then open the original paper, repository or release notes. On YouTube, look for a recent uncut demo with the commands and results visible. Try a useful step yourself. You can keep a simple note: use it now, watch it, or skip it for now.
A post can help you find something worth trying. You’ll still need to check whether it helps with your tasks.
- Open the maker’s release notes, model card or paper. The official DeepSeek and Z.ai repositories are places to start. Check the date, exact variant and license. If you saw a score on X, follow it back to the original result.
- Check OpenCode’s model catalog and
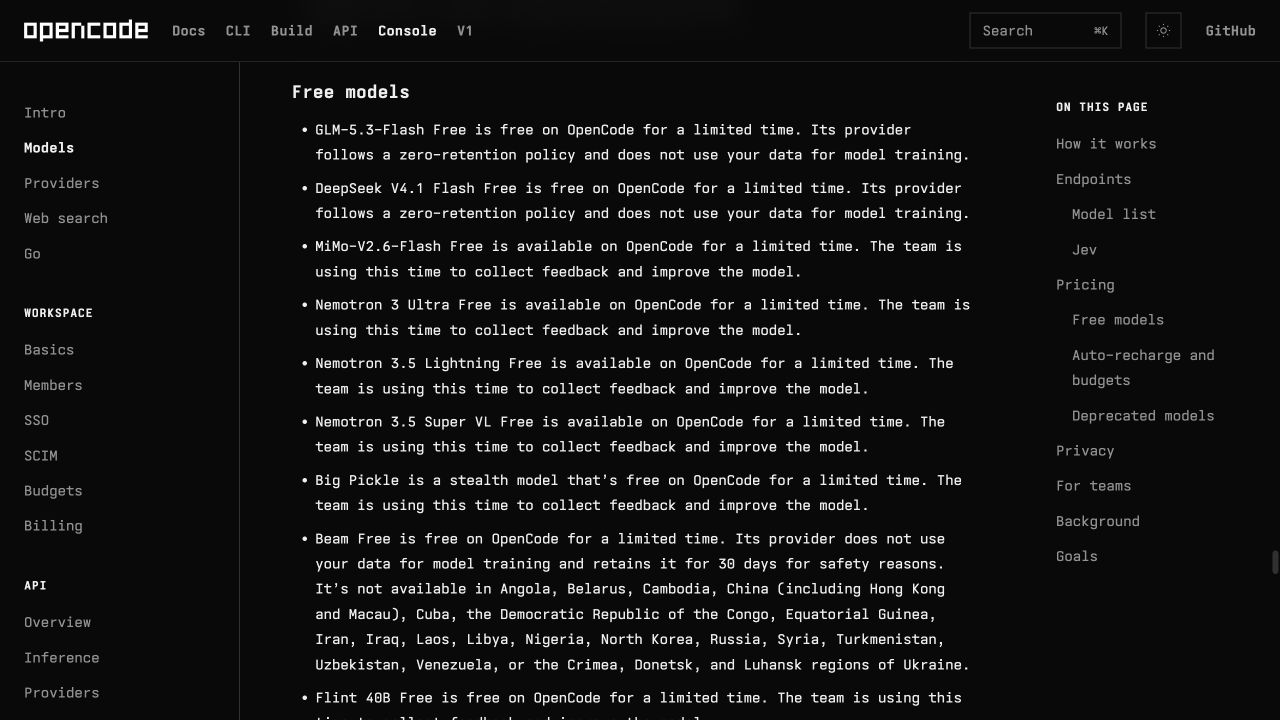
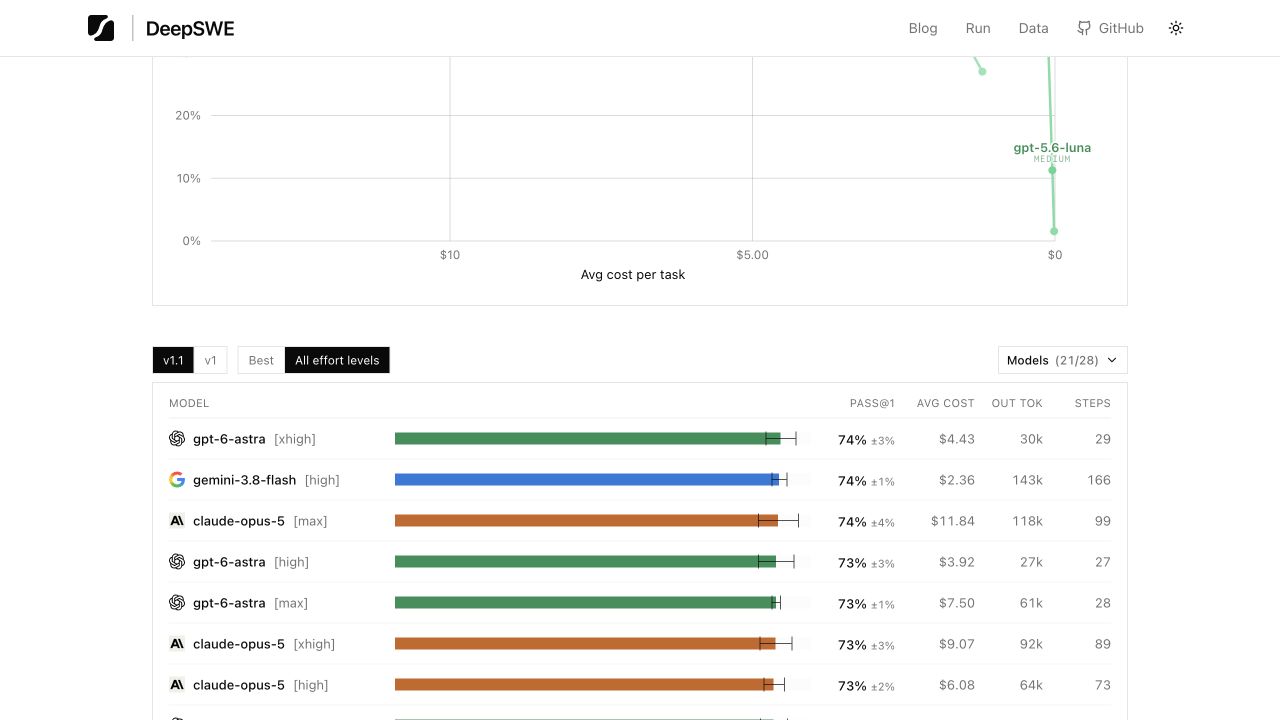
/modelsin your installation. Note the provider and model ID, then check price, limits and data terms. For class, we’ll use DeepSeek V4.1 Flash through Raph Workshop. Check the workspace connection before the lab. For comparisons, agree on the other model and spending limit first, or use an available free model. - Choose a benchmark that resembles your work. DeepSWE tests repository engineering tasks; Terminal-Bench tests terminal-agent tasks. Artificial Analysis includes a Coding Agent Index and cost/time comparisons. Its broader Intelligence Index measures more than coding.
Comparing benchmark scores
Before treating one score as better than another, check what was tested:
- Compare the same benchmark and version. A percentage of resolved tasks and an Elo score measure different things. “Almost solved” doesn’t count as solved, and different benchmark versions may contain different tasks.
- Check the model variant and checkpoint. Flash and full models can differ. So can reasoning settings, agent software and time or tool budgets. A free alias doesn’t establish that you’re using the checkpoint described in a paper.
- Look for the task count, repeat runs and uncertainty. A small ranking gap is weak evidence when the intervals overlap. Note the date and whether the result came from the maker or an independent evaluator.
- Check the time and cost per completed task. Generating tokens faster doesn’t necessarily mean finishing the work faster.
A prompt for investigating a benchmark claim
Objective: assess whether this model claim is relevant to our work:
[paste the claim and original source links]

Constraints: use attributable evidence, mark missing details unknown
and do not infer a winner from incomparable rows or a tiny difference.

Choose how to check the original sources using available capabilities.
Record exact model/checkpoint, provider, release date, benchmark
version, metric, harness, reasoning setting, tool/time budget,
cost and uncertainty. Explain what the evaluation measures and whether
its rows are comparable. Suggest one bounded repository task to test the claim.
Cite source URLs; identify any capability or access you lack.
Open the sources it cites and check them. If a detail isn’t published, leave it unknown.
Watch the lab
42:44 of actual VS Code and OpenCode recordings on macOS, with added narration and shortened waits. Use the Windows shortcuts in the written steps. The connection chapter starts already signed in; use the class-key steps below. Starts muted.
Jump to a section
Connect your class key
Raph will give you one key privately. You don’t need his login, a workspace invitation or your own payment method.
- Open your assigned
student-XX.txtfile and copy the complete key beginning withoc_sk_. - In VS Code, click OpenCode’s Ask anything… box, type
/connectand press Enter. - Choose OpenCode Console, then its service-account API-key method. The OpenCode Console account method is a different sign-in route.
- Click the API key field. Paste with Ctrl+V (Mac: Cmd+V) and press Enter. Put the key in this credential field, not in the conversation or a project file.
- Back in Ask anything…, send
/models. Search for DeepSeek and select DeepSeek V4.1 Flash from OpenCode Console:opencode/deepseek-v4.1-flash. Choose the entry without Free. - Press Shift+Tab until you see Plan. Check that the project path ends in
epic-stack, then send:
Reply READY. Do not use tools or change files.You should get READY. That checks the connection; it doesn’t check the app.
Each class key has a $2.50 limit and expires one day after it was created. If you get an invalid-key, expiry or budget error, stop and ask Raph. Don’t add a card or buy a subscription. Keep your key private.
In a new worktree window, check /models again. If the key connection is missing, repeat these steps with your same assigned key.
Running Epic Notes
Let’s try the workflow on an existing application.
Epic Notes is the example app in Epic Stack. It has users, forms, a database, authentication and tests. We’ll use synthetic accounts to add a filter and fix a title bug. The app is already built, so we can spend the afternoon learning how to work on it.
You’ll do the labs individually. You’ll give the agent a job, question its plan and try the result yourself. Keep a short note of what you asked for and what happened; you’ll come back to it at the end.
Finish laptop setup before class. We’ll use this half hour to check that the app runs, the starting tests pass and the agent can find the relevant code. If setup is blocked, follow the fallback instructions below.
Setting up the app
Use Windows, Git Bash, VS Code and OpenCode for the main steps below. On a Mac, use your usual terminal and Cmd wherever a copy or file shortcut says Ctrl. F1 opens the Command Palette on either system; some laptops need Fn+F1.
The Windows File Explorer and Git Bash images are credited to their sources. The shared VS Code and Epic Notes screens were captured on macOS. Follow the Windows shortcuts in the text for the shared VS Code screens. Click any screenshot to enlarge it.
Before class, install Git for Windows with Git Bash, Node 22.x, at least 22.18, and VS Code. Keep Git and Node on PATH, then close and reopen VS Code. If your work laptop needs IT approval, arrange that before the workshop.
1. Download and extract the kit
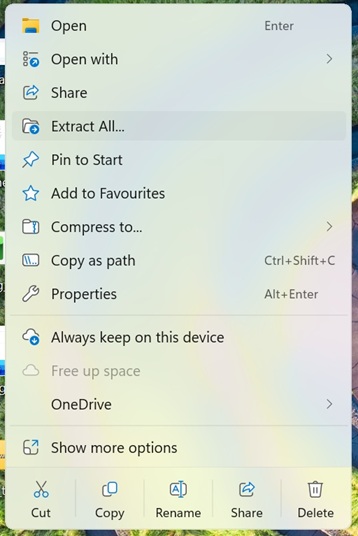
Download the tutorial kit. Press Win+E to open File Explorer, click Downloads, then right-click Epic-Notes-Tutorial-Kit.zip → Extract All….
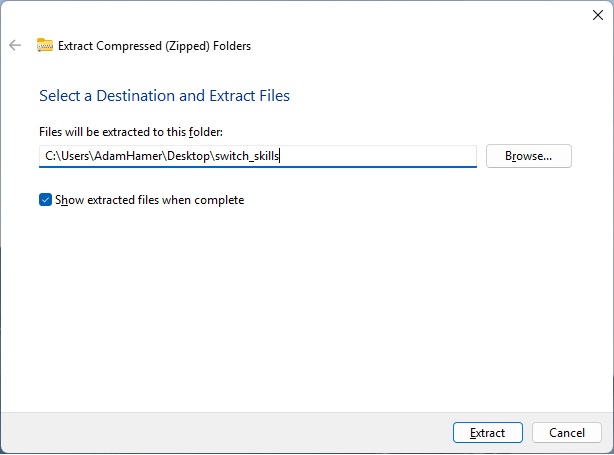
In the destination box, choose a short local folder outside OneDrive, such as C:\Users\YourName\code. Replace YourName with your Windows user-folder name. Keep Show extracted files when complete checked. Click Extract. Open the resulting Epic-Notes-Tutorial-Kit folder; you should see prepare.mjs. If there’s another folder with that name inside, open that one.
On a Mac, double-click the ZIP in Downloads and open the extracted folder.
2. Open that folder in VS Code
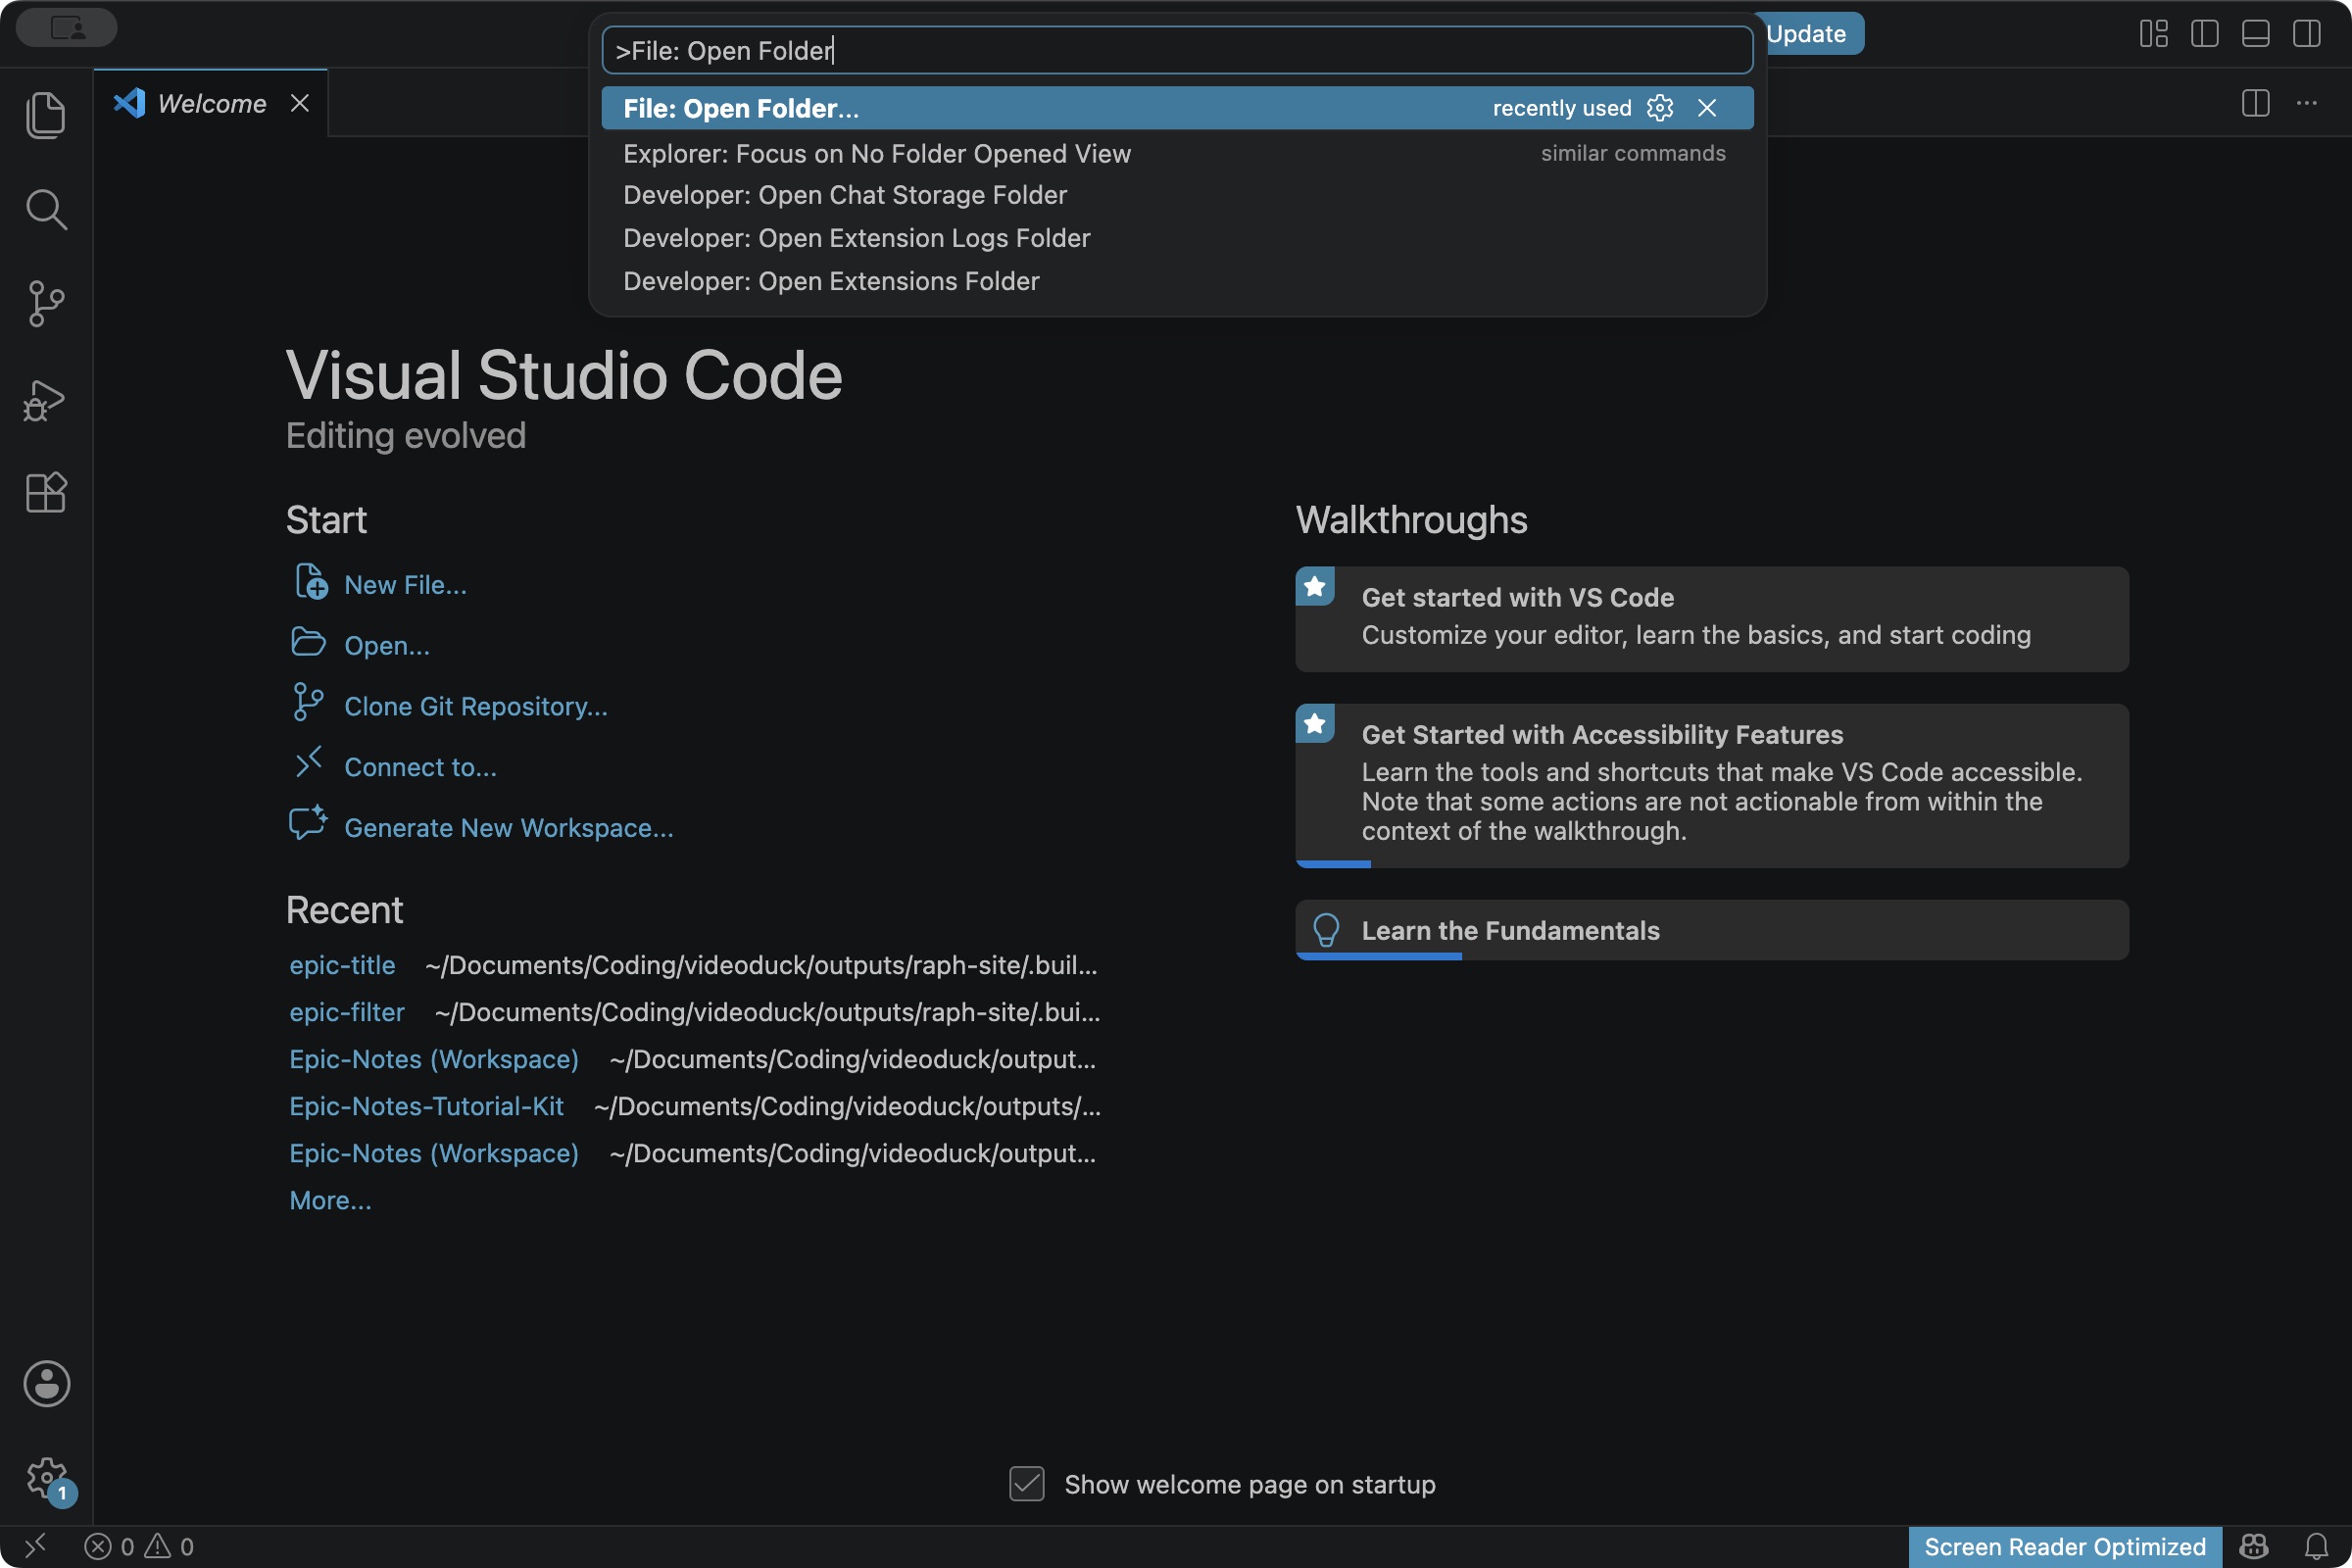
Open VS Code. Press F1, type File: Open Folder, then click the exact File: Open Folder… result. In the folder picker, select the extracted Epic-Notes-Tutorial-Kit folder and click Select Folder (Mac: Open). The Explorer on the left should list prepare.mjs. Don’t open the ZIP.
If VS Code asks about trust, review this downloaded workshop folder before allowing its tasks. Choose only this folder; don’t extend trust to the parent folder. If company policy blocks it, ask IT rather than disabling protections.
3. Choose Git Bash, then open a terminal
On Windows, press F1, type Terminal: Select Default Profile, click that result and choose Git Bash. This applies to new terminals. If Git Bash is missing, finish installing Git for Windows and restart VS Code.
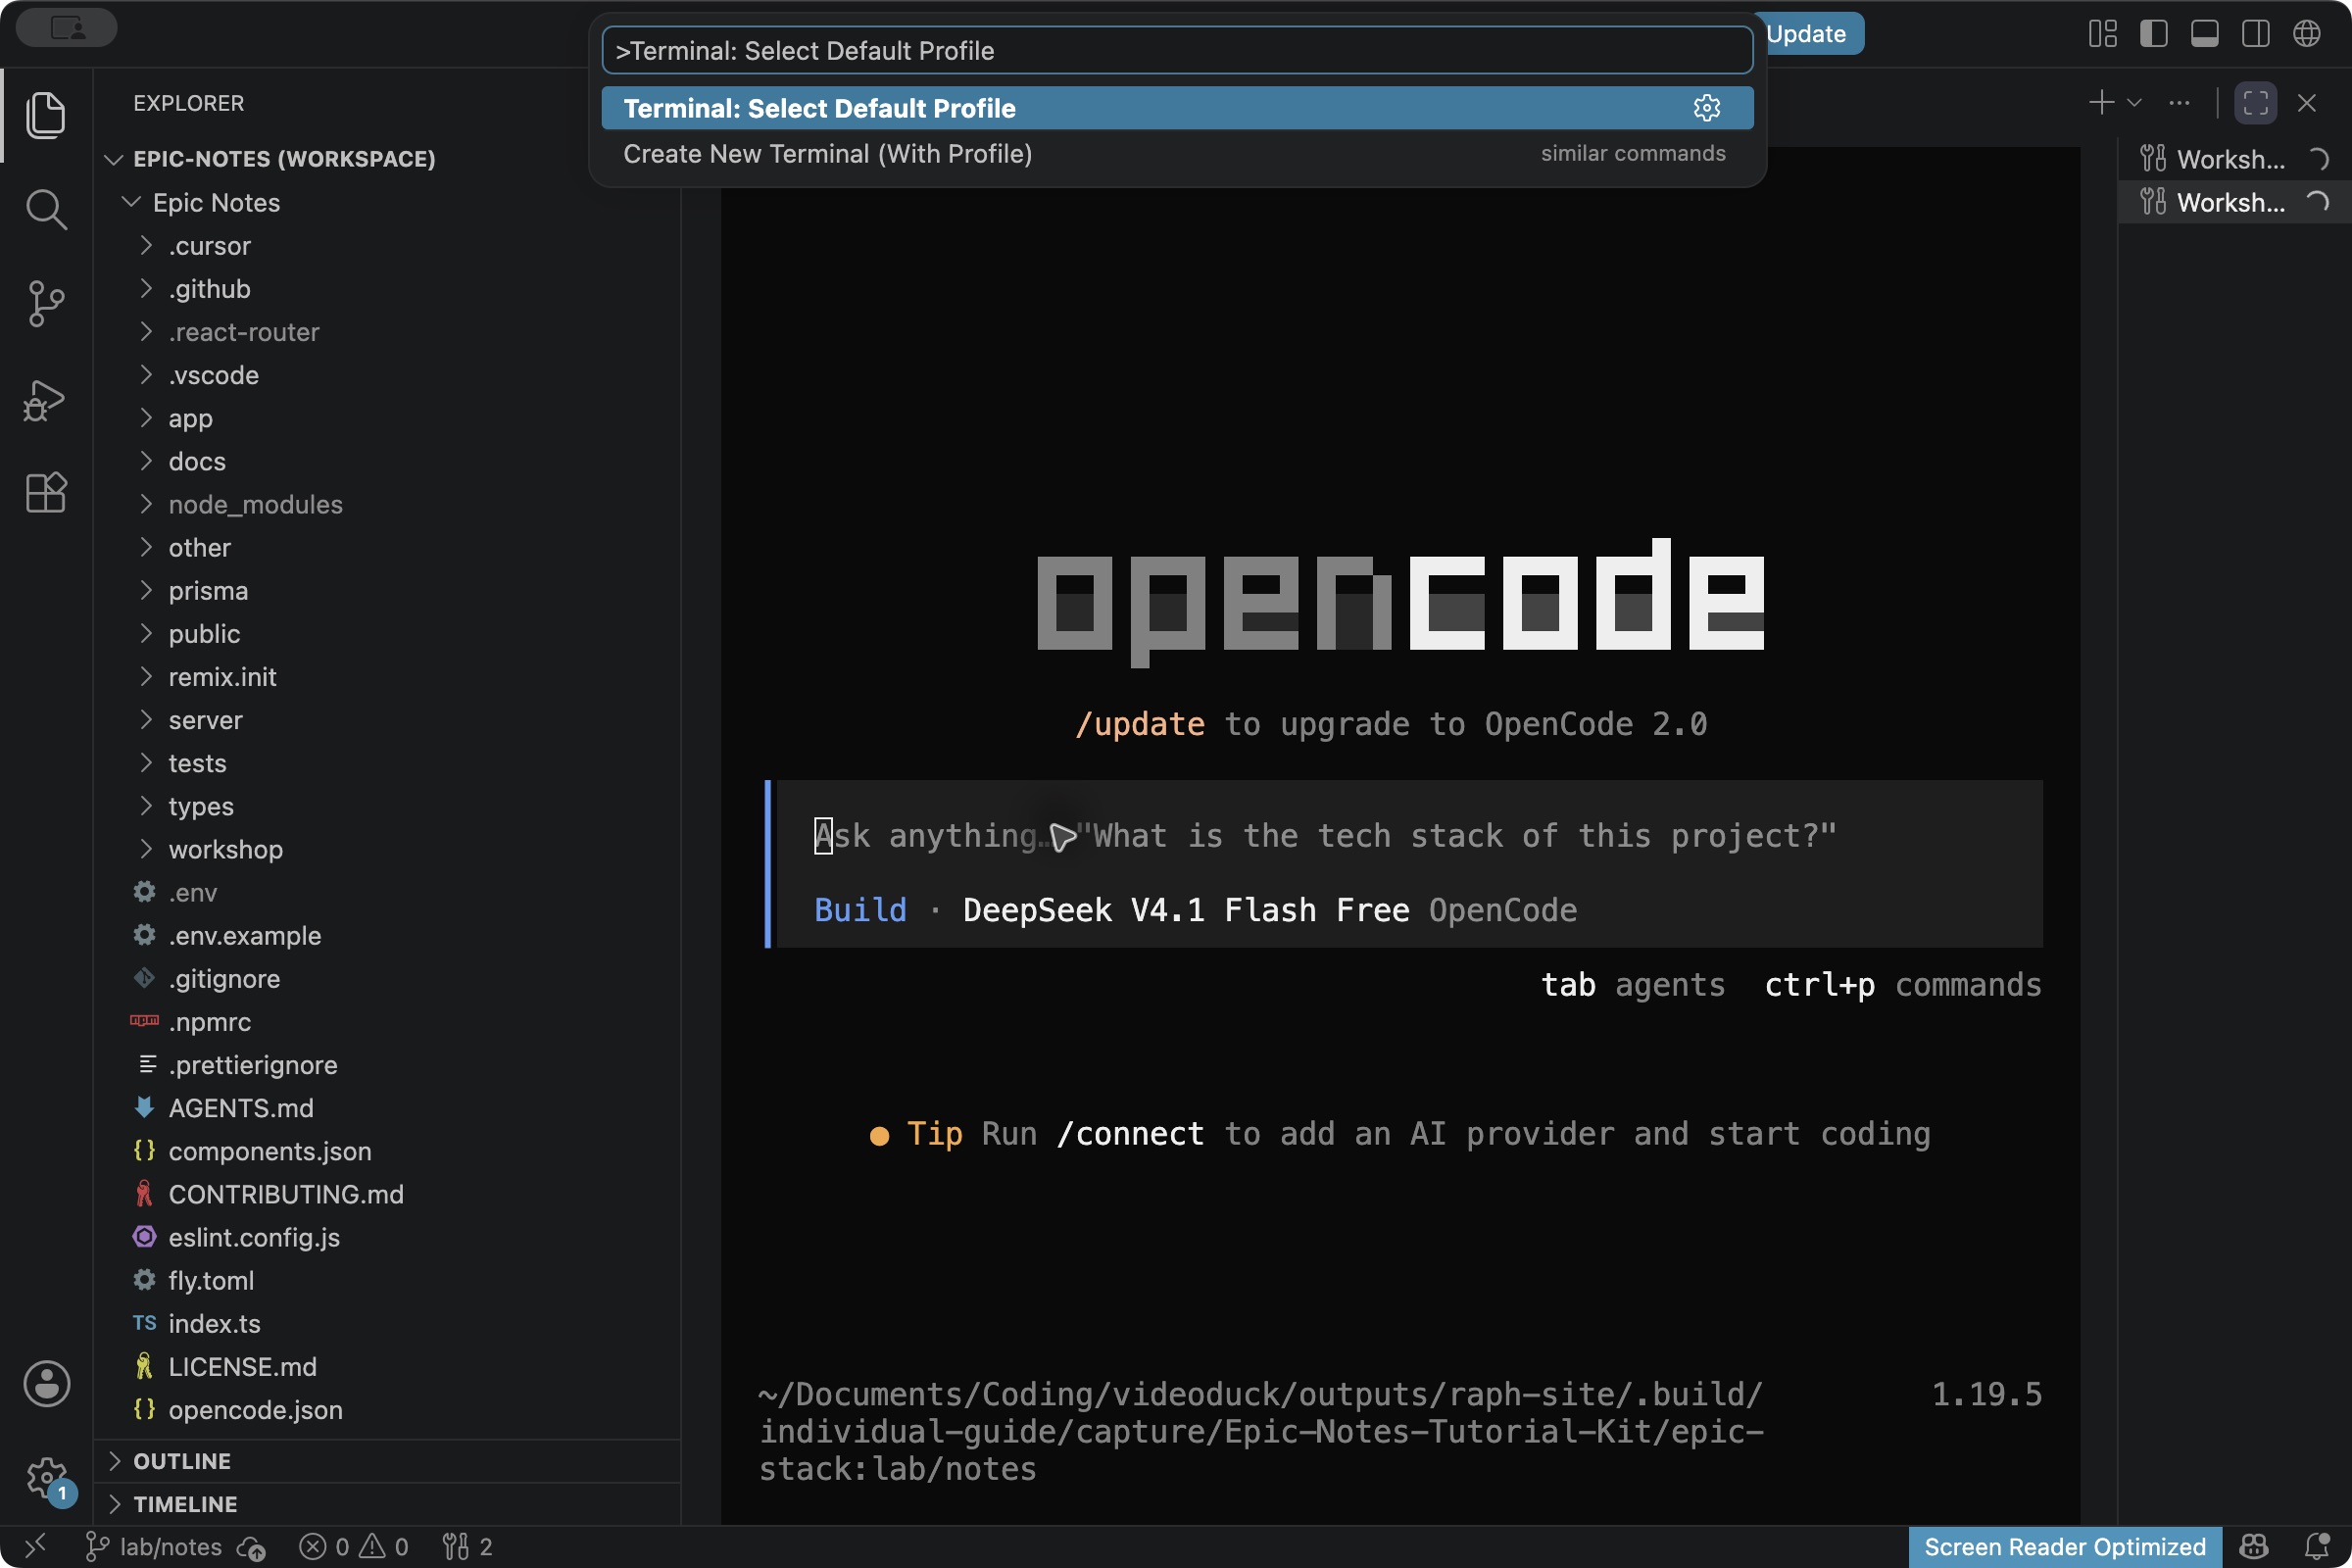
Press F1 again. Run Terminal: Create New Terminal. A shell opens at the bottom. On Windows, its tab should say bash or Git Bash.
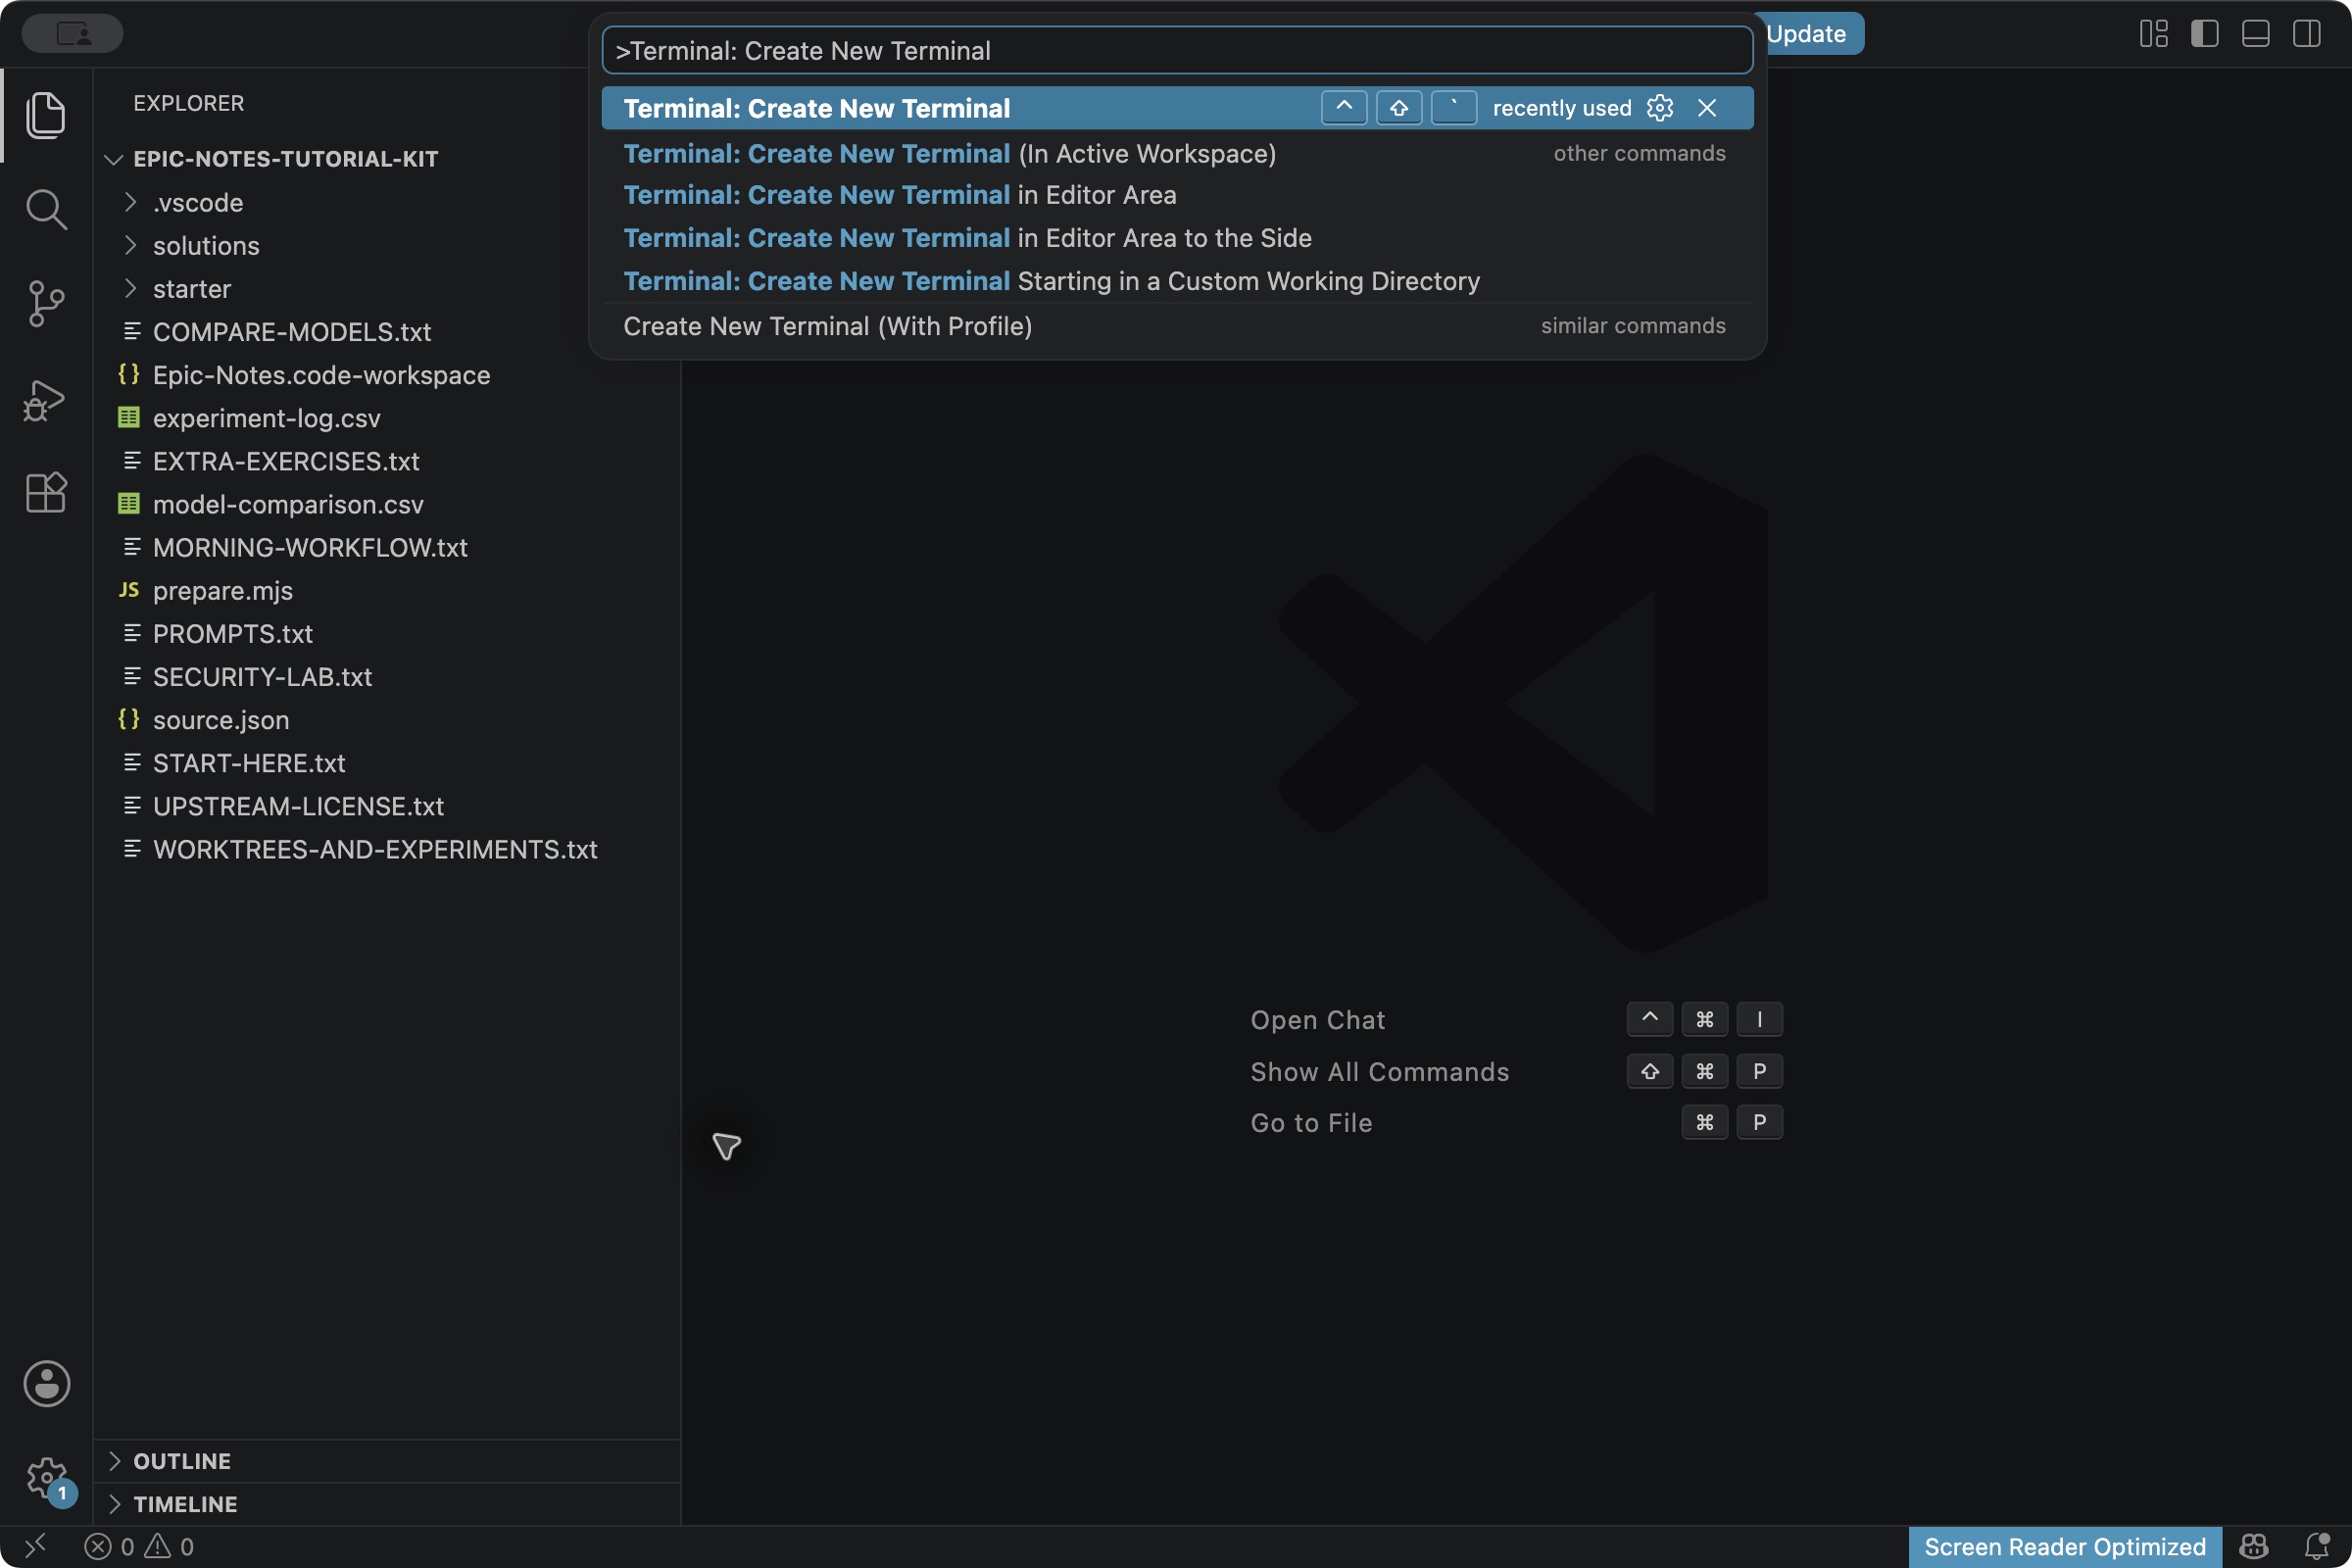
4. Run the setup commands in the shell
Where: VS Code’s bottom Terminal panel, in Epic-Notes-Tutorial-Kit. This is the shell, before OpenCode is running.
Click Copy on each command, click after the shell prompt and press Ctrl+V, then Enter. If Git Bash intercepts paste, use Ctrl+Shift+V. Mac: Cmd+V. Run these one at a time:
node --versiongit --versionnpm --version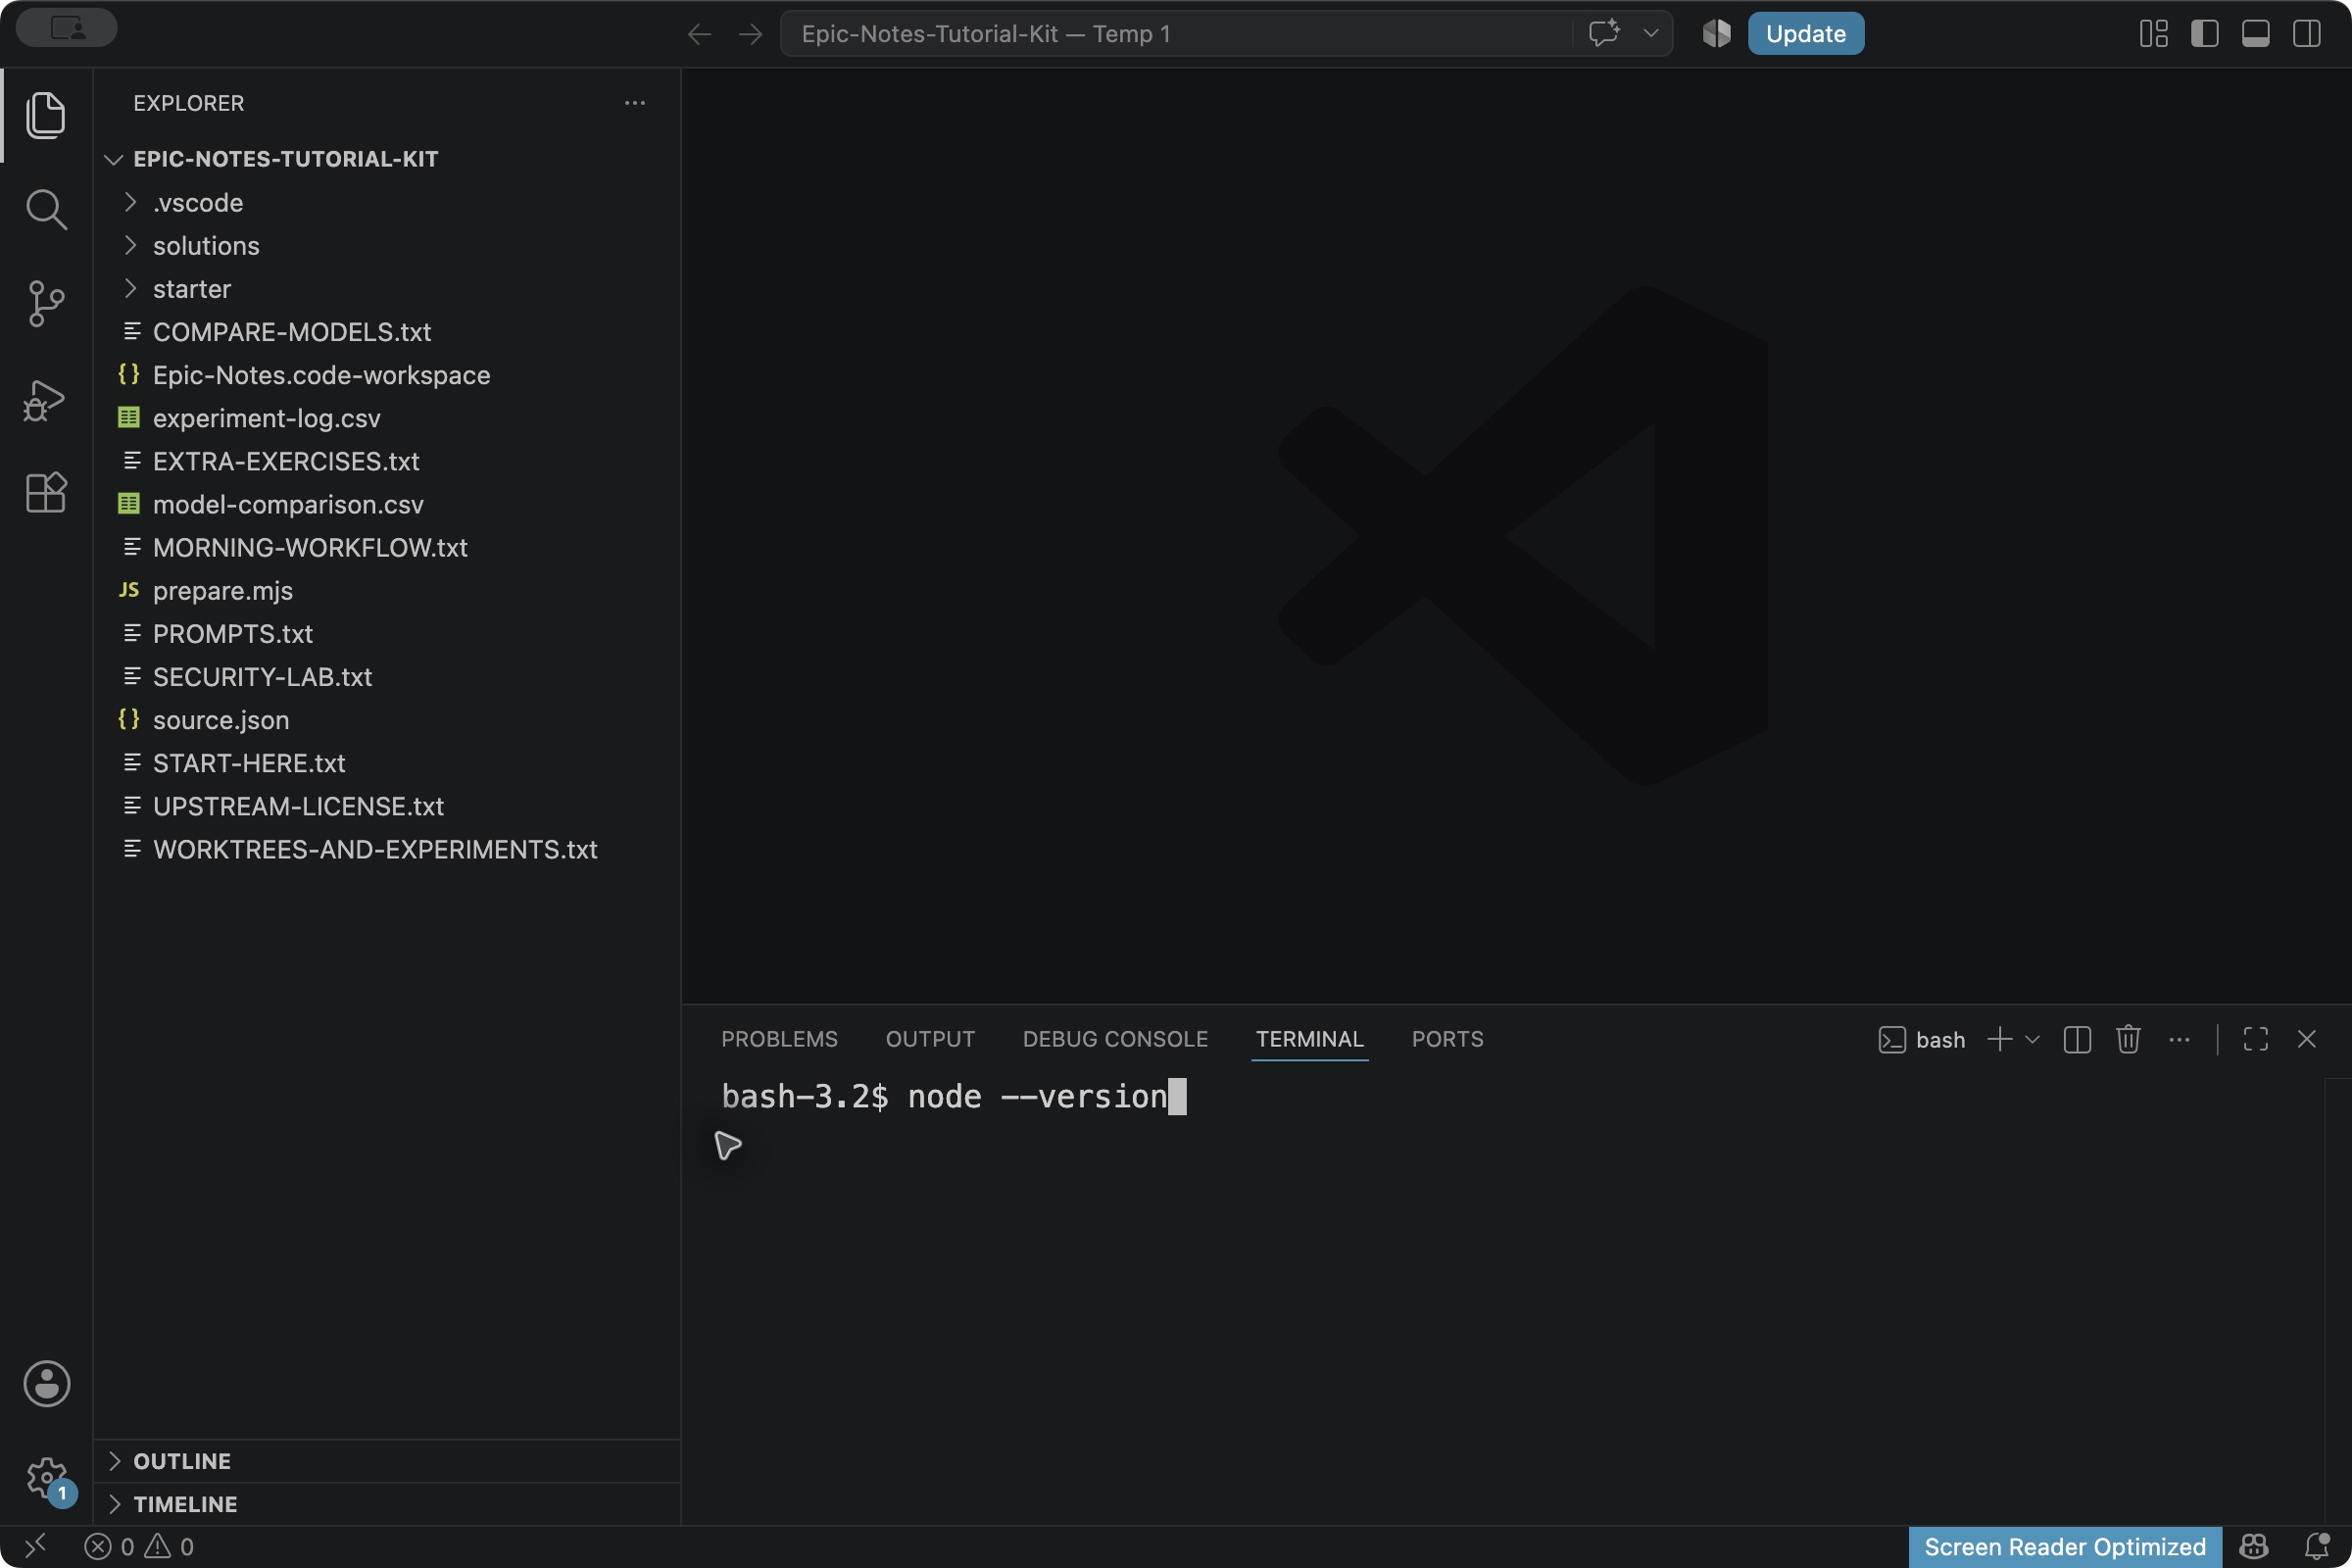
Node should print v22.x, at least v22.18.0. Git and npm should each print a version. A “not found” message means setup isn’t ready; install the missing tool and reopen VS Code.
node prepare.mjsWait for Prepared. This downloads Epic Stack at a fixed commit, installs its dependencies and creates synthetic local data. Keep the pinned versions; don’t follow update advertisements in the install output. Don’t run preparation again over an existing epic-stack folder.
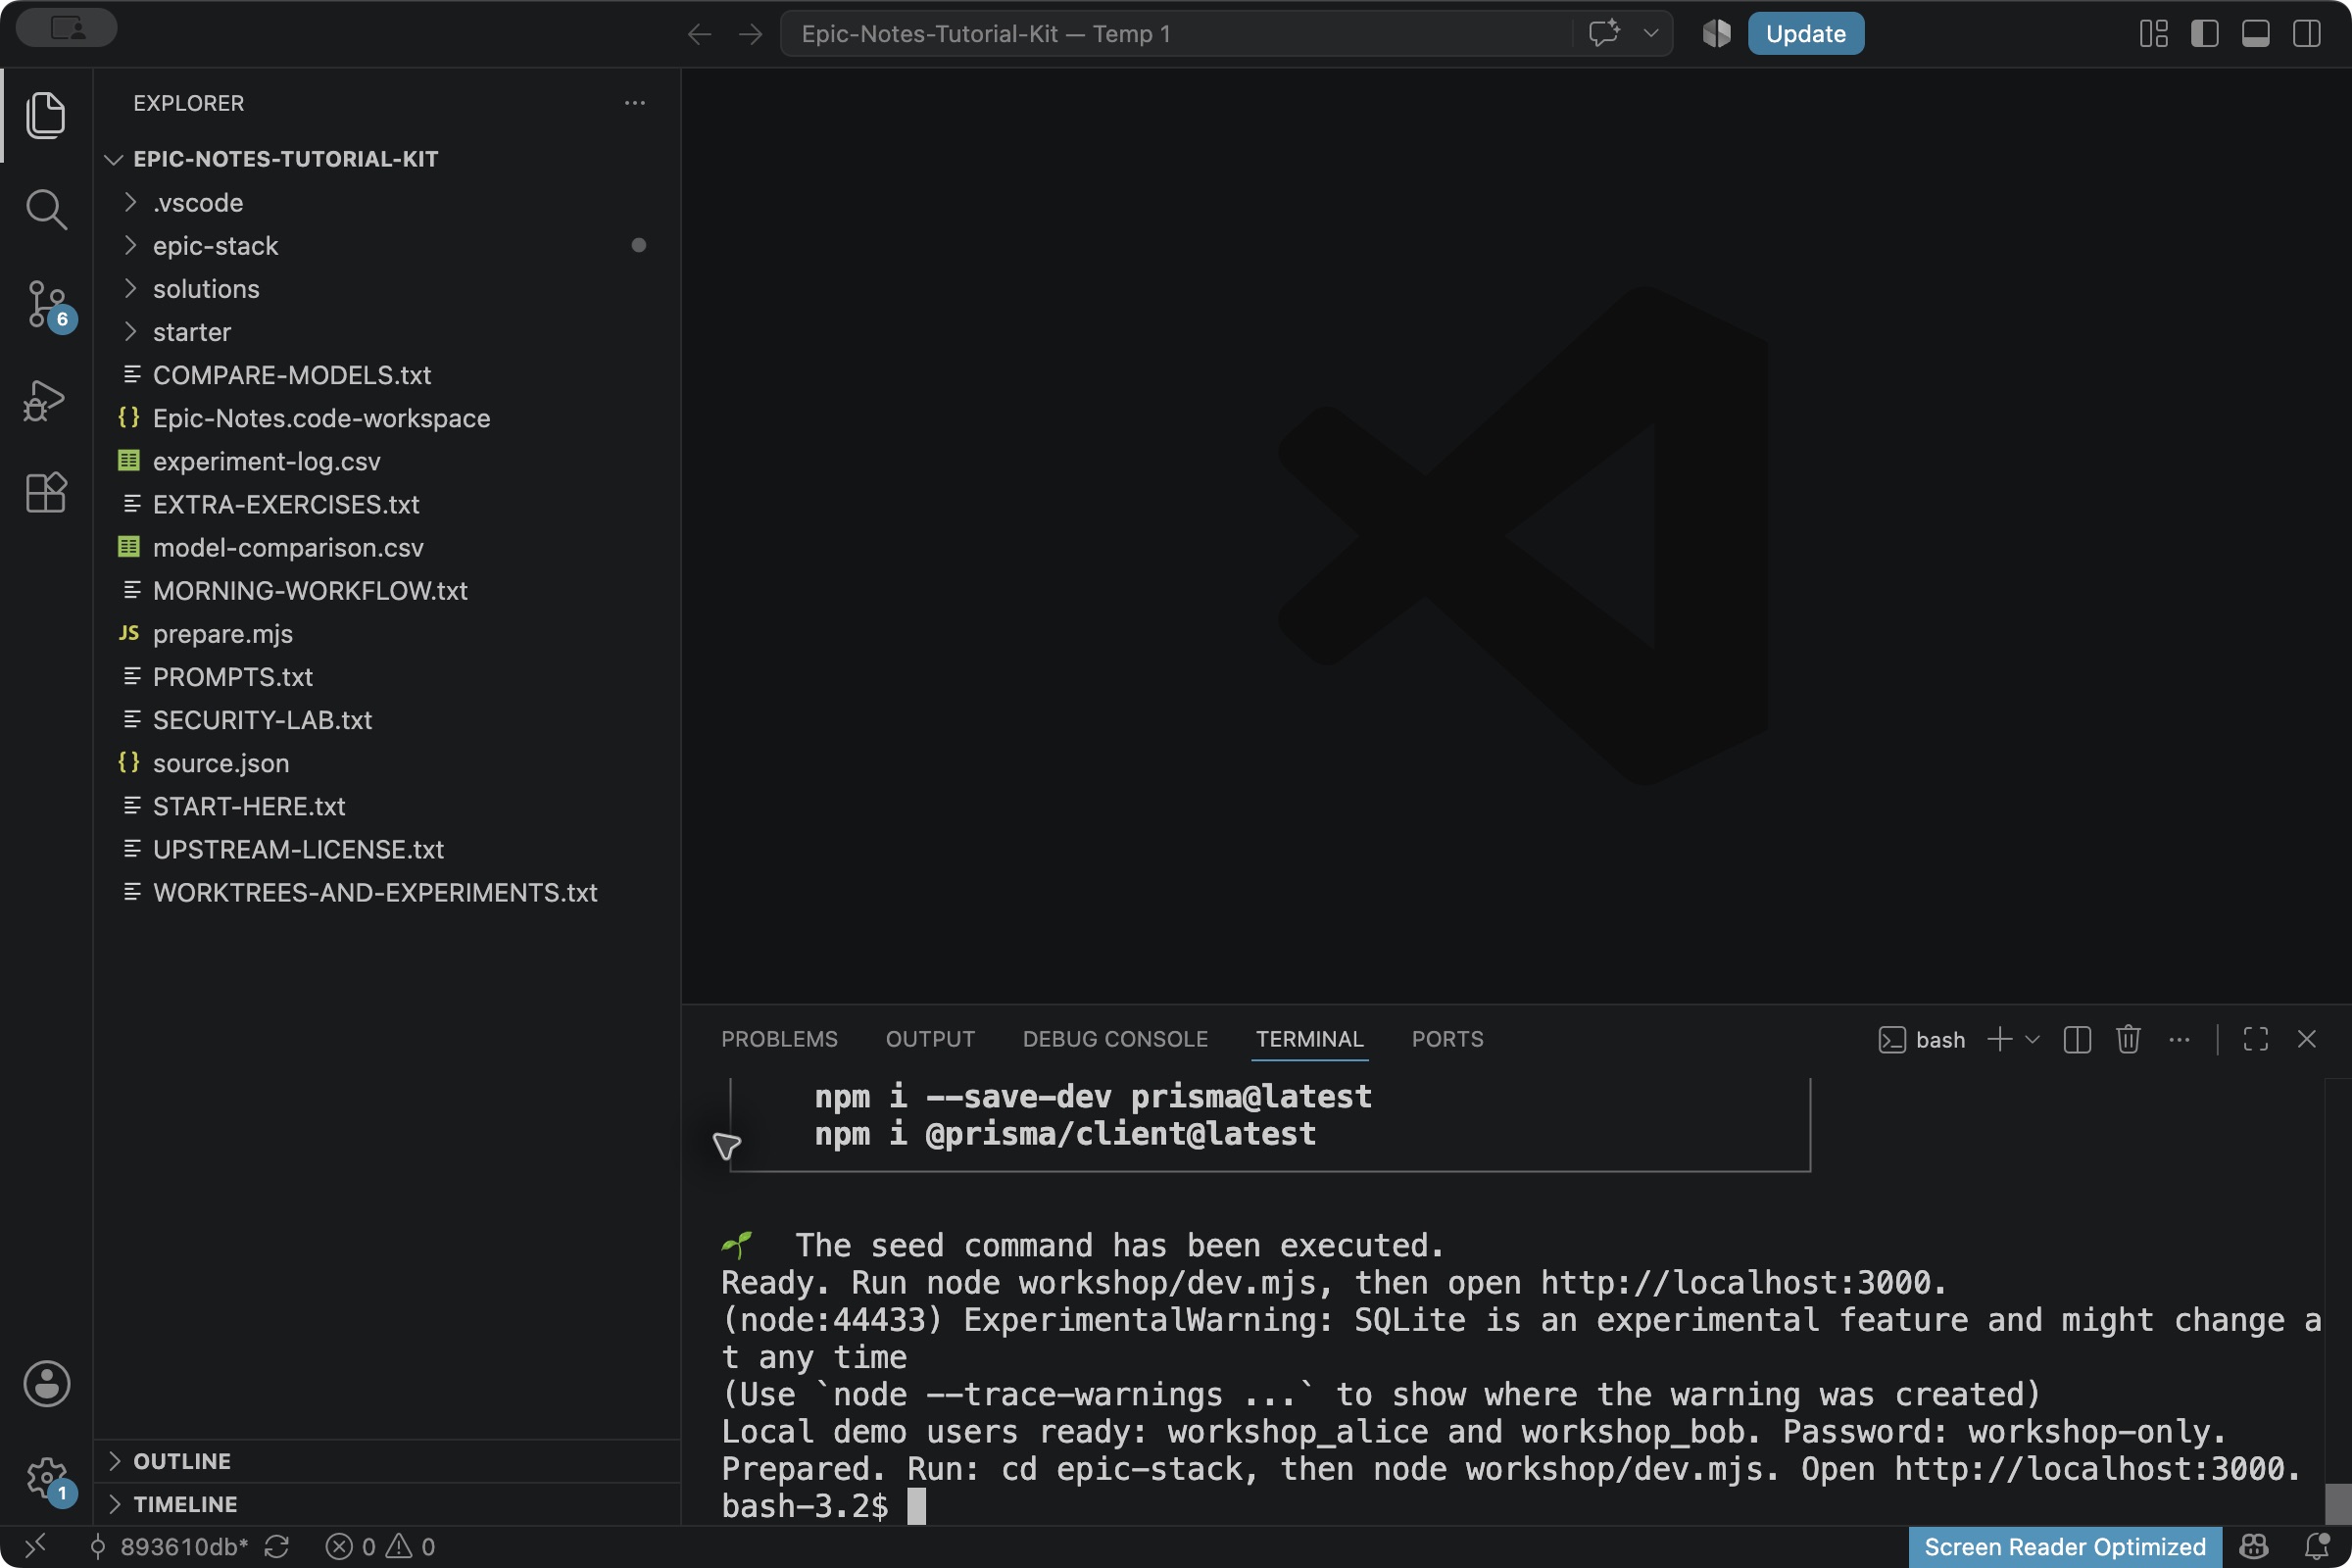
5. Open the workshop workspace
Press F1, choose File: Open Workspace from File…, select Epic-Notes.code-workspace beside prepare.mjs and click Open. The Explorer should now show Epic Notes. This workspace points at the prepared epic-stack app.
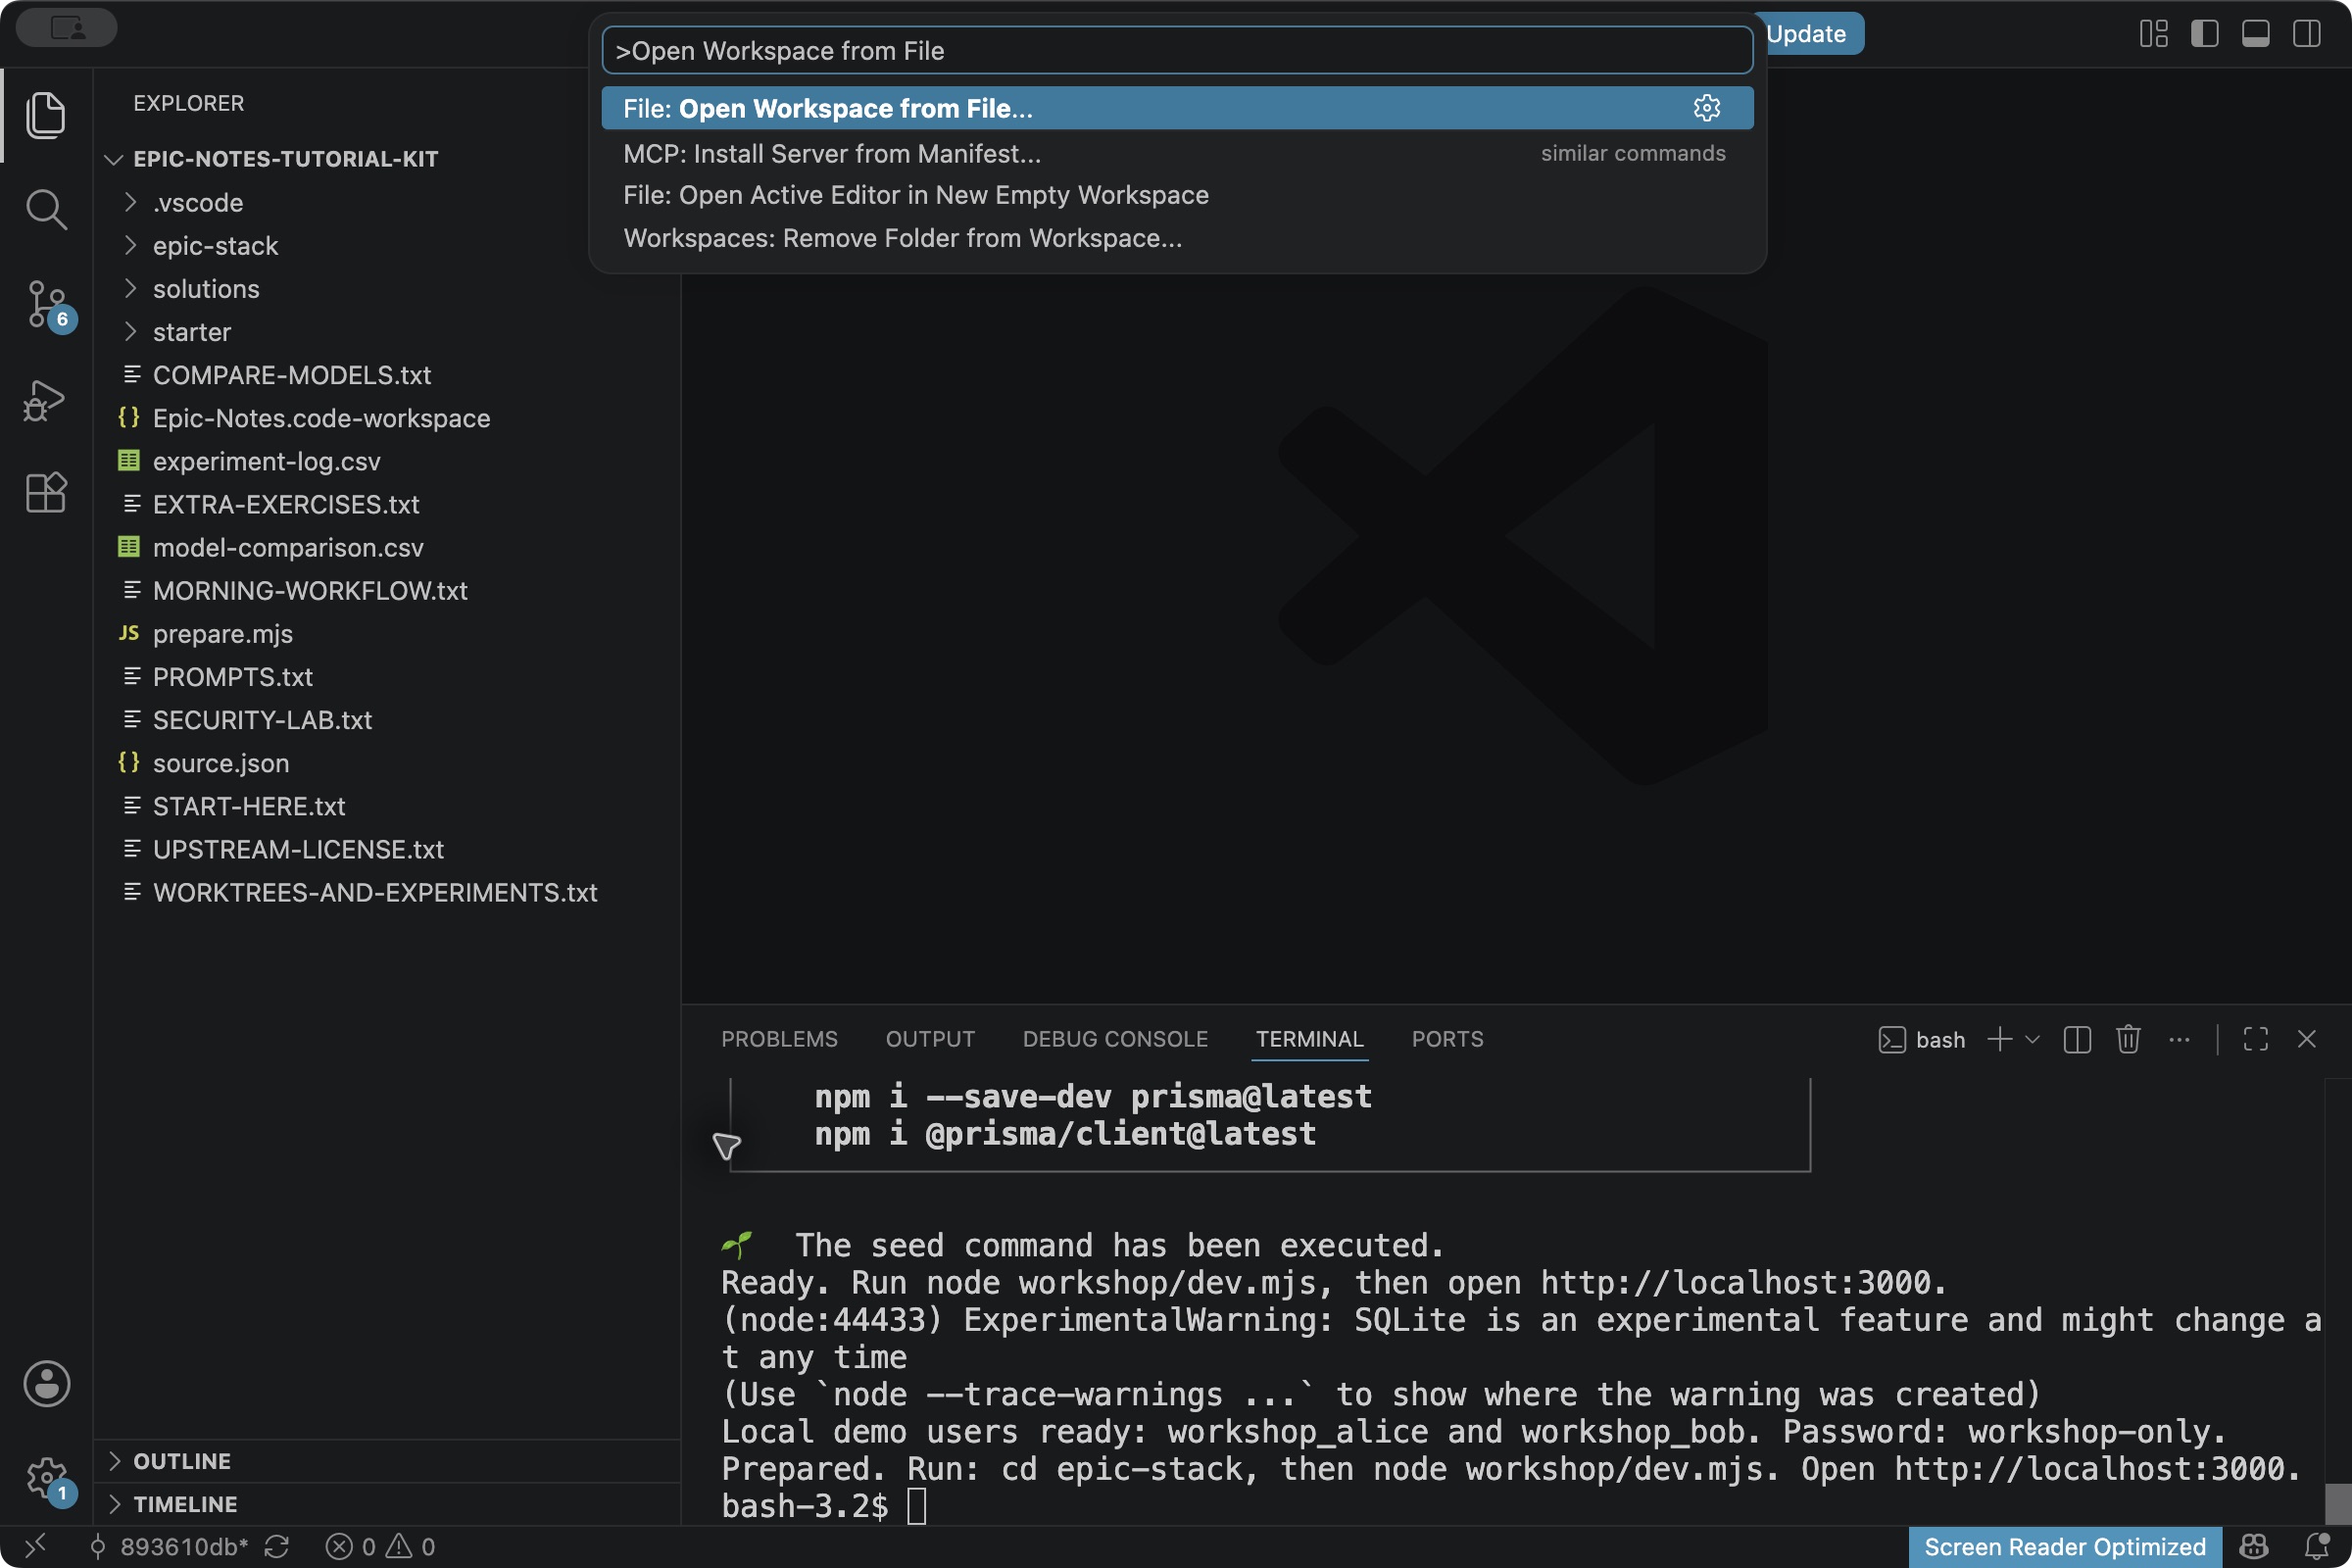
6. Start the app task
Press F1, type Tasks: Run Task and click that exact result. VS Code may put a similar command above it; don’t choose “Rerun” or “Run Build Task.” In the next list, click Workshop: app.
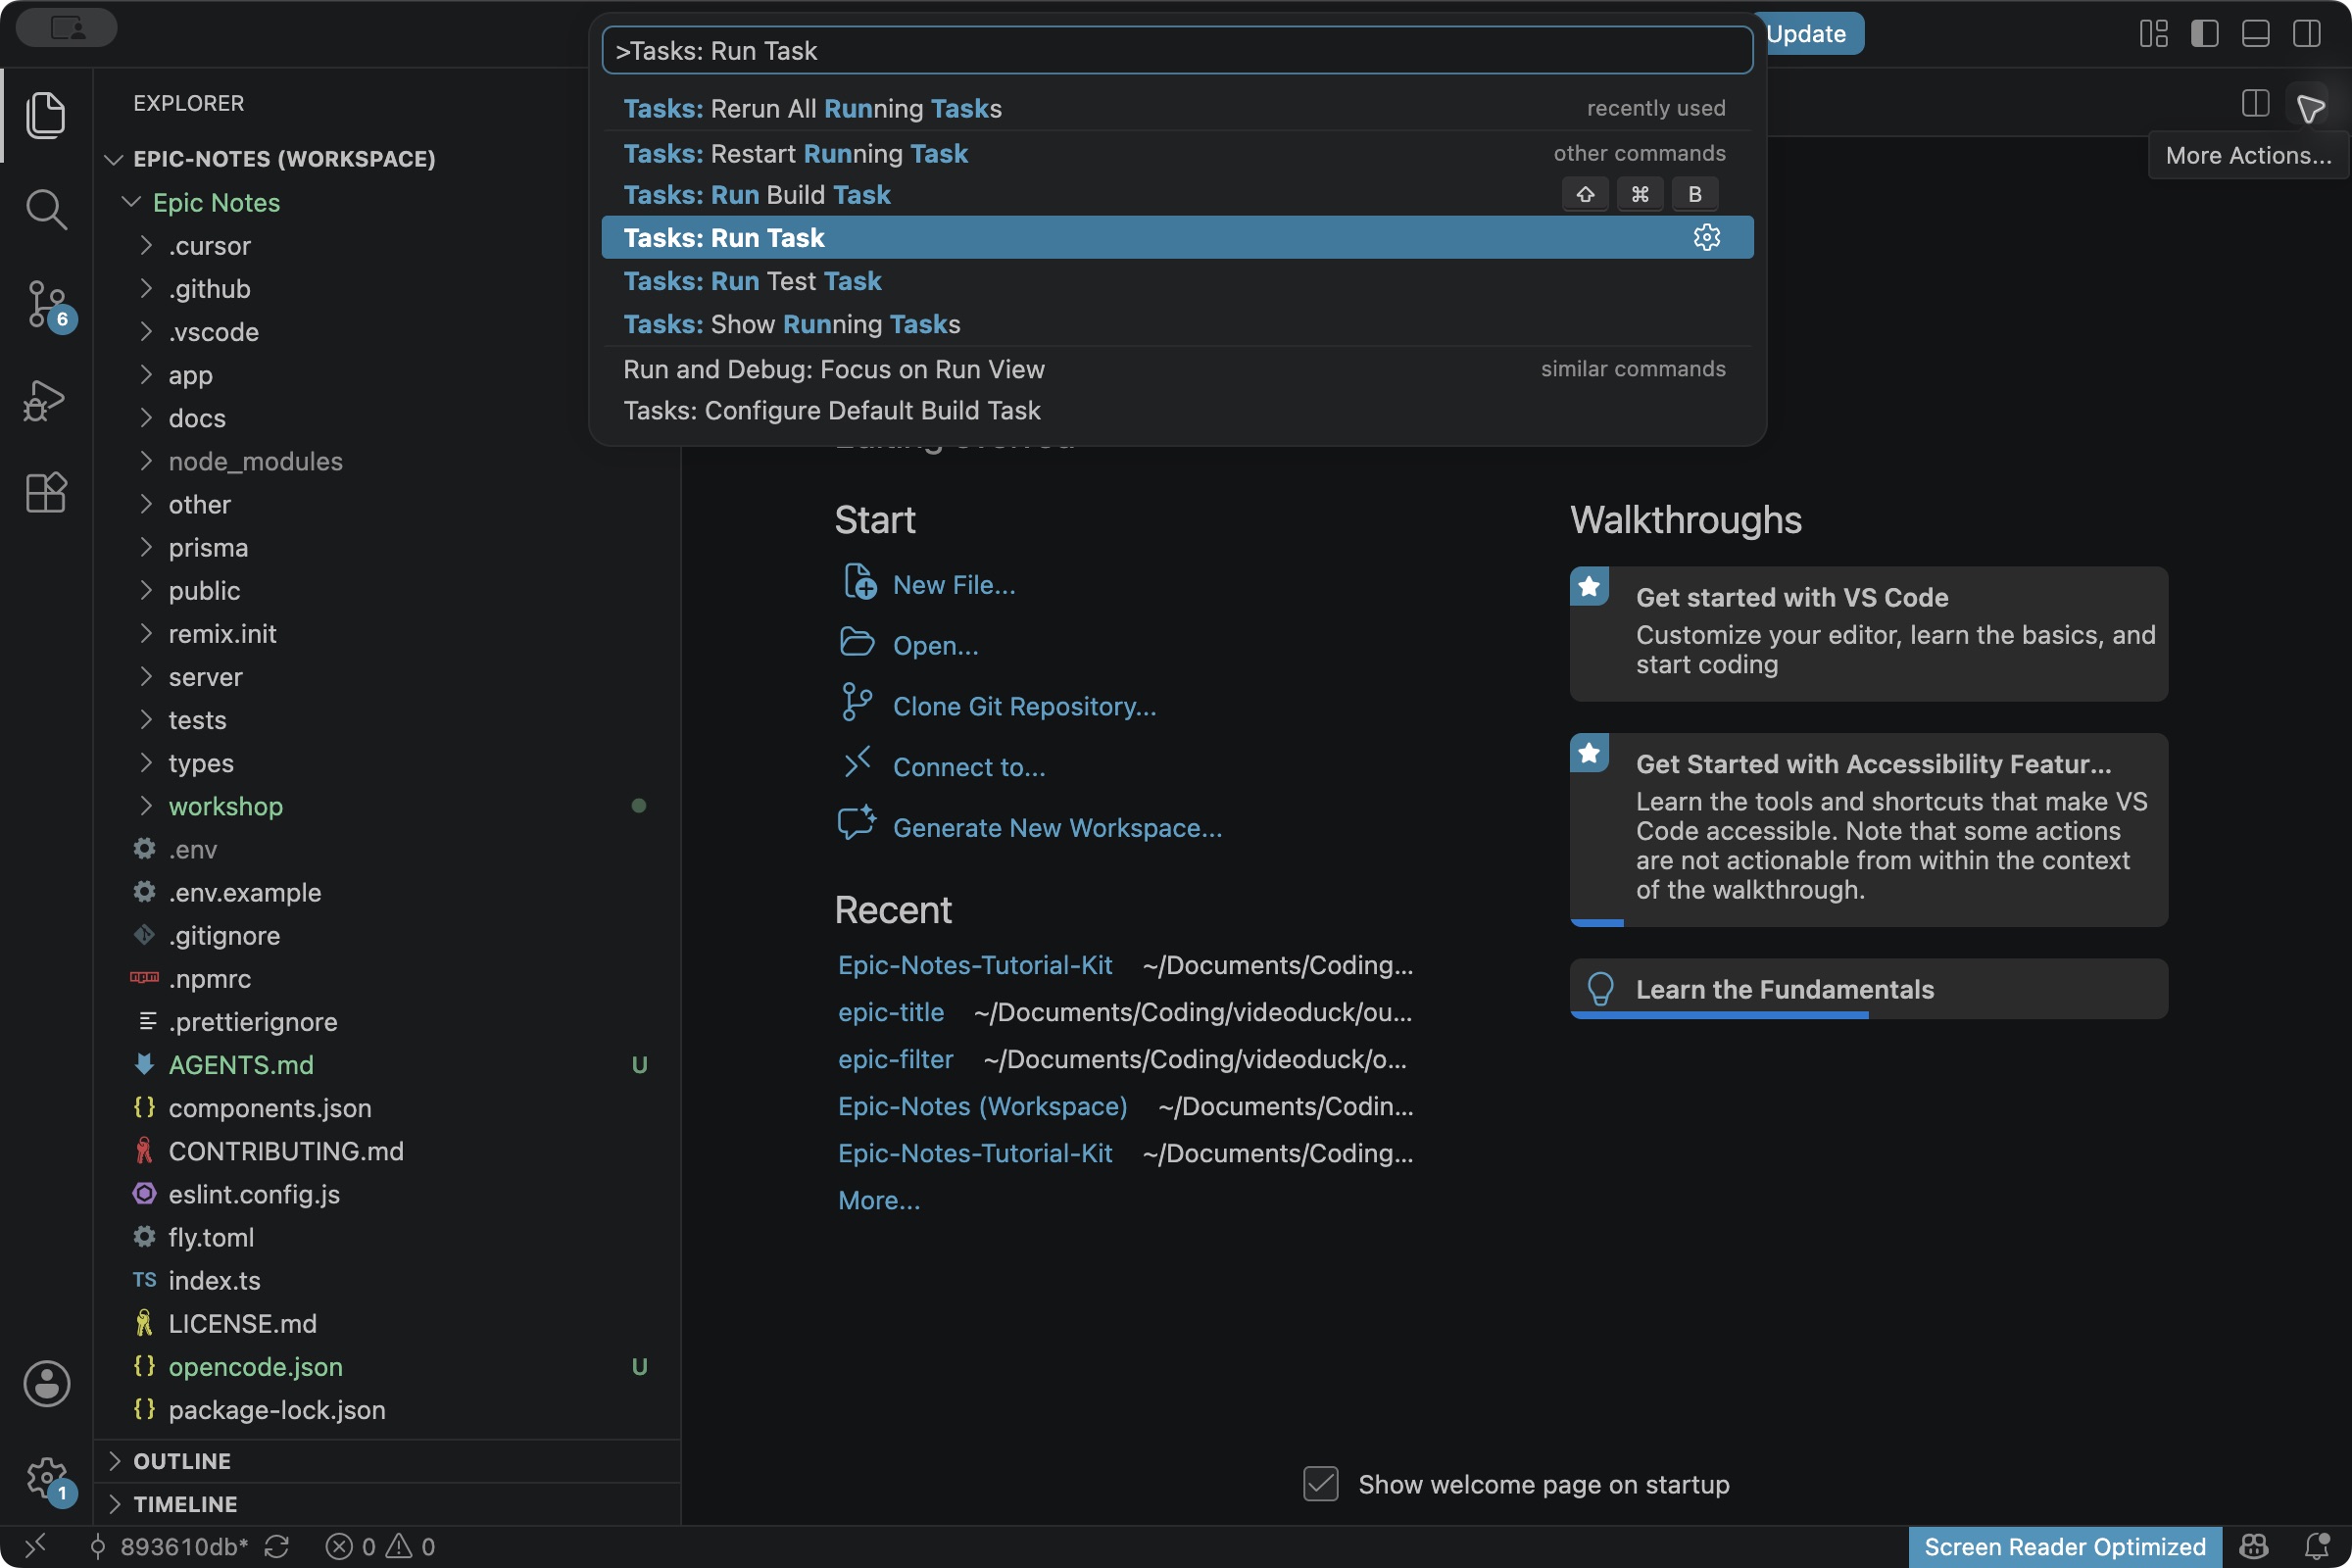
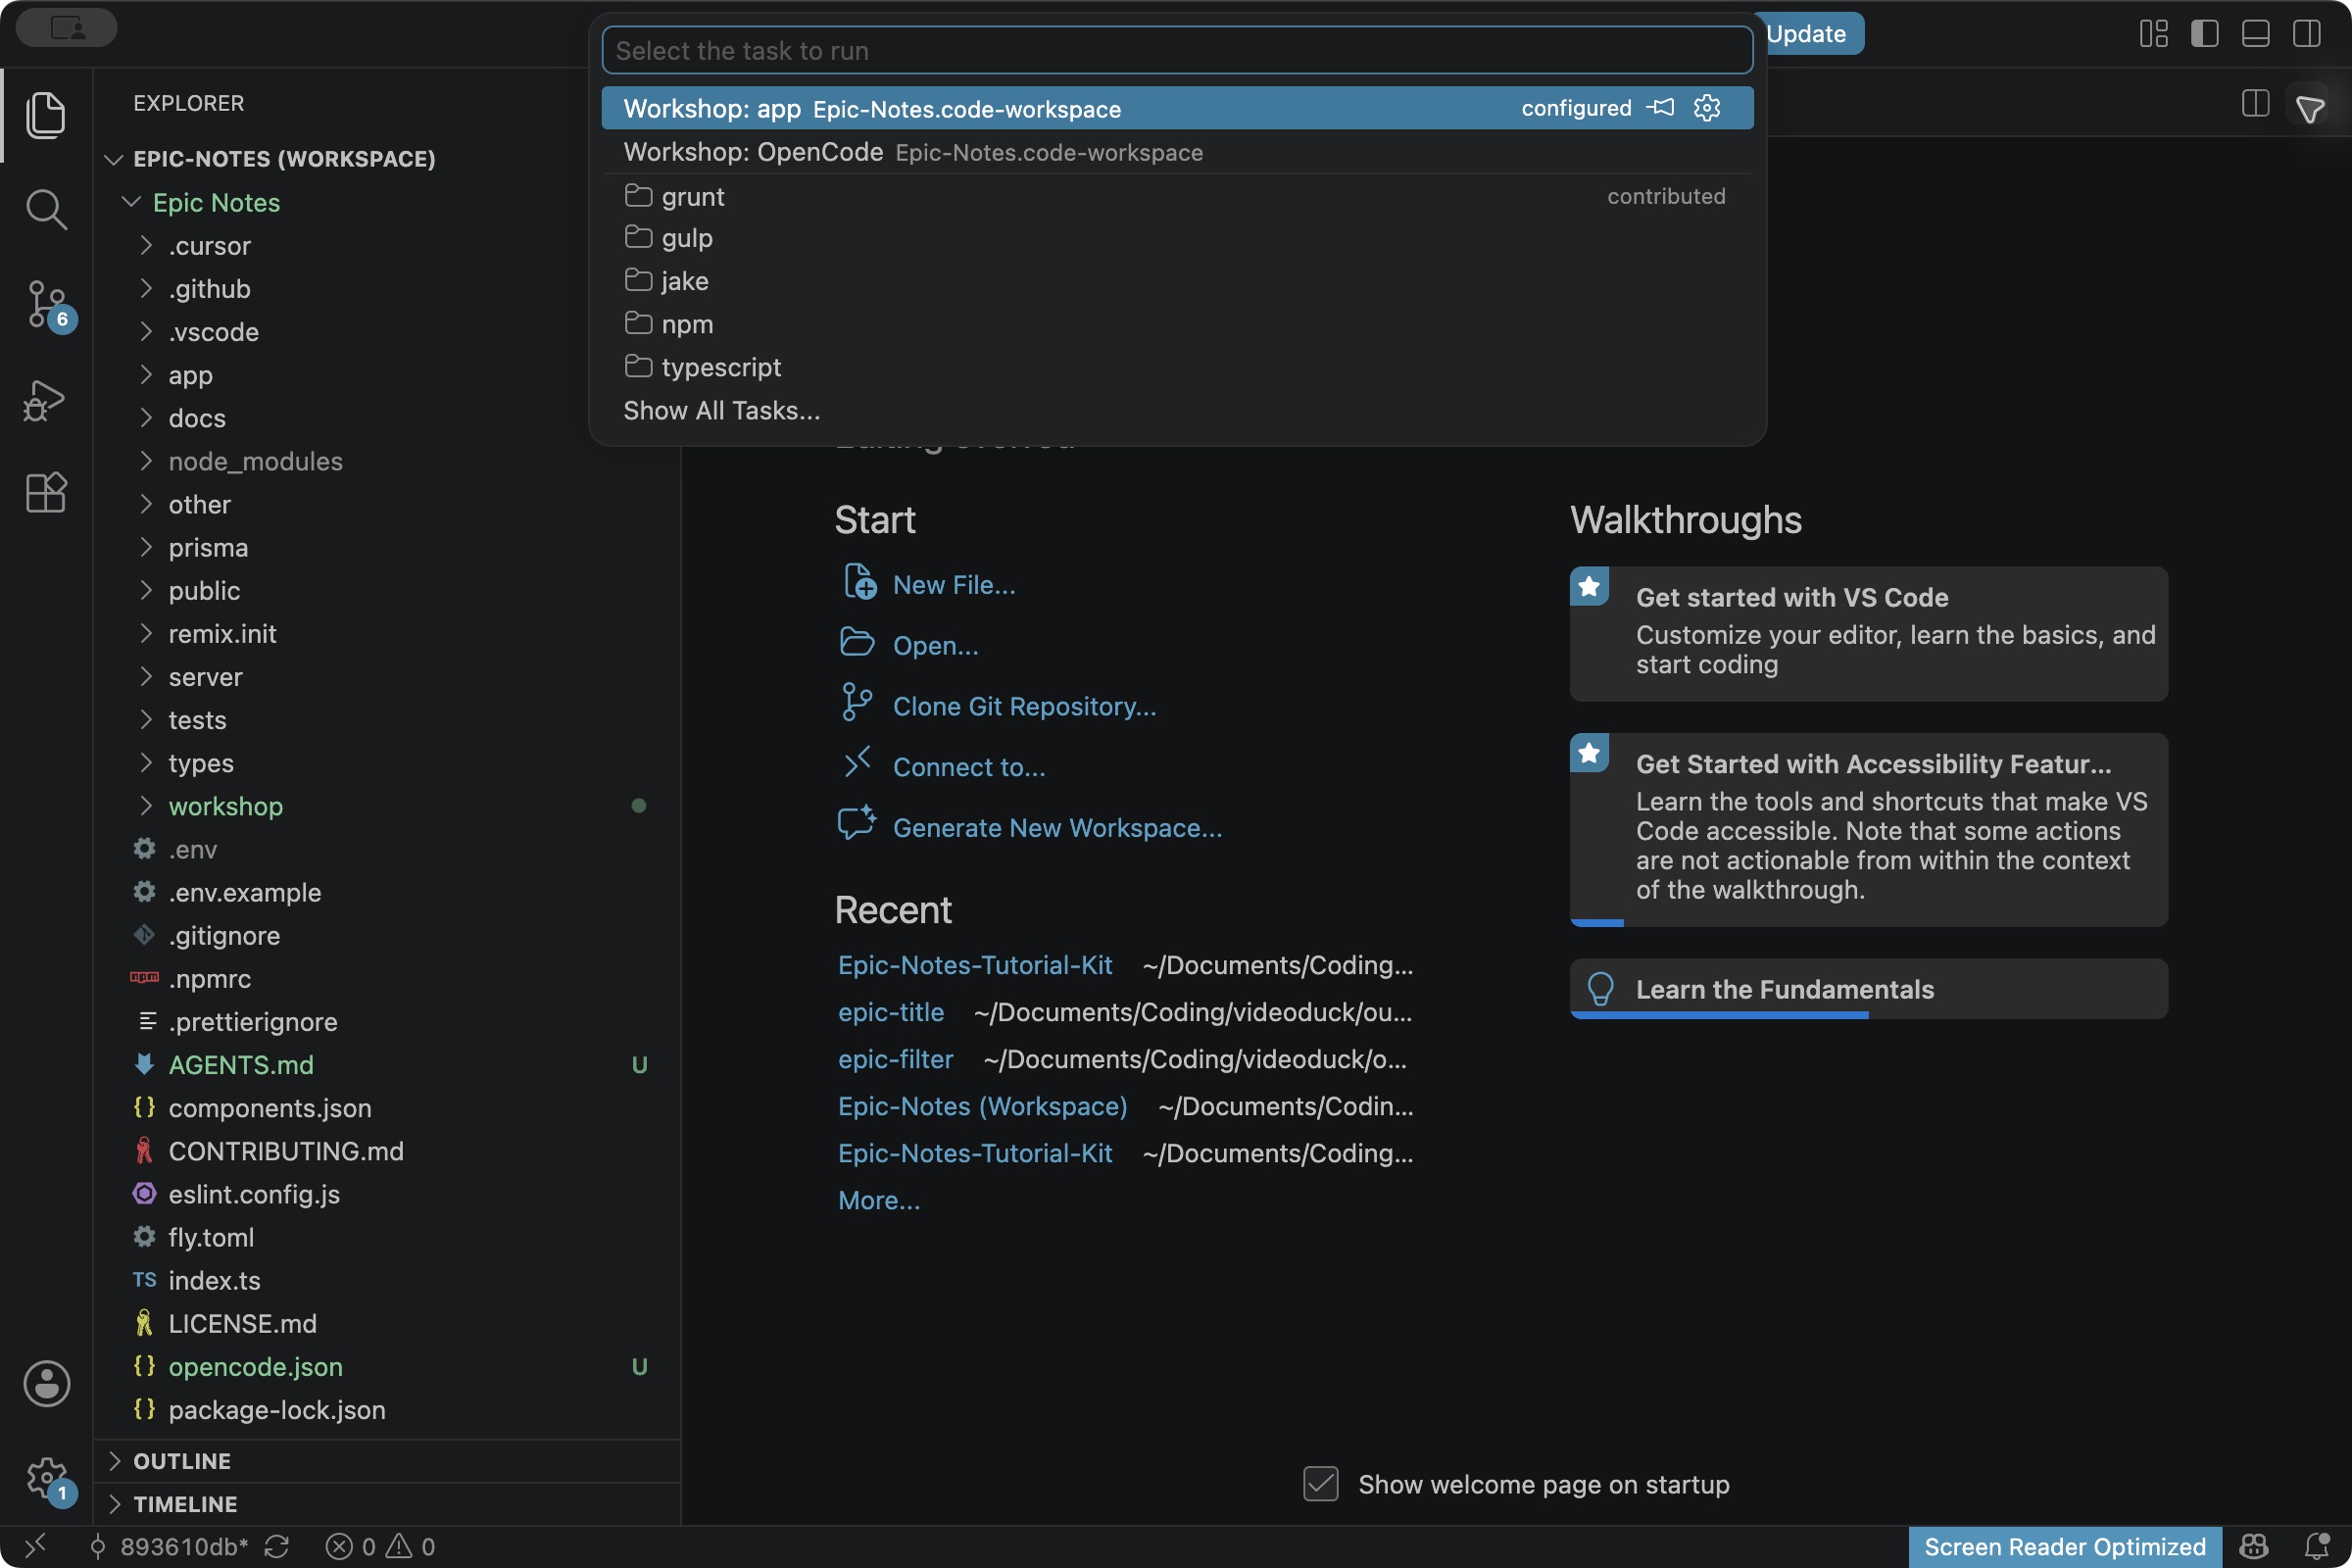
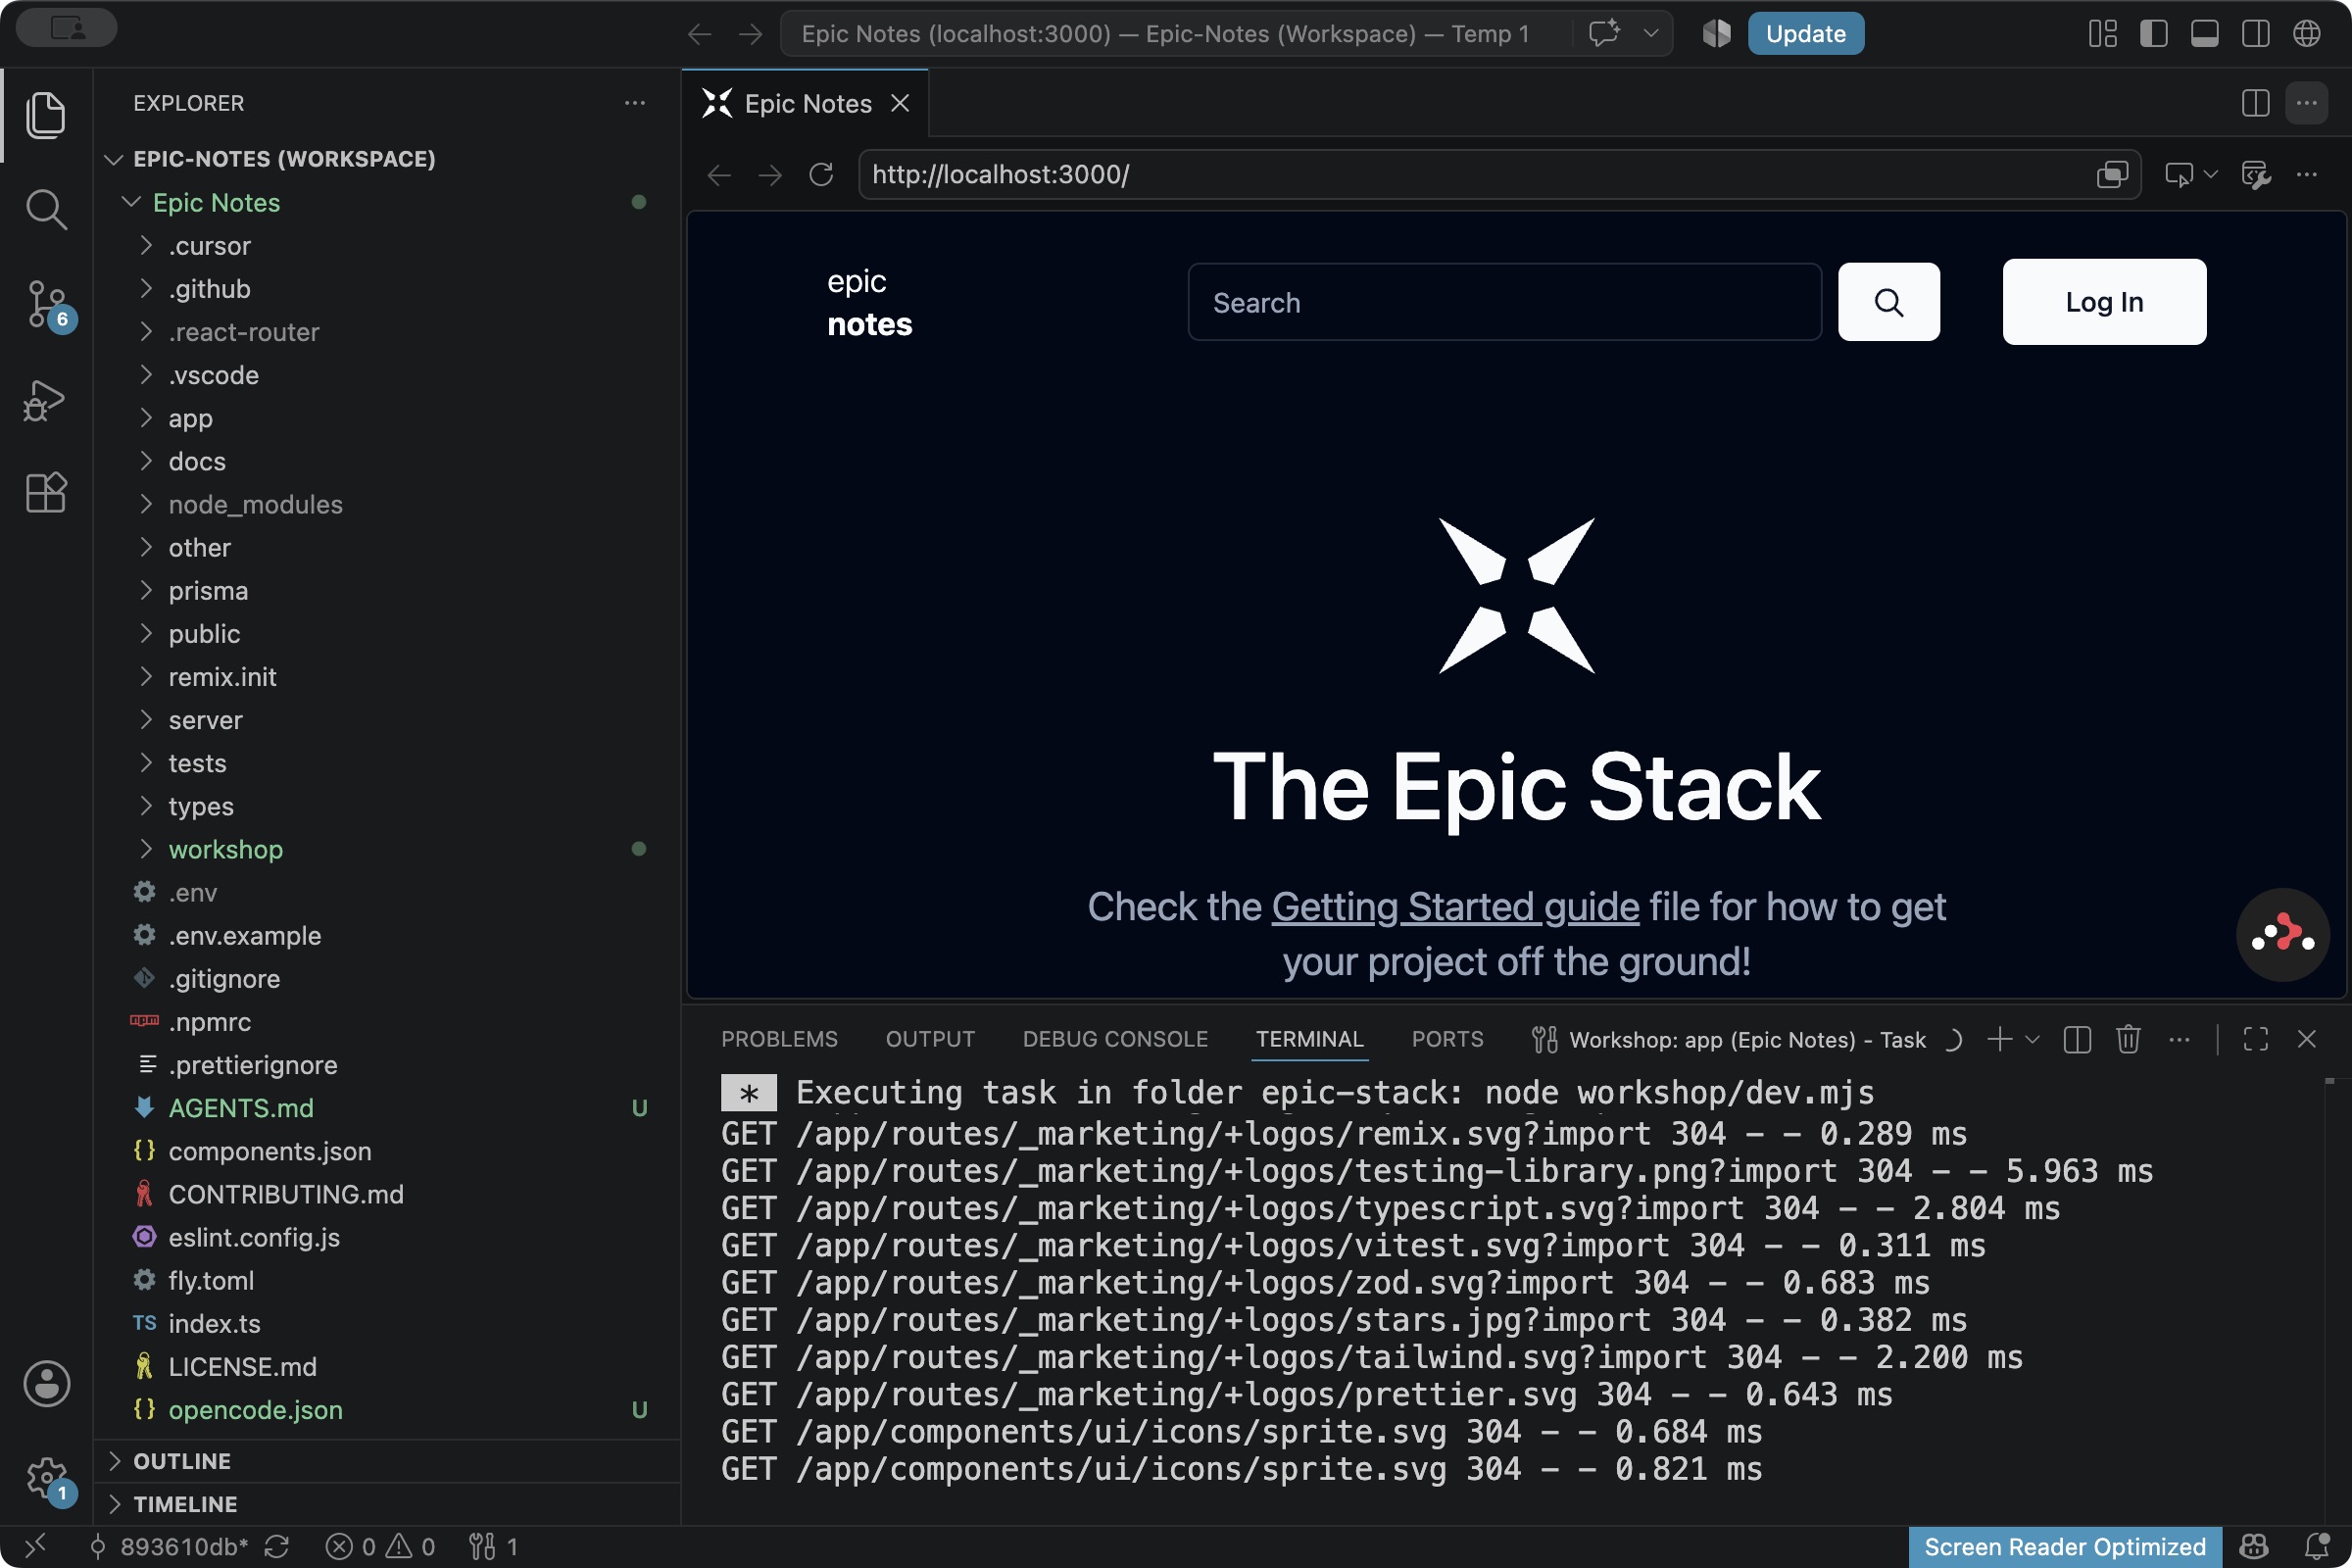
Leave that terminal running. Find its Local: address, usually http://localhost:3000. If it says 3001, use that address instead. You want this app, not an older server on the same laptop.
7. Open the app and sign in
Press F1, run Browser: Open Integrated Browser, paste the Local address in its URL box and press Enter. Older VS Code: use Simple Browser: Show. The page opens inside VS Code. To refresh this preview later, click the circular-arrow button just left of its address box.
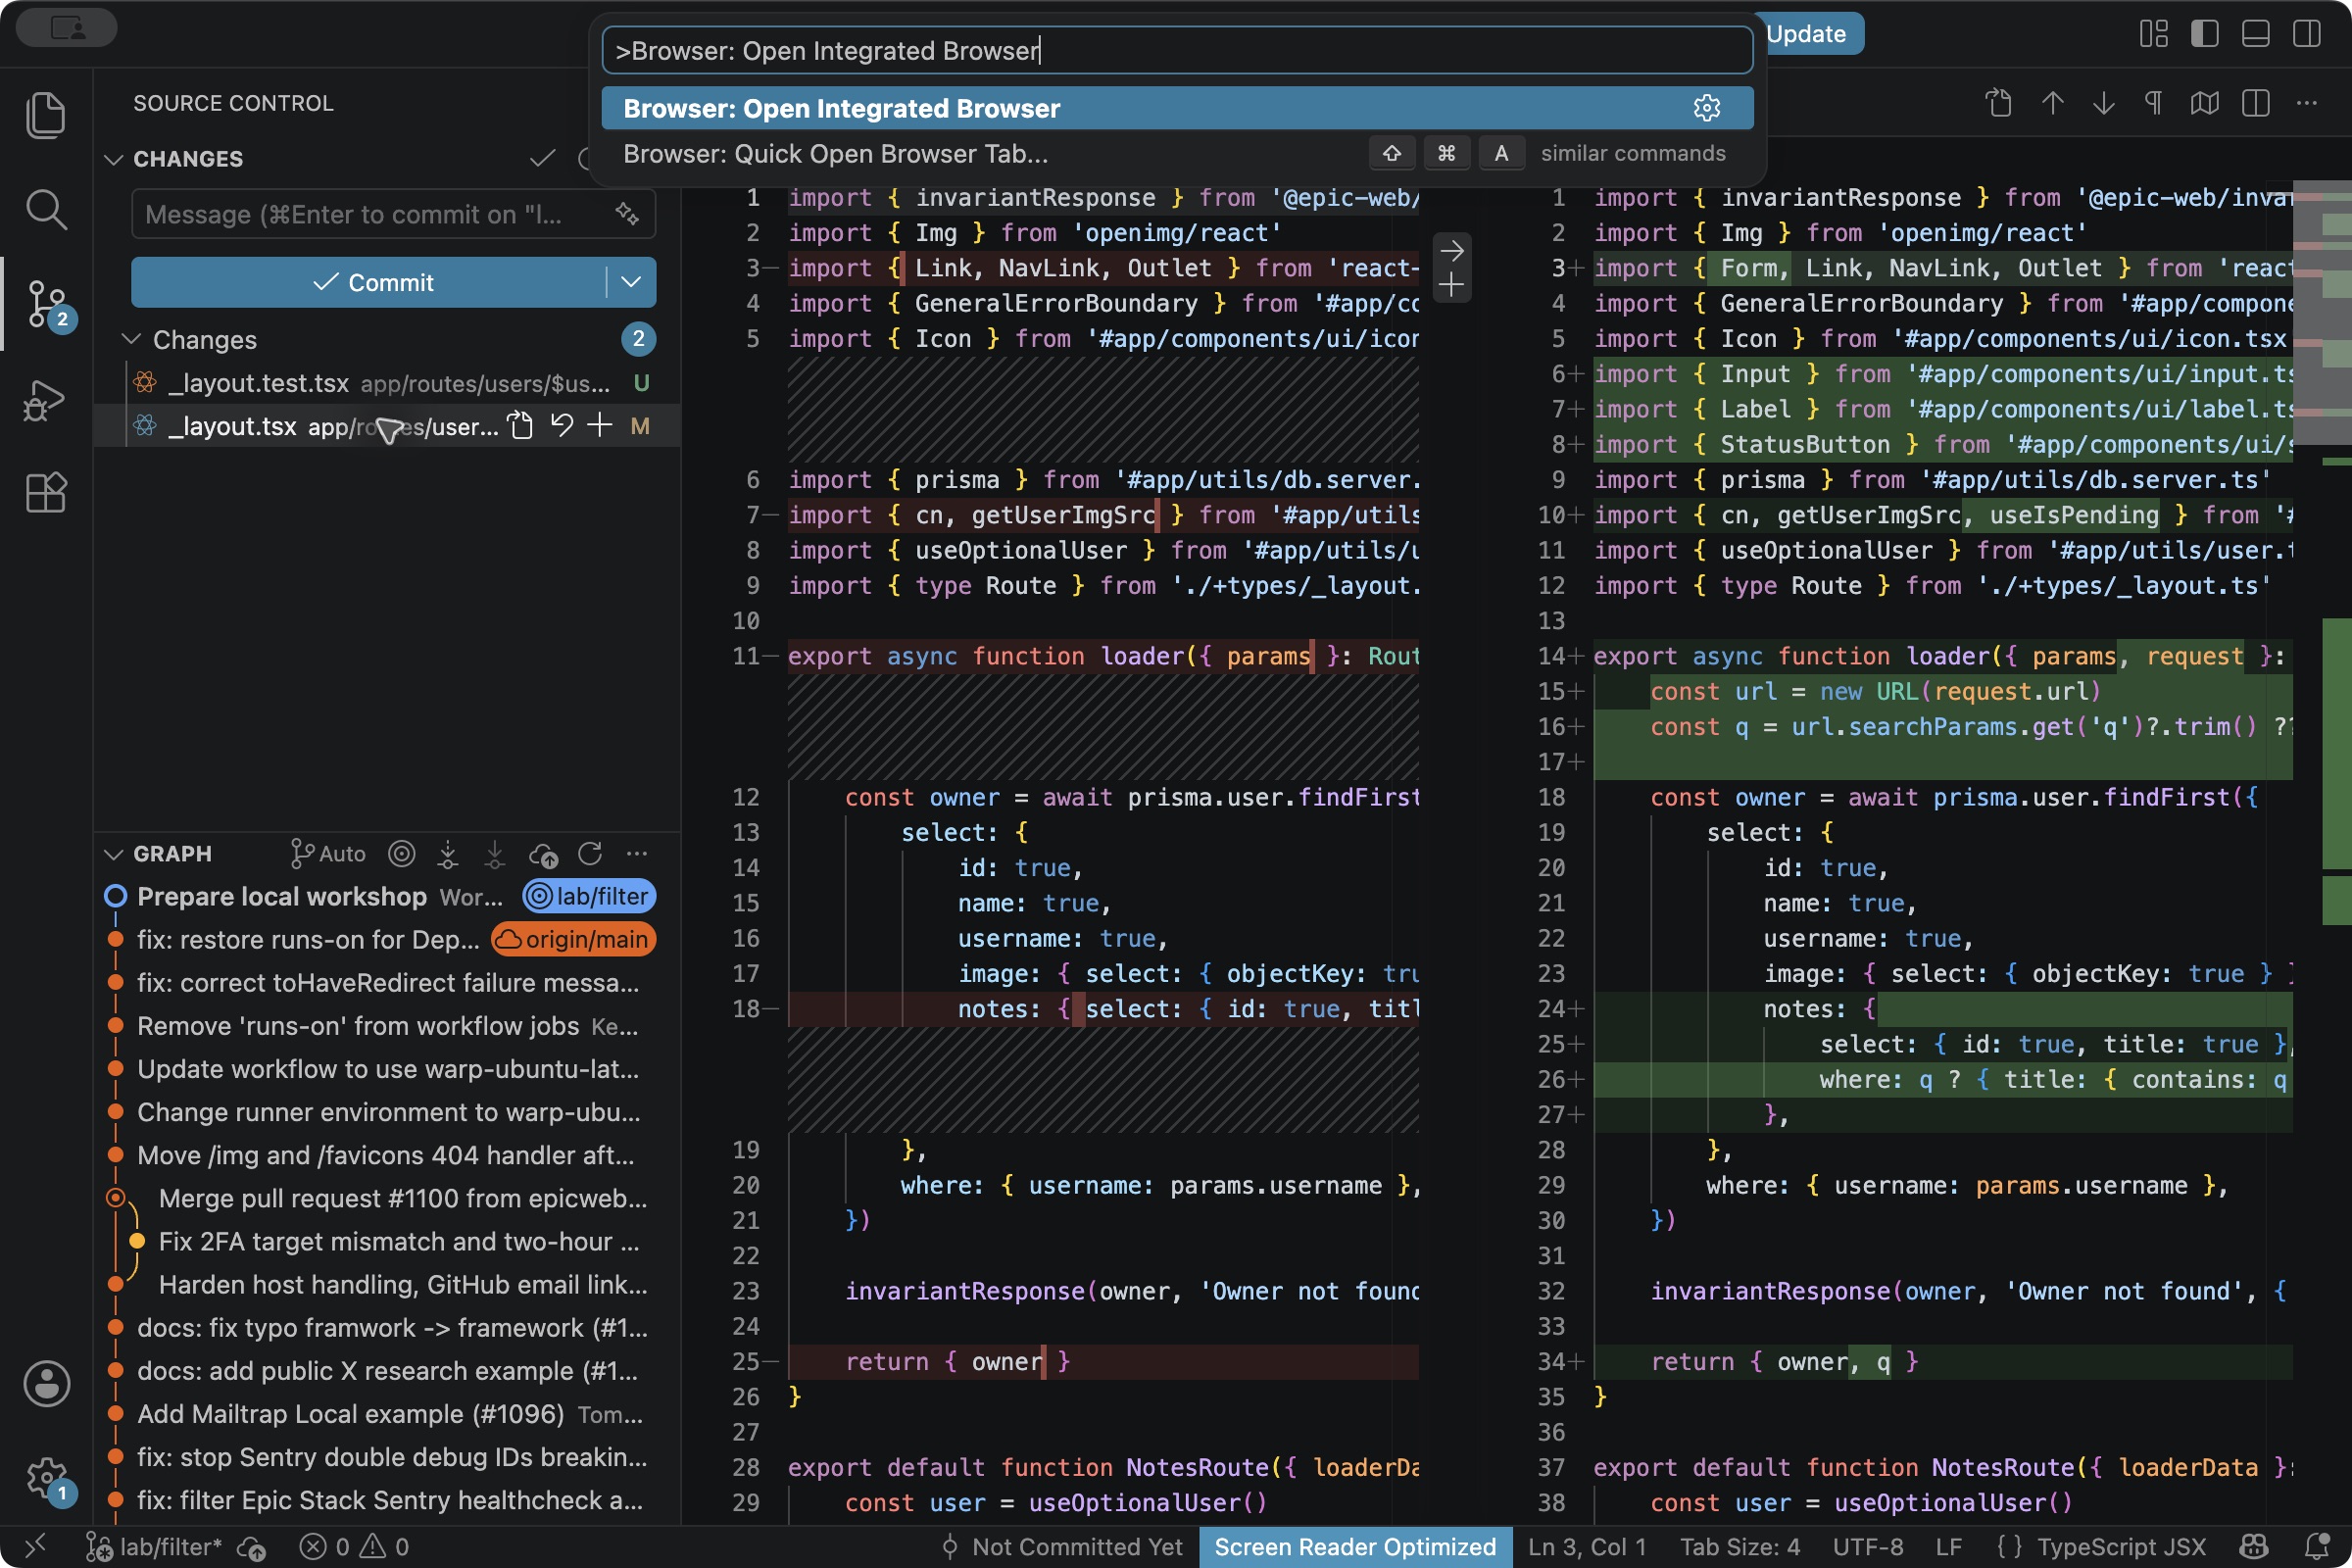
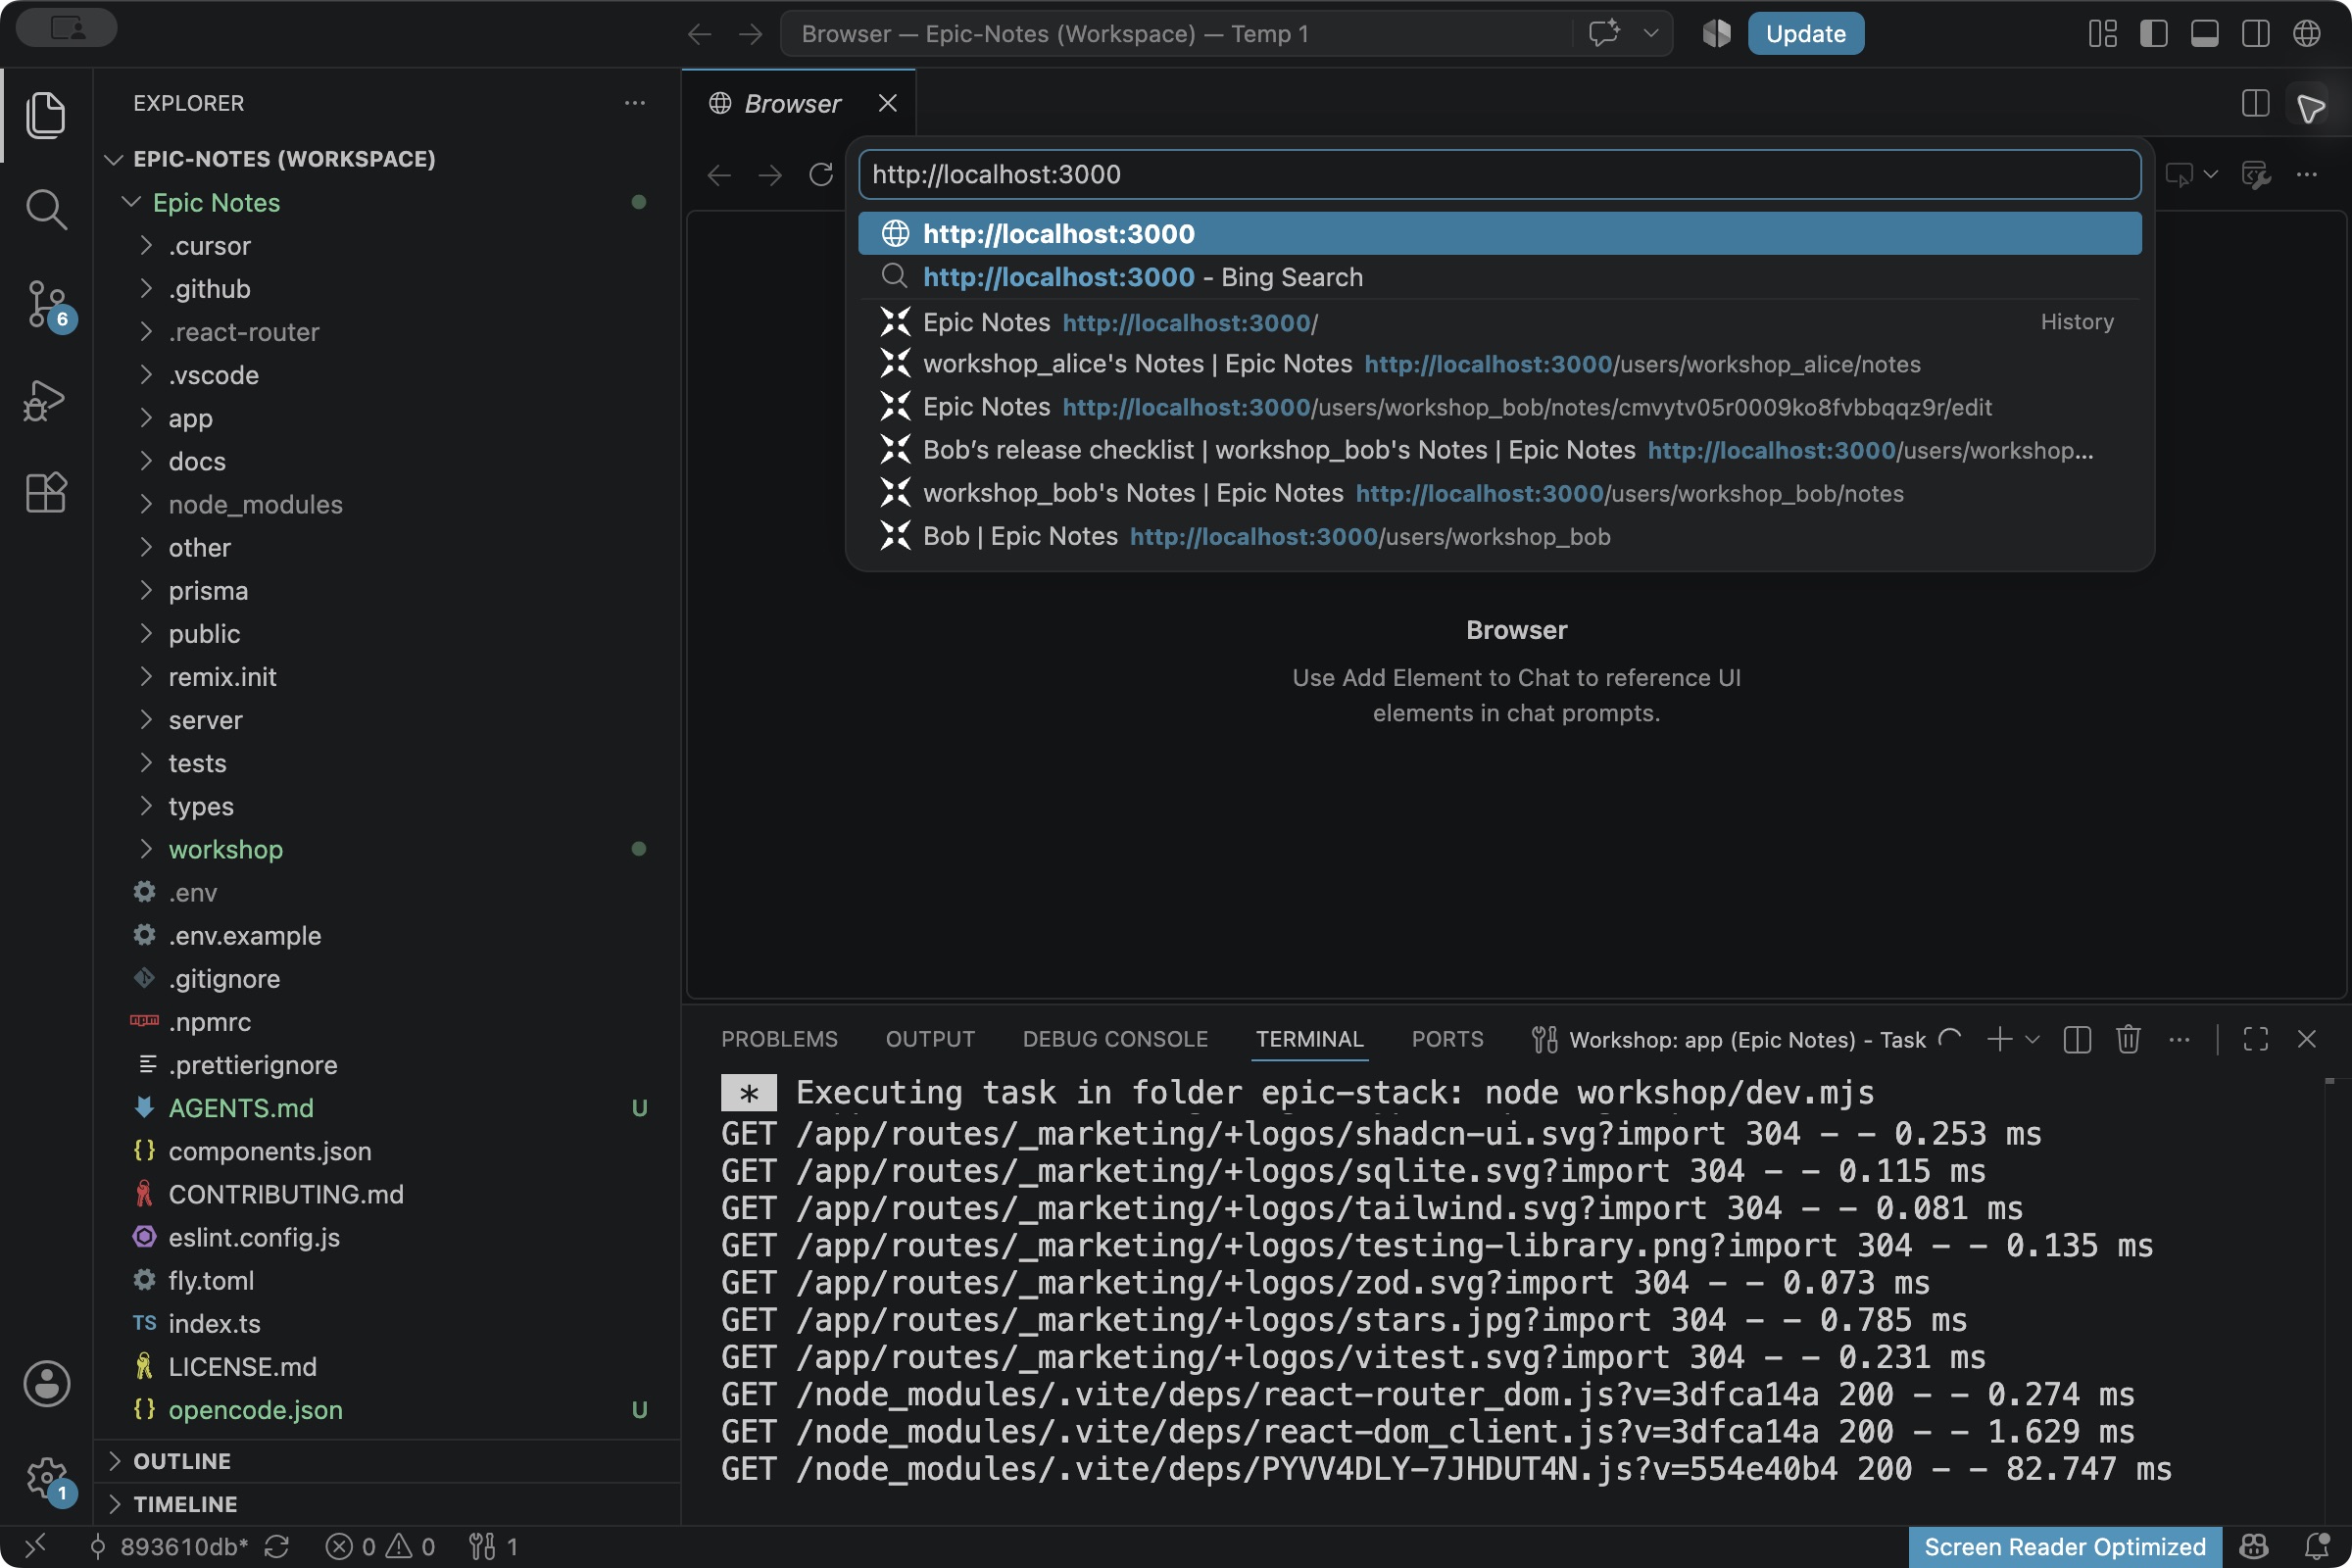
Click Log In at the top right.
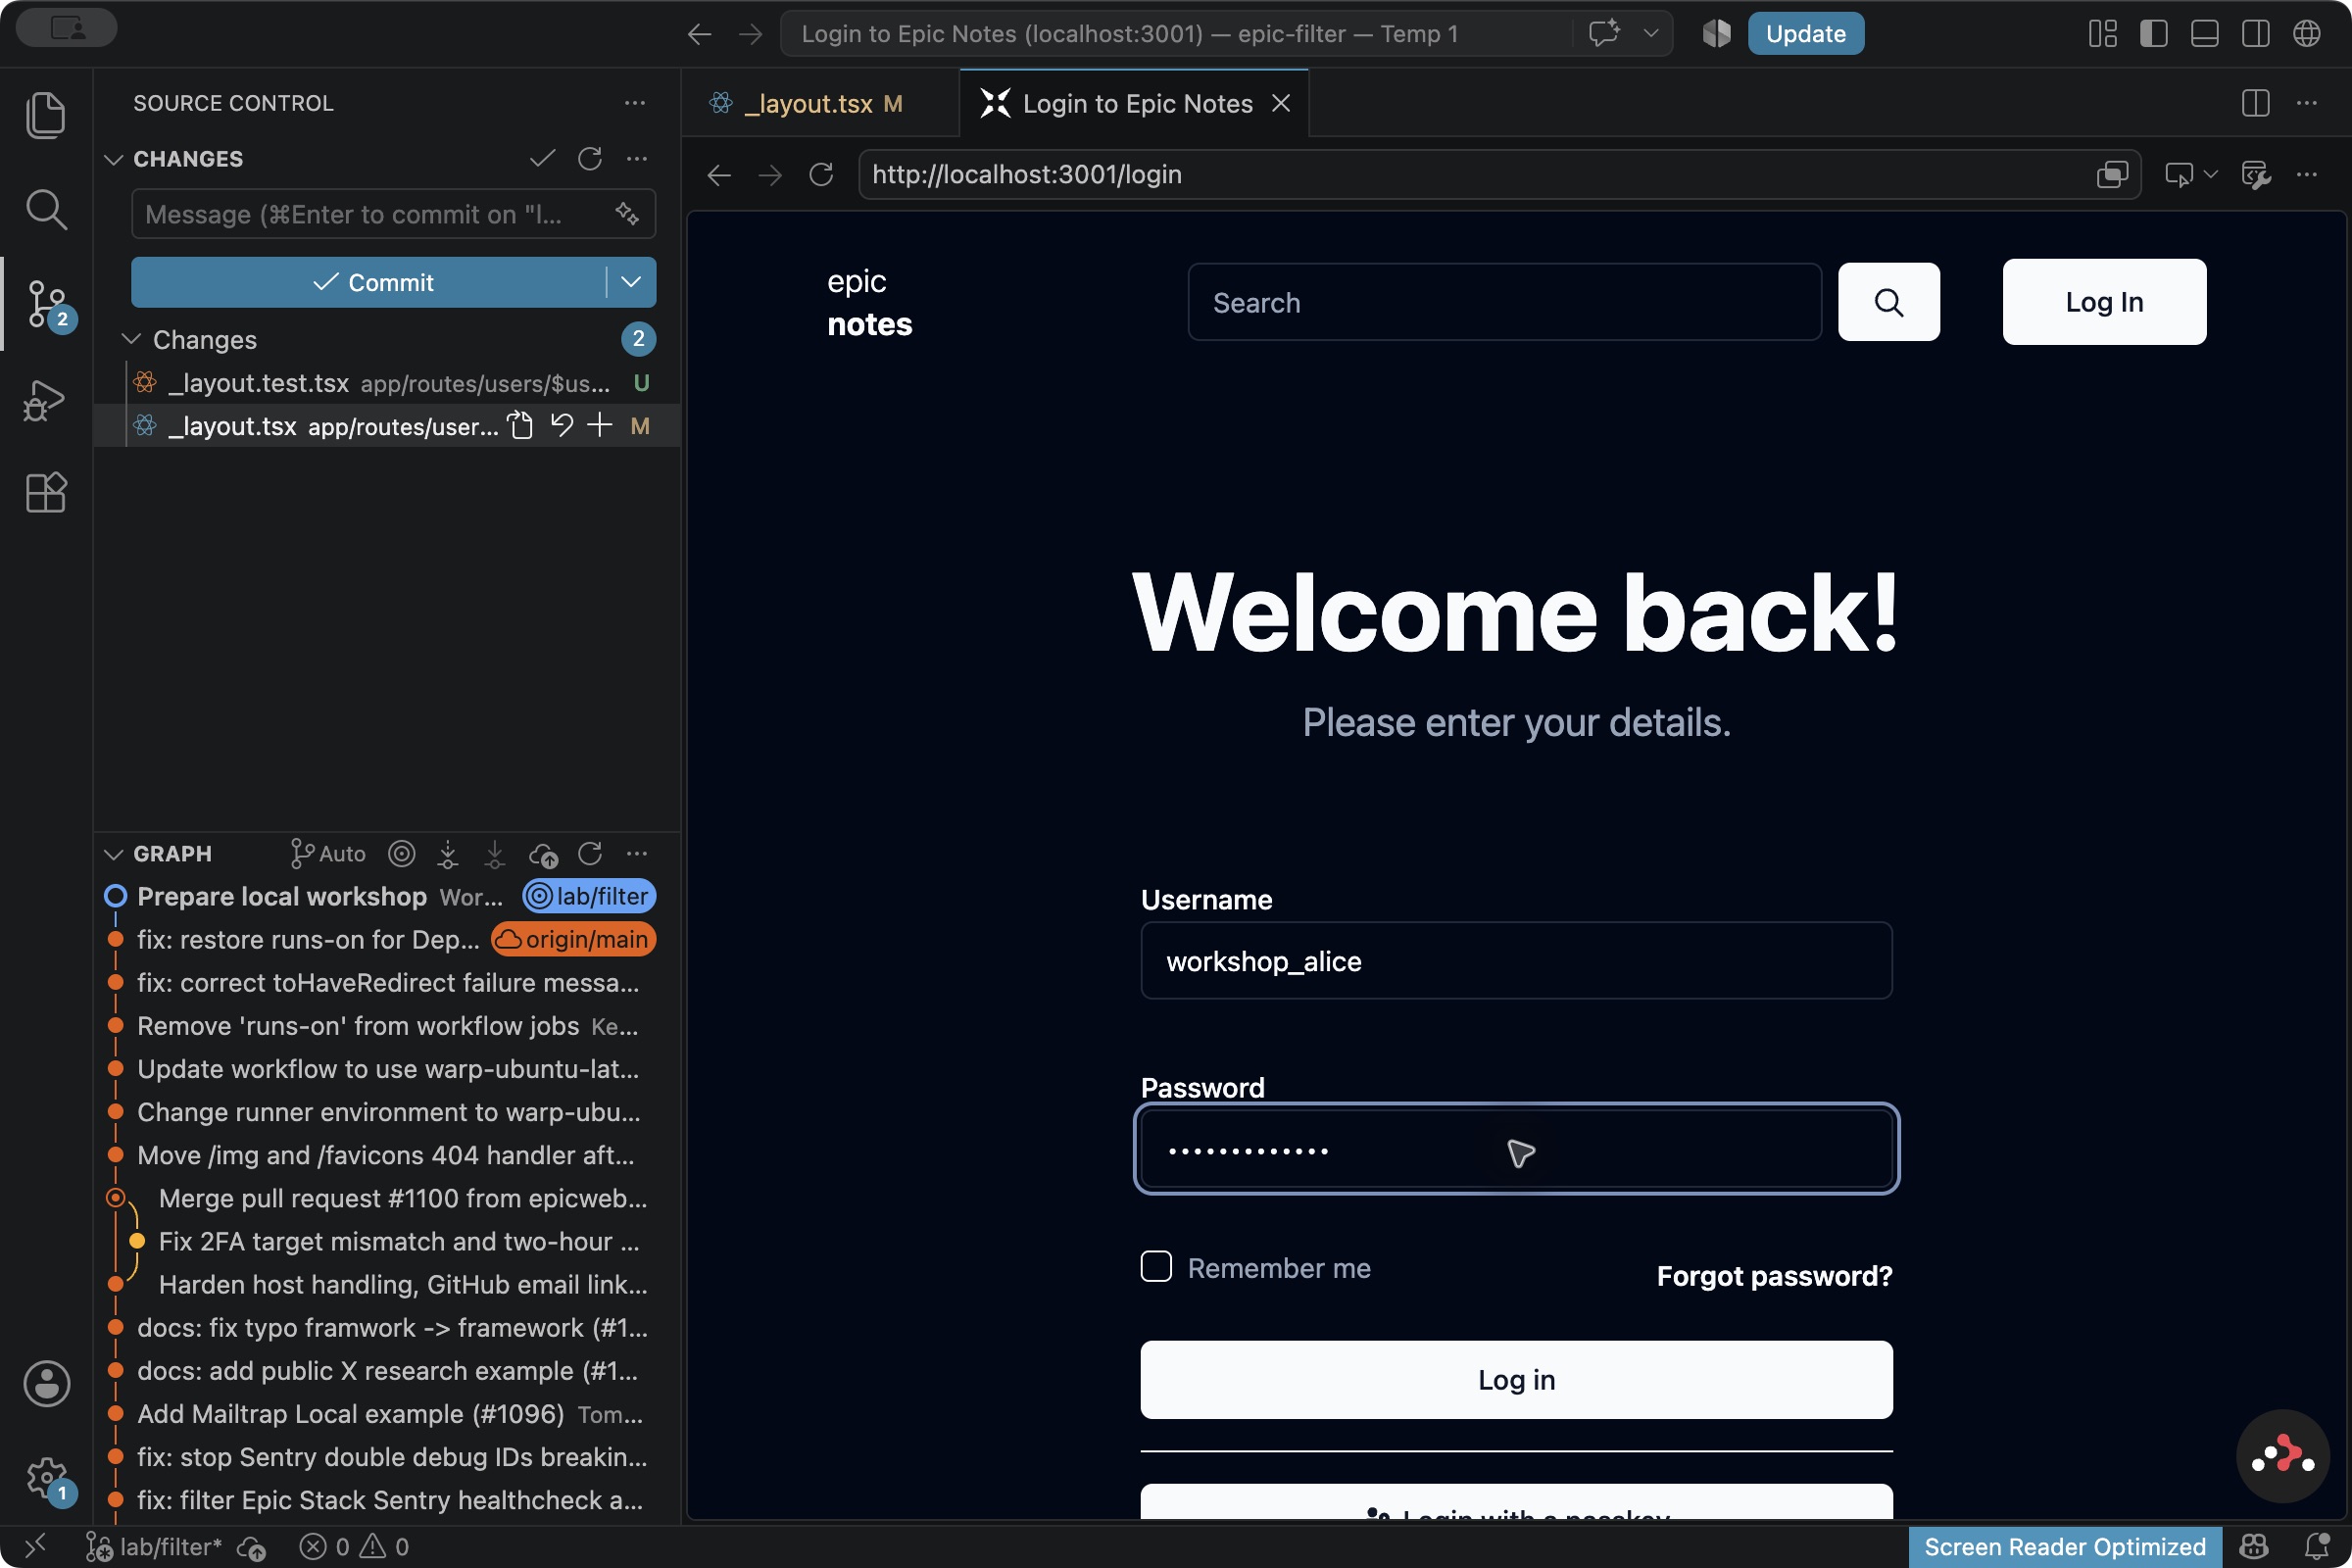
Click Username and enter workshop_alice. Click Password and enter workshop-only. Click the Log in button under the fields. Use these demo fields, not GitHub sign-in or Create an account.
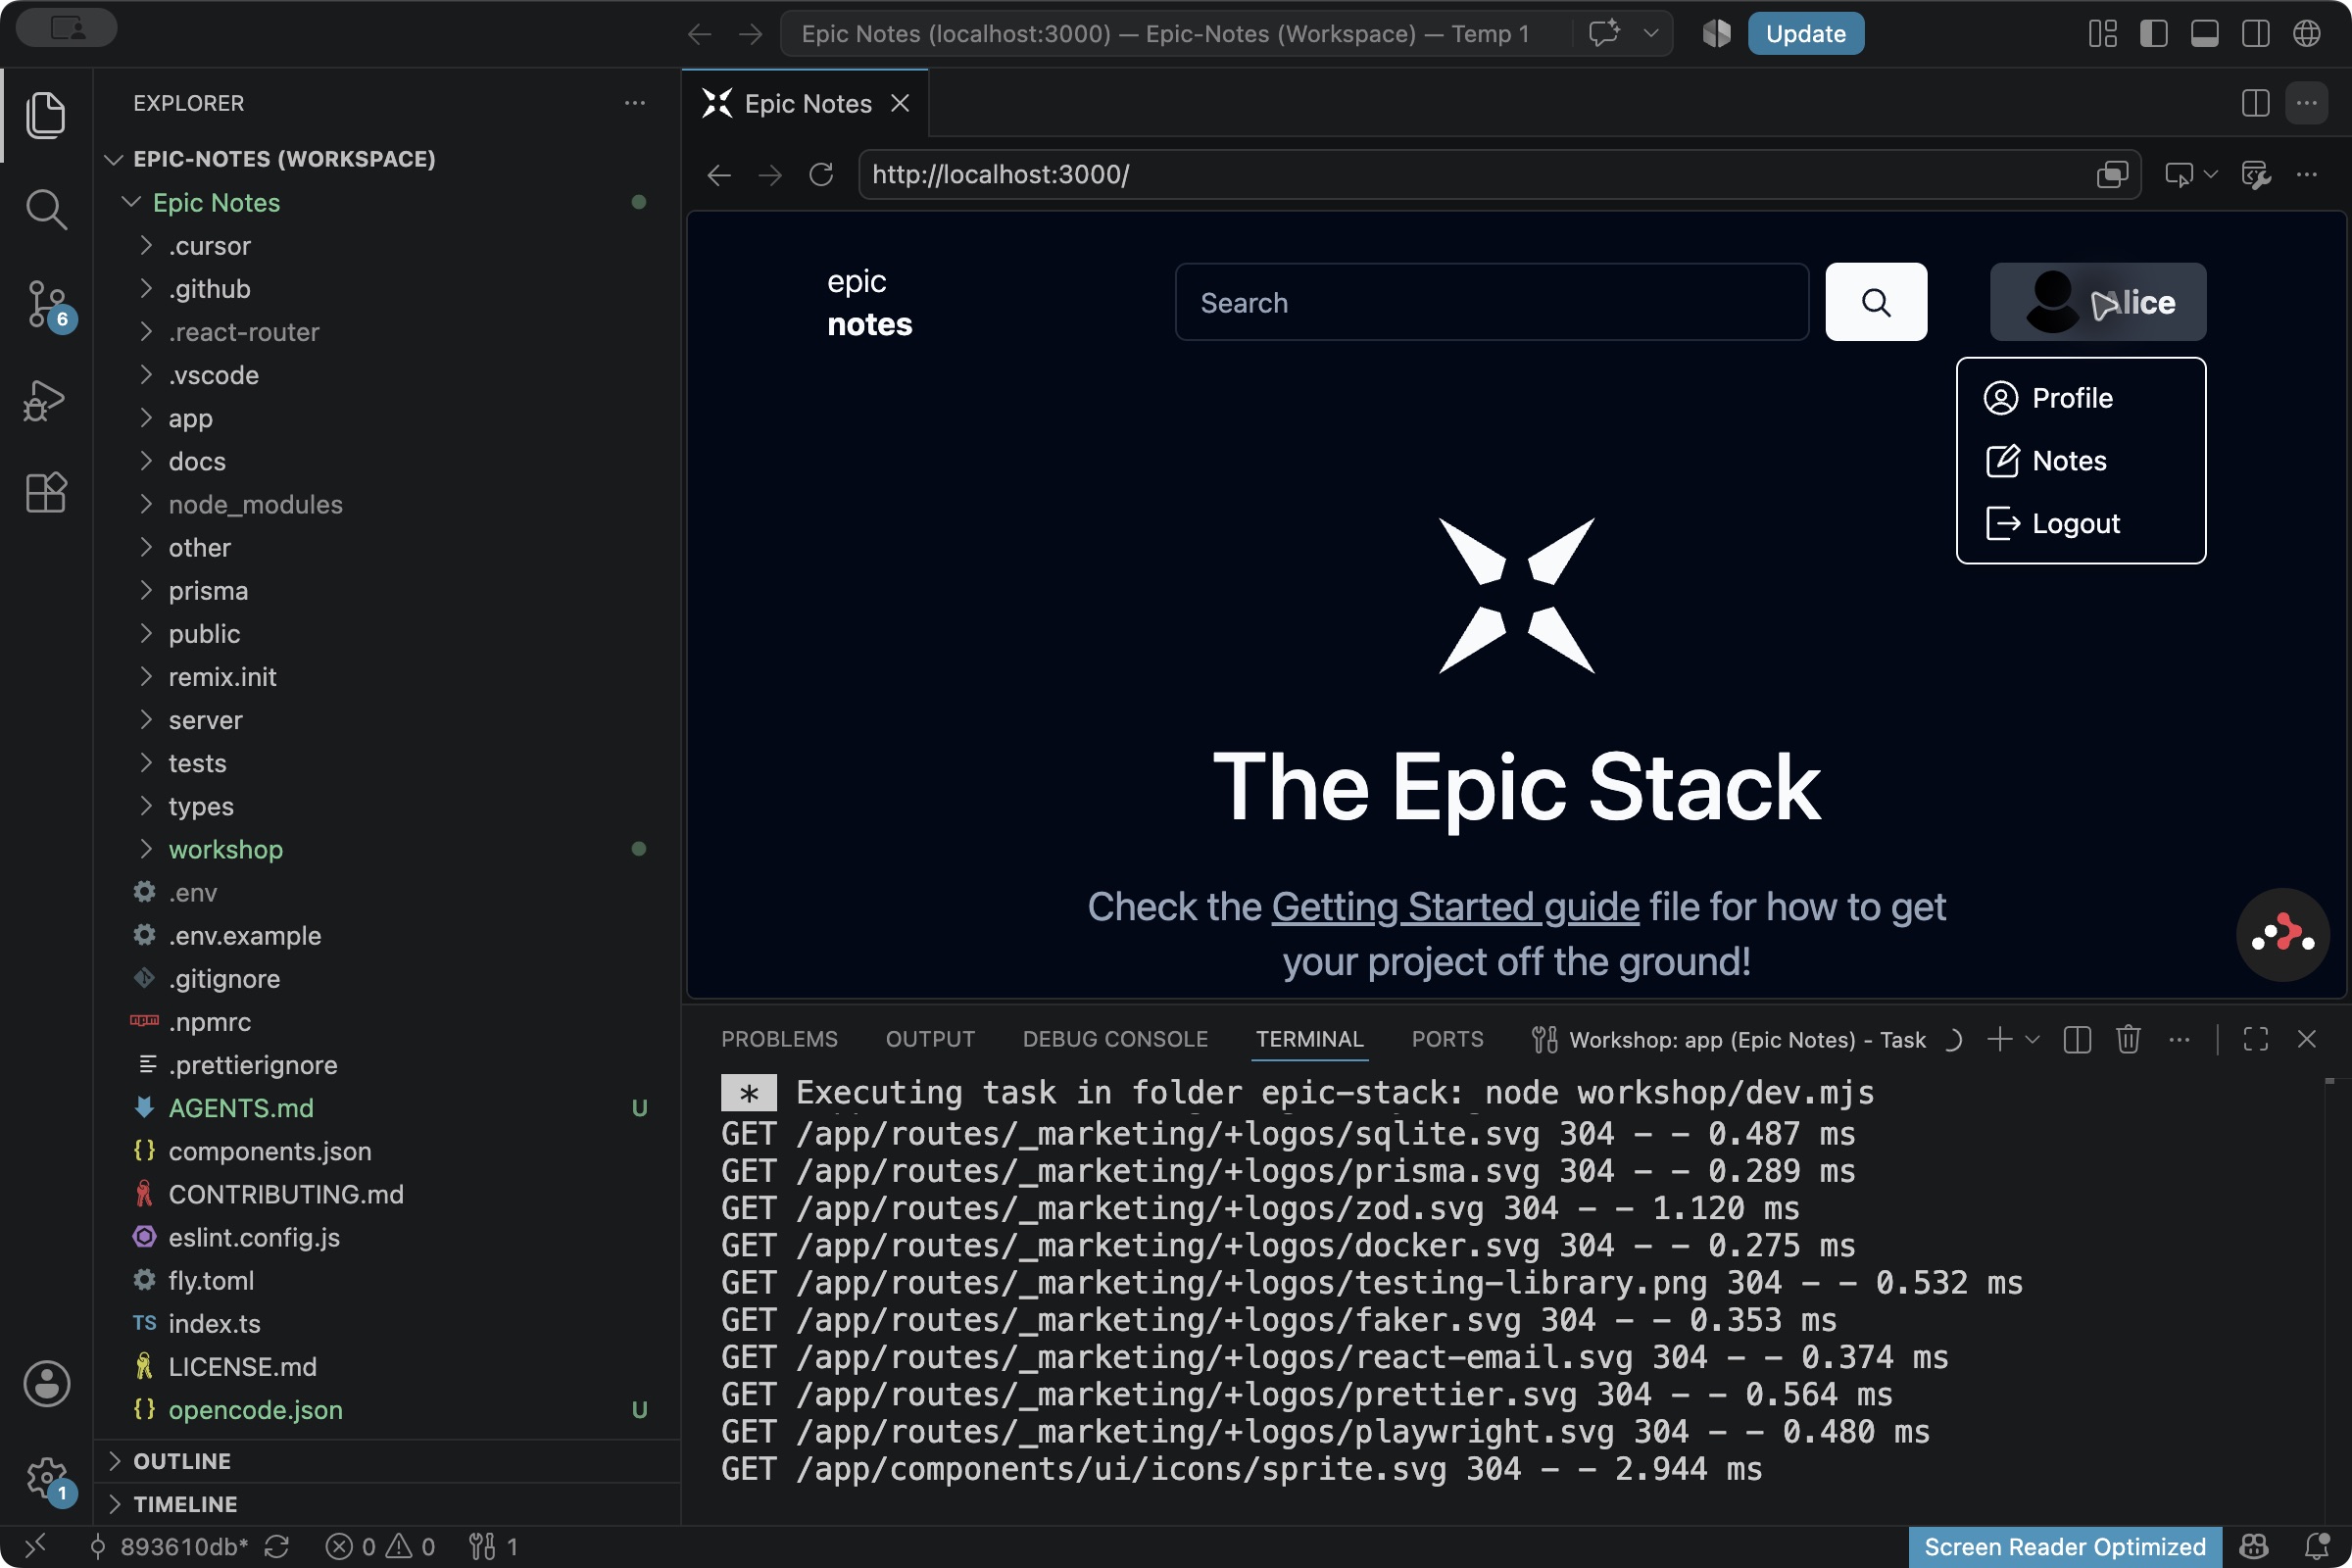
Click Alice at the top right, then Notes in the menu. You should see Release checklist, Budget review and Meeting notes.
8. Start OpenCode in its own terminal
If you already installed opencode-ai, remove that old package first. Skip this command on a fresh laptop:
npm uninstall -g opencode-aiKeep Workshop: app alive. Press F1 → Terminal: Create New Terminal. In this new shell, paste the install command below and press Enter. The folder is now epic-stack.
npm install -g @opencode/cli@latest
opencode --version
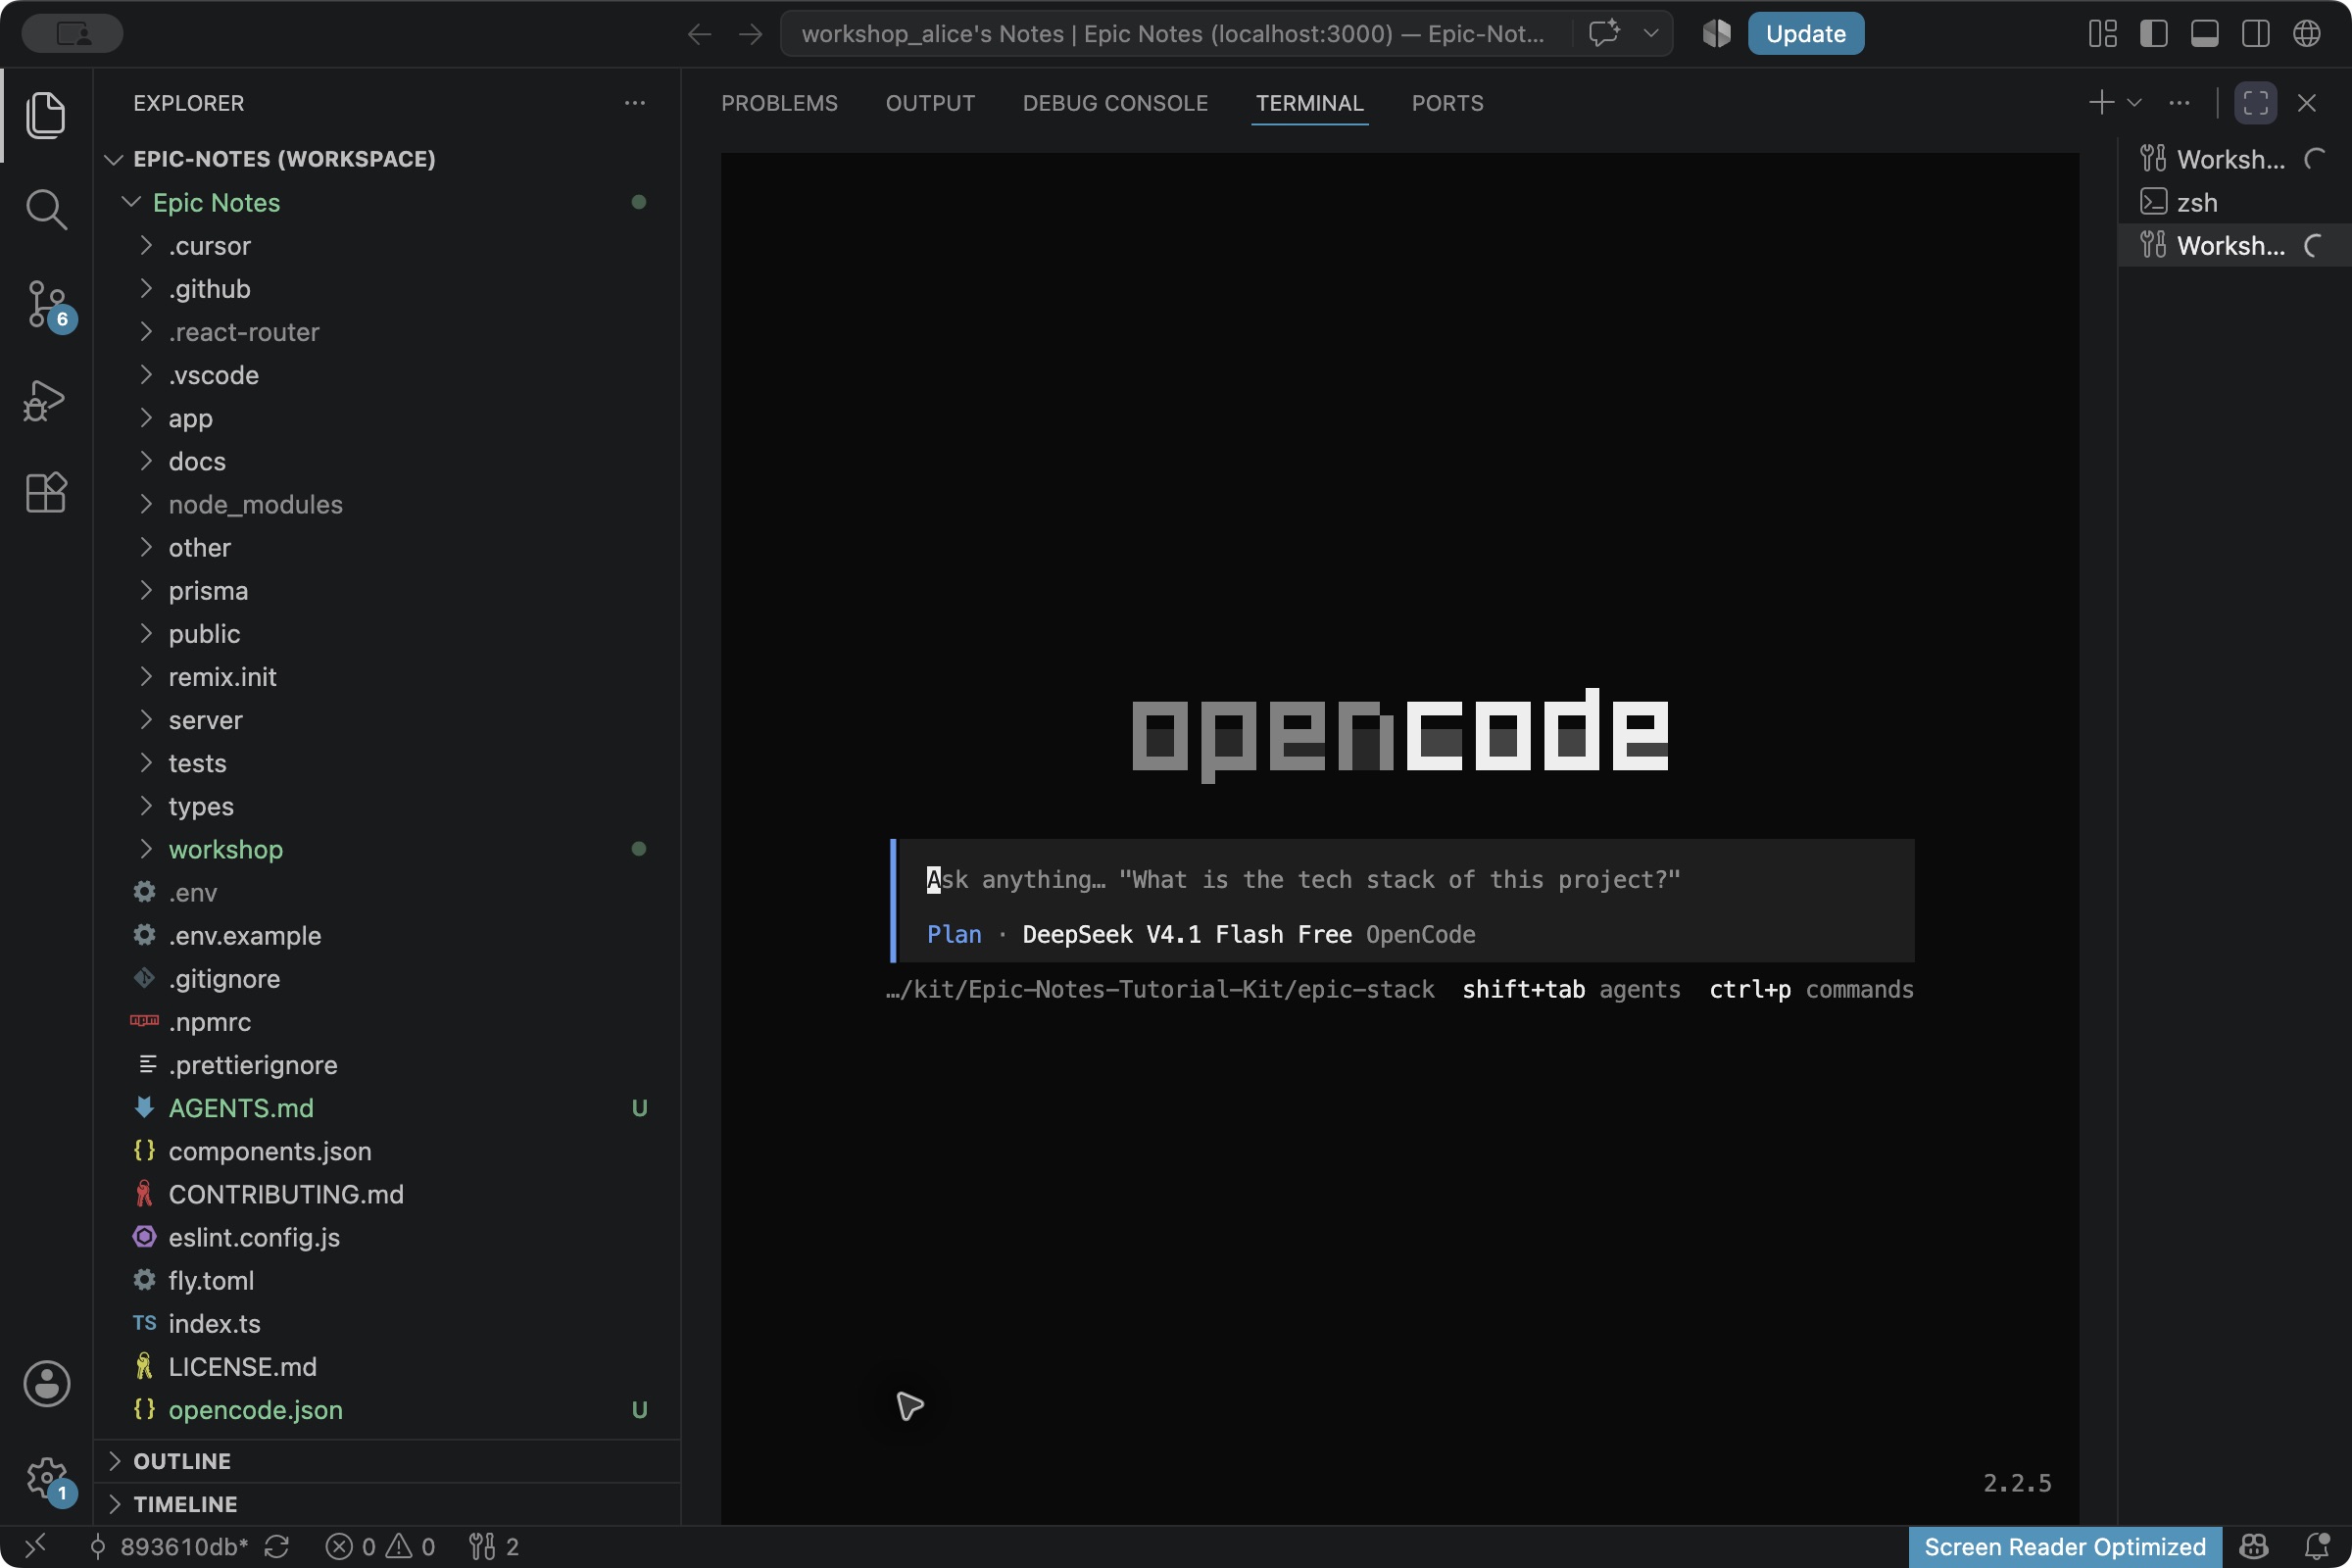
When the shell prompt returns, press F1 → Tasks: Run Task → Workshop: OpenCode. Use the current stable OpenCode v2 release. This guide uses v2.2.5. OpenCode v1 no longer supports the free route; an old installation can report a limit even when the real problem is its version.
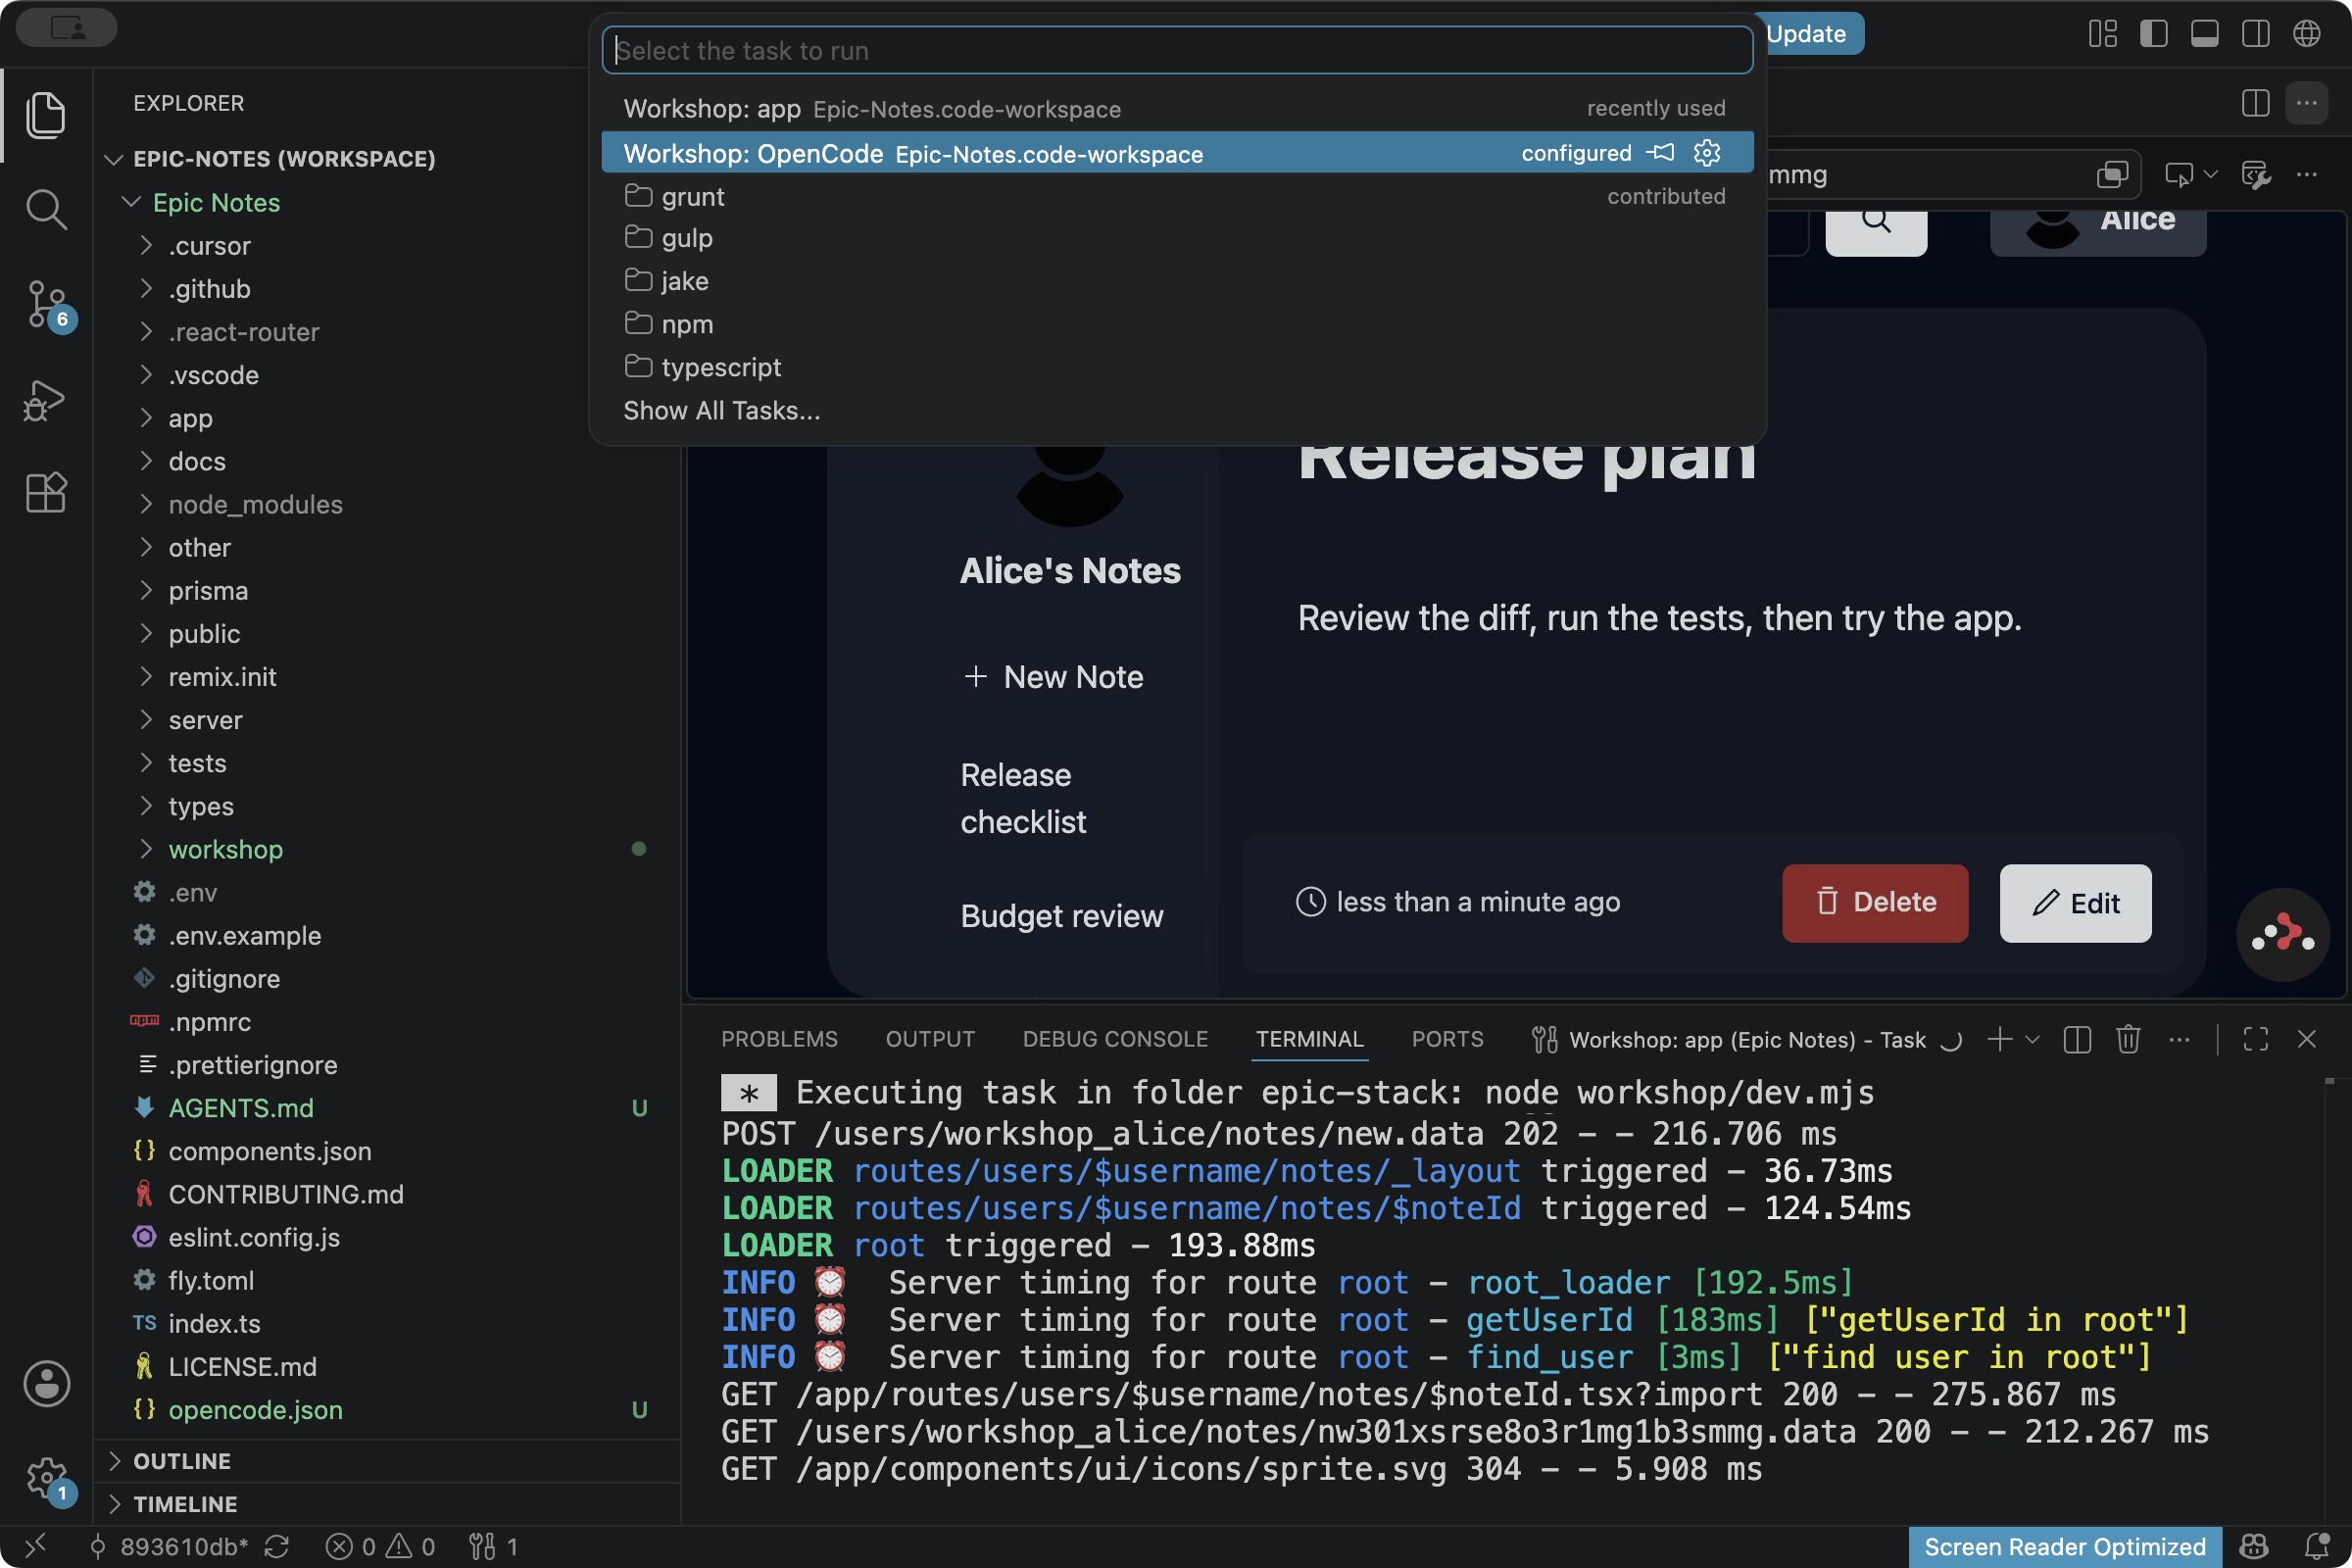
Connect your class key, then check Plan, DeepSeek V4.1 Flash and the epic-stack path before sending the first lab prompt.
If you can’t access a model
You can still run the app, inspect the supplied changes and try the results using the reference patches. That won’t practise having an agent implement or review the work. Keep track of which route you followed.
In the prepared epic-stack terminal, run the unchanged tests first:
npm test -- --run --maxWorkers=2The unchanged app should have 42 passing tests. If a test fails, investigate before editing the app. The commands below save only the preparation files in a fresh folder. If lab/notes already exists, inspect and reuse it; don’t recreate it or reset your work.
git switch -c lab/notes
git add AGENTS.md opencode.json workshop
git -c user.name="Workshop Learner" -c user.email="learner@example.test" commit -m "Prepare local workshop"
git status --short
Git status should be empty after that commit. Follow the worktree setup once, then use the reference patches in the filter exercise, the failing-test exercise and the repair exercise. Finish with the named-file commits and integration steps. Don’t apply a patch over existing edits. A fresh AI review remains pending if you still can’t access a model.
9. Ask the agent to check the starting app
Where: OpenCode message box · epic-stack · Plan. Click the Copy button below, return to VS Code, click Ask anything… and paste. Press Enter to send.
Objective: establish a trustworthy starting point for the Epic Notes lab
and save a local preparation checkpoint before application changes.

Constraints: work in this prepared VS Code checkout with synthetic data.
Read AGENTS.md. Do not edit application code, read .env or credentials,
install tools, change global settings or push. Keep normal approvals on.
The checkpoint may contain only AGENTS.md, opencode.json and workshop/.
Use lab/notes and this commit's demo identity: Workshop Learner,
learner@example.test; do not change global Git identity.

Inspect the repository instructions and available capabilities first.
Choose the tools and checks needed to confirm the upstream, starting
state and documented test baseline. Explain your choices and stop
for approval. Then execute the approved plan, report actual commands,
exit codes and test totals, and show the final working-tree state.
If the preparation branch/checkpoint already exists, inspect and reuse
it; do not recreate it or reset work. Report any changes from that
starting point. Stop on setup errors before creating a new checkpoint.
Use the Copy button, then paste the whole prompt into that message box with Ctrl+V (Mac: Cmd+V). Don’t send it line by line. Check the pasted prompt, then press Enter once.
Read its proposed checks. If the scope fits, type Approved. Proceed within that scope. into the same box and send it. Keep Plan for read-only checks. If it needs to save the agreed preparation files and checkpoint, switch to Build with Shift+Tab after approving that scope. Keep normal permission requests on.
Check the actual output: the unchanged app should have 42 passing tests, a local lab/notes preparation checkpoint and an empty Git status. If those checks fail, stop here and fix setup.

If a step gets stuck
Cannot find module …prepare.mjs: you opened the wrong folder. Open the folder containing that file and create a new terminal.command not found: finish installing the tool, then close and reopen VS Code.epic-stack already exists: keep it. Extract a fresh kit elsewhere if you need a clean start.- Model limit error: check
opencode --versionfirst. Use v2, not v1. If it still reports a limit, stop the request with Esc. Check the connected workspace and selected model. Ask Raph about class credit or member limits, or use the reference route; listing a model does not prove you have quota. - A package fails to install: check the first error and your Node version. Native dependencies may need IT-provided build tools. Don’t run
npm audit fix --force. - Tests time out: keep
--maxWorkers=2, stop extra suites and ask the agent to inspect the failure rather than weaken the check. - No tasks: open
Epic-Notes.code-workspace, not just the folder. Or use the direct commands below.
Optional: direct commands instead of workspace tasks
Open epic-stack. In a shell, run the app command and leave it running:
node workshop/dev.mjsOpen another shell in the same folder. Start OpenCode there:
opencode --standaloneUsing WSL or PowerShell
OpenCode recommends WSL on Windows. If you already have it, open the kit with VS Code’s WSL extension. Install Git, Node 22 and OpenCode inside that Linux environment, keep the project under ~/code, and run every lab command in its Ubuntu terminal. Don’t reuse Windows node_modules or switch environments halfway through setup.
If you need a new WSL installation, arrange it with IT before the workshop using Microsoft’s instructions; it may require administrator access and a restart. Git Bash is the native Windows route described here.
If you prefer PowerShell, use npm.cmd, npx.cmd and opencode.cmd wherever the instructions use npm, npx and opencode. This avoids blocked .ps1 shims. Keep the single quotes around $username paths. You don’t need to change the machine’s execution policy. Use Git Bash for the class so the facilitator can follow your terminal.
10. Ask it how a note is saved
Before changing anything, let’s ask how saving a note works. The agent should find the real files and explain how the form reaches the database. If the explanation is unclear, we can open the code it names.
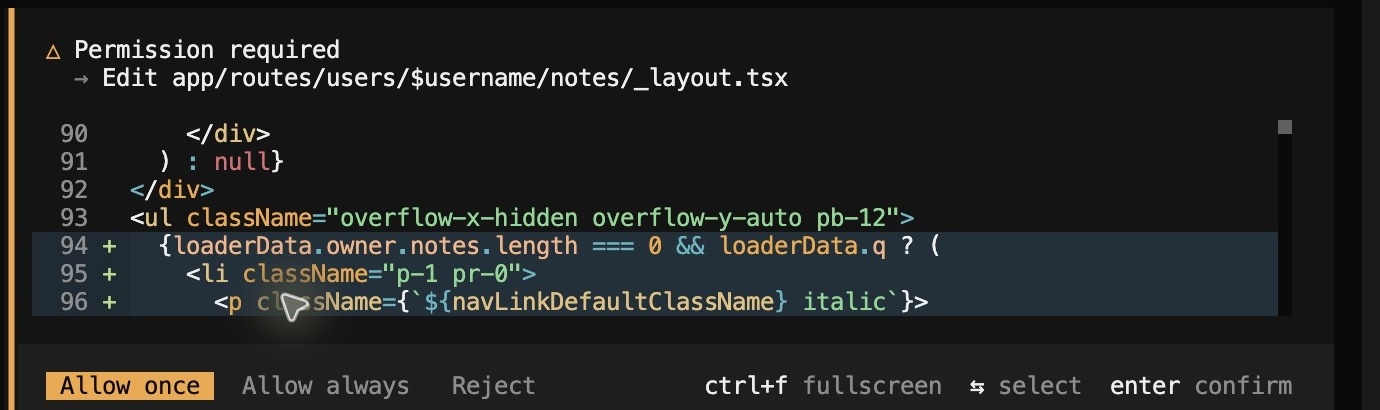
Where: OpenCode · epic-stack · Plan. Click its message box, press Shift+Tab until it says Plan, then paste and send this prompt.
Objective: understand how creating and editing a note works so we can
decide where a small change belongs.

Constraints: inspect this existing VS Code project read-only. Read
AGENTS.md; do not edit, install, read .env or credentials, or use
subagents. Keep normal command approvals enabled.

Inspect the repository and available capabilities. Choose how to find
the relevant behavior. Explain the flow, validation, persistence and
ownership rules using actual file references. Say what is public,
what you could not confirm and what you would inspect next.
Do not propose new tooling before checking what is already available.
When it names a file, press Ctrl+P (Mac: Cmd+P), paste that path and click the matching result. This box opens a file; it doesn’t send a prompt to the agent.
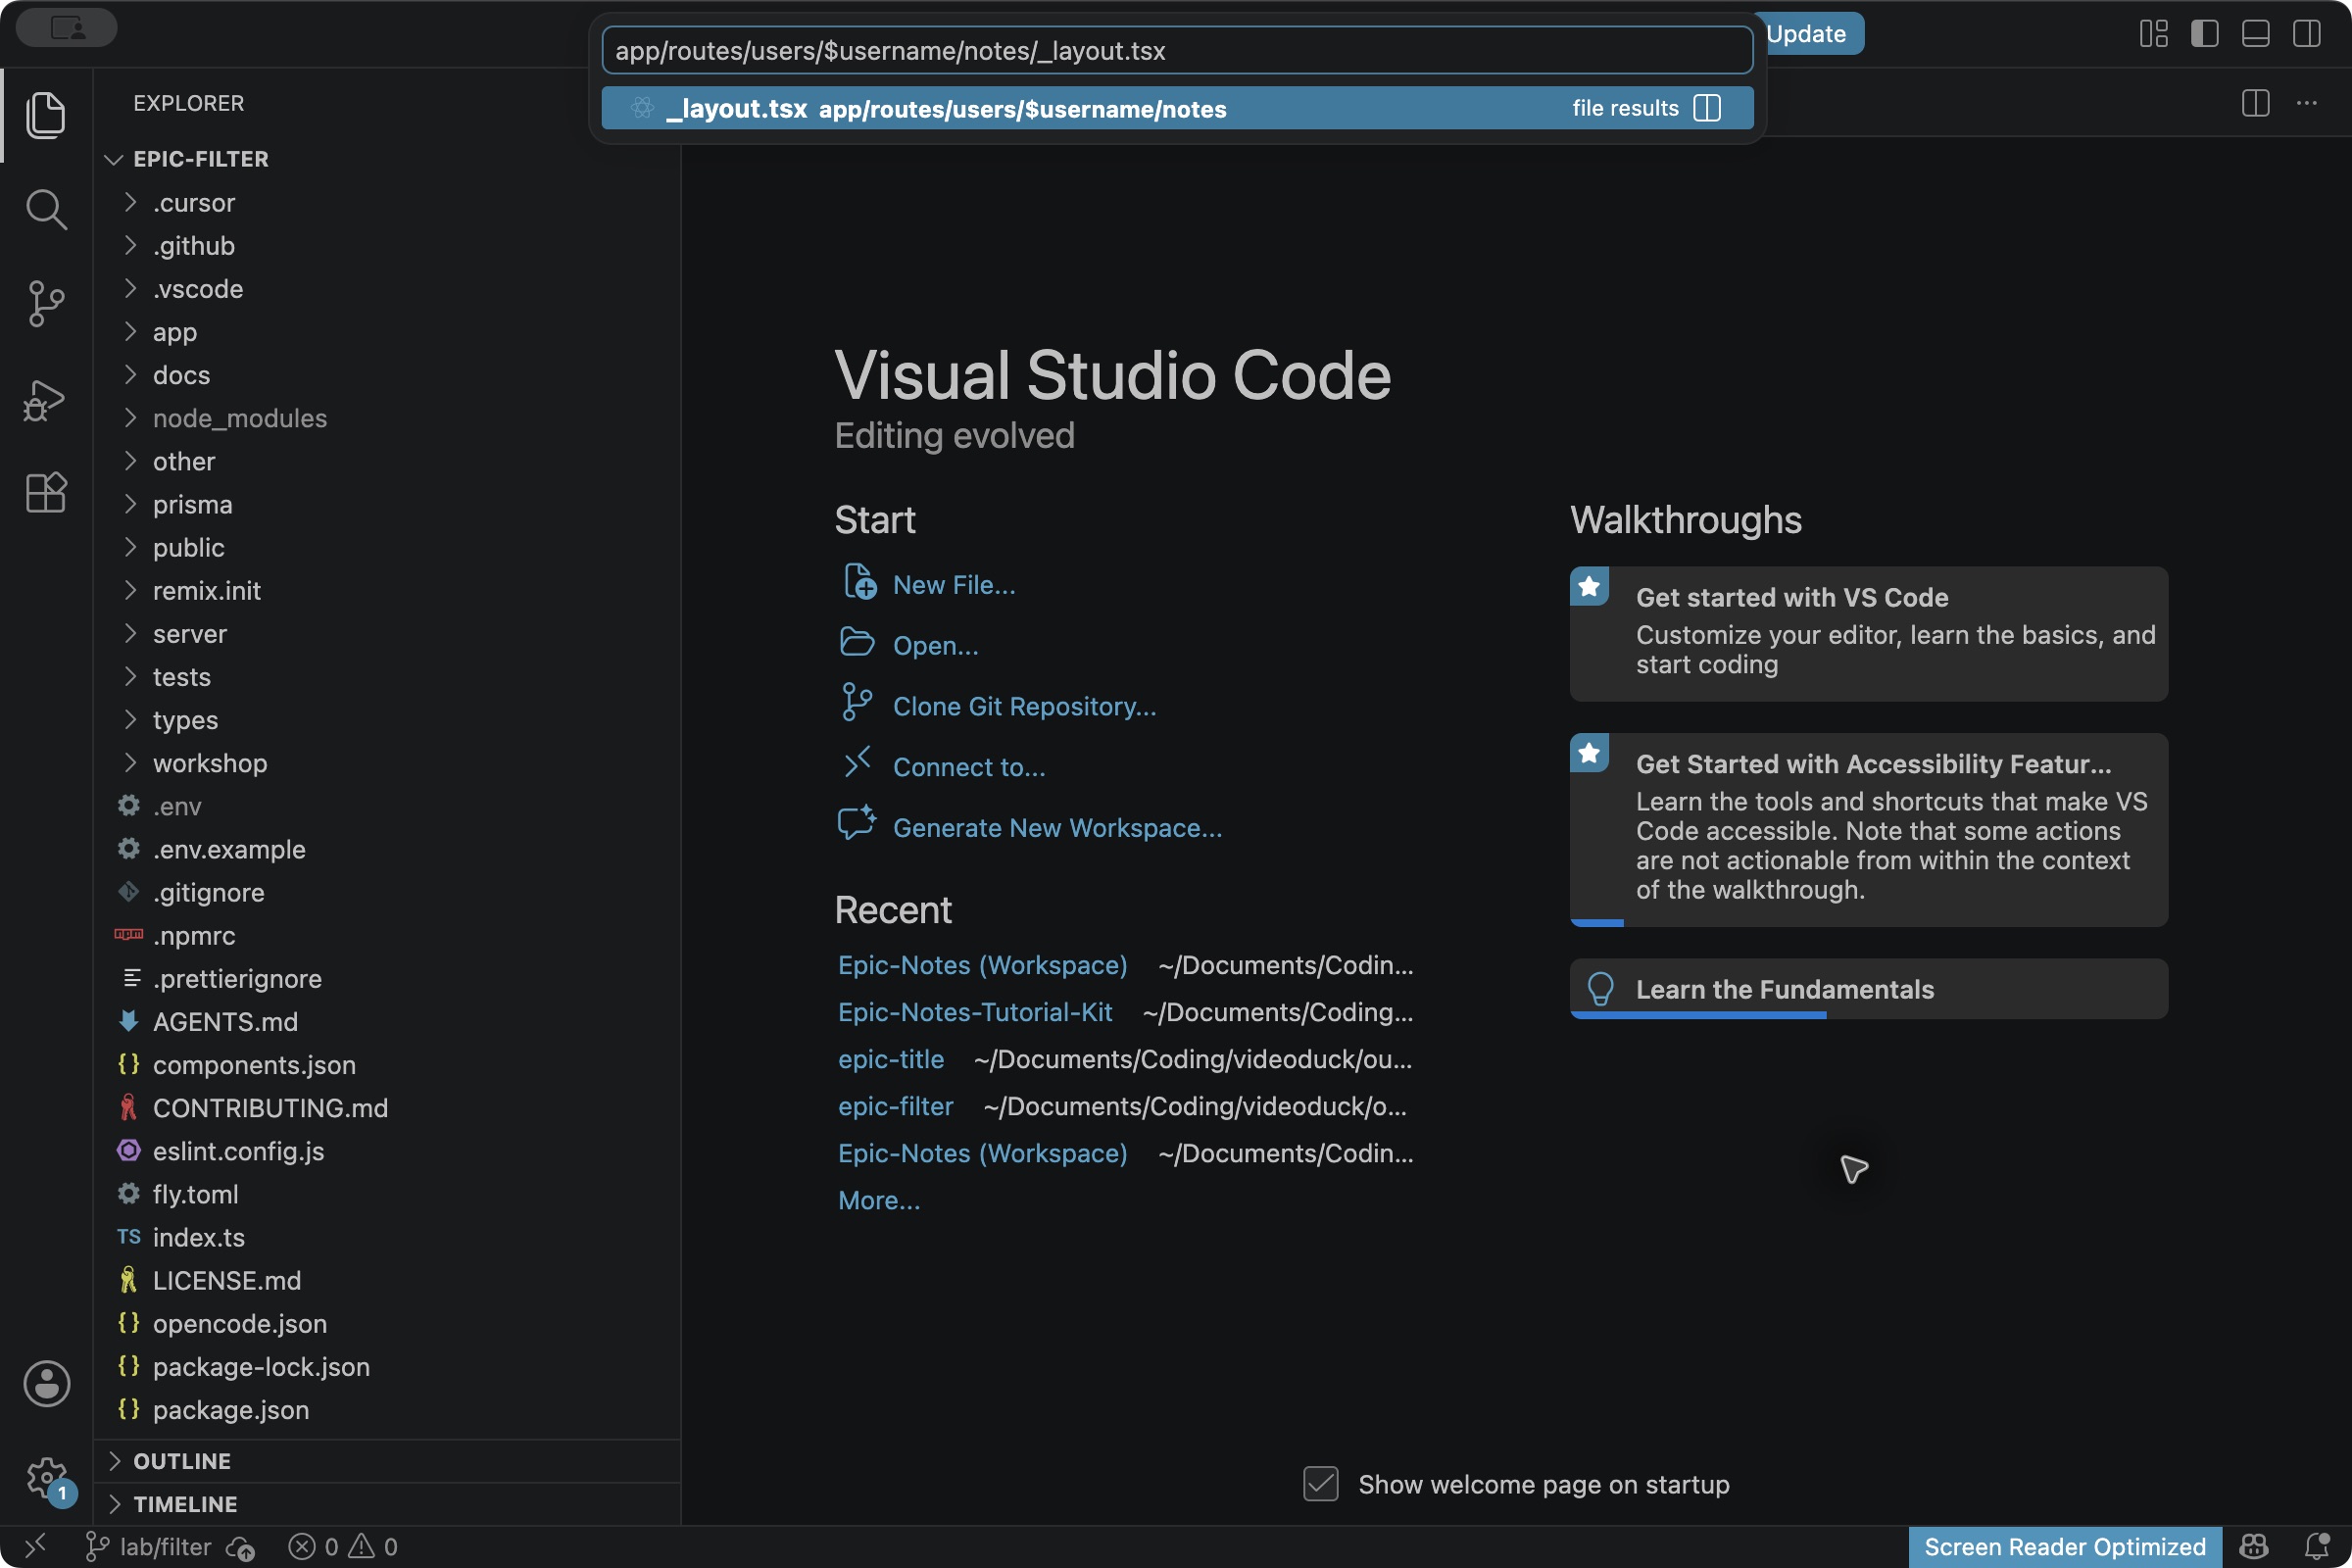
You should find this chain under app/routes/users/$username/notes/:
form + schema+shared/note-editor.server.tsx
authenticated action + database write
Ask it to show where the app checks the user, validates the title and saves the note. Reading notes is public; editing somebody else’s note should be denied.
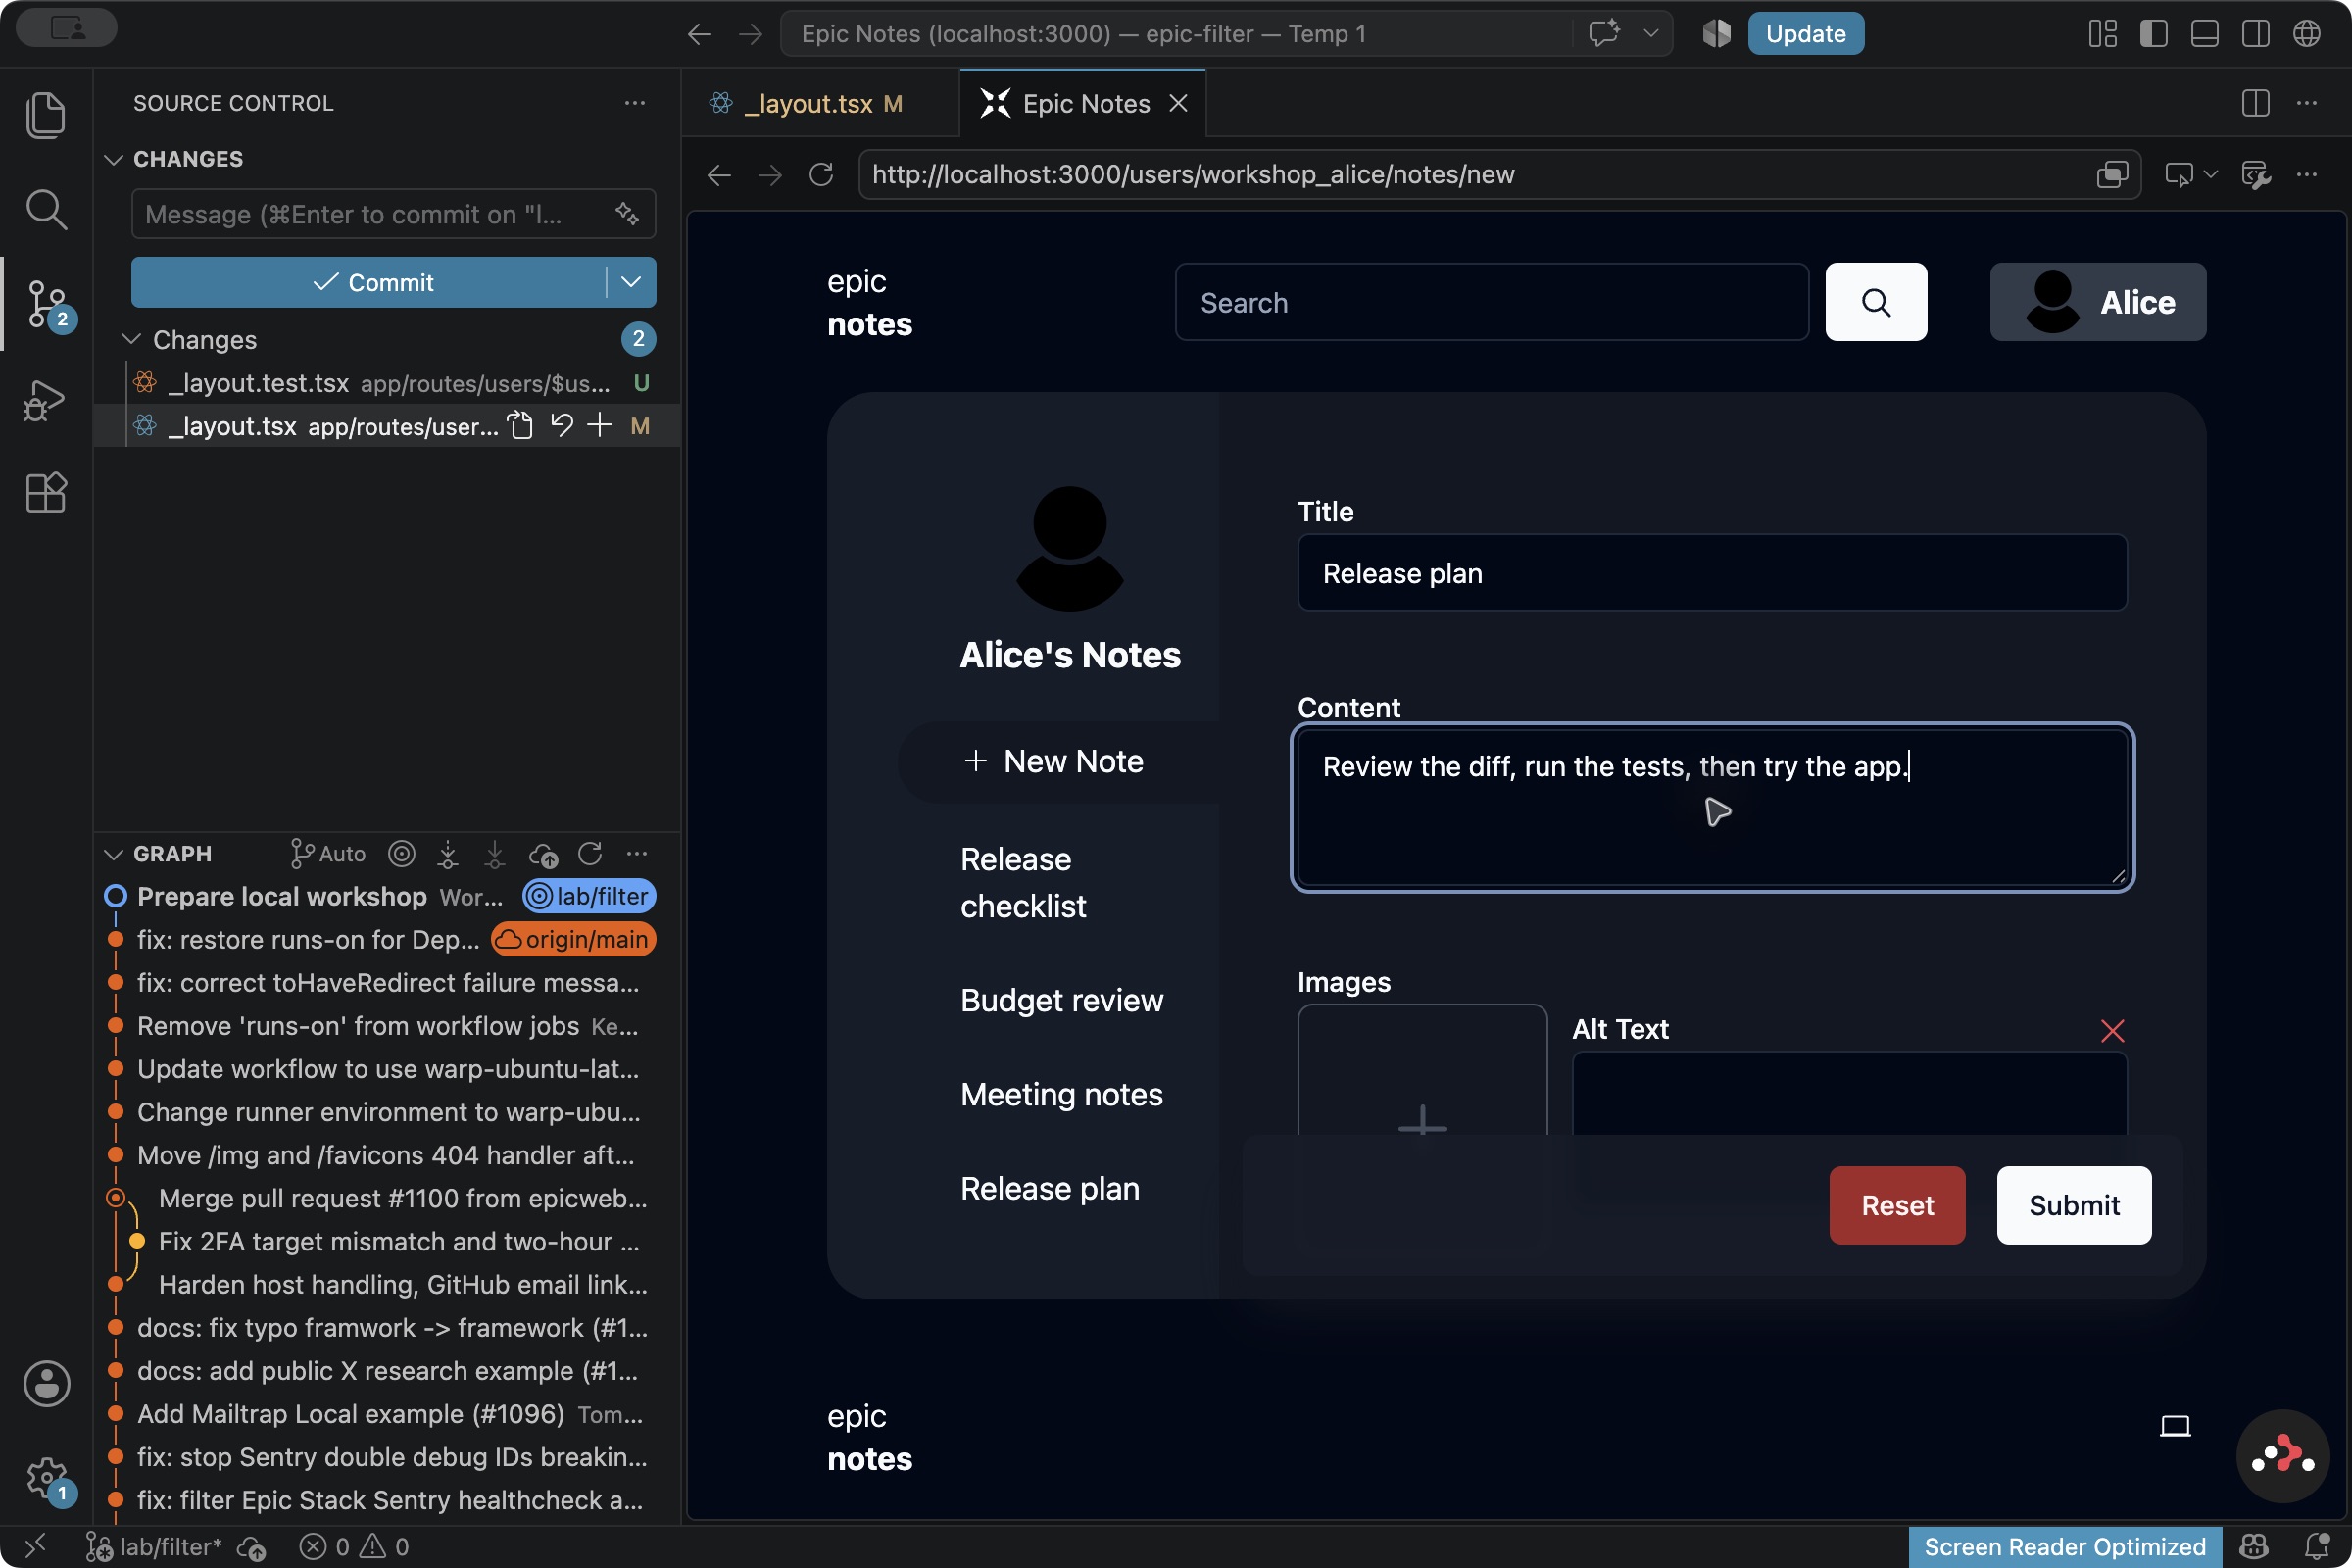
In the app preview, click New Note.
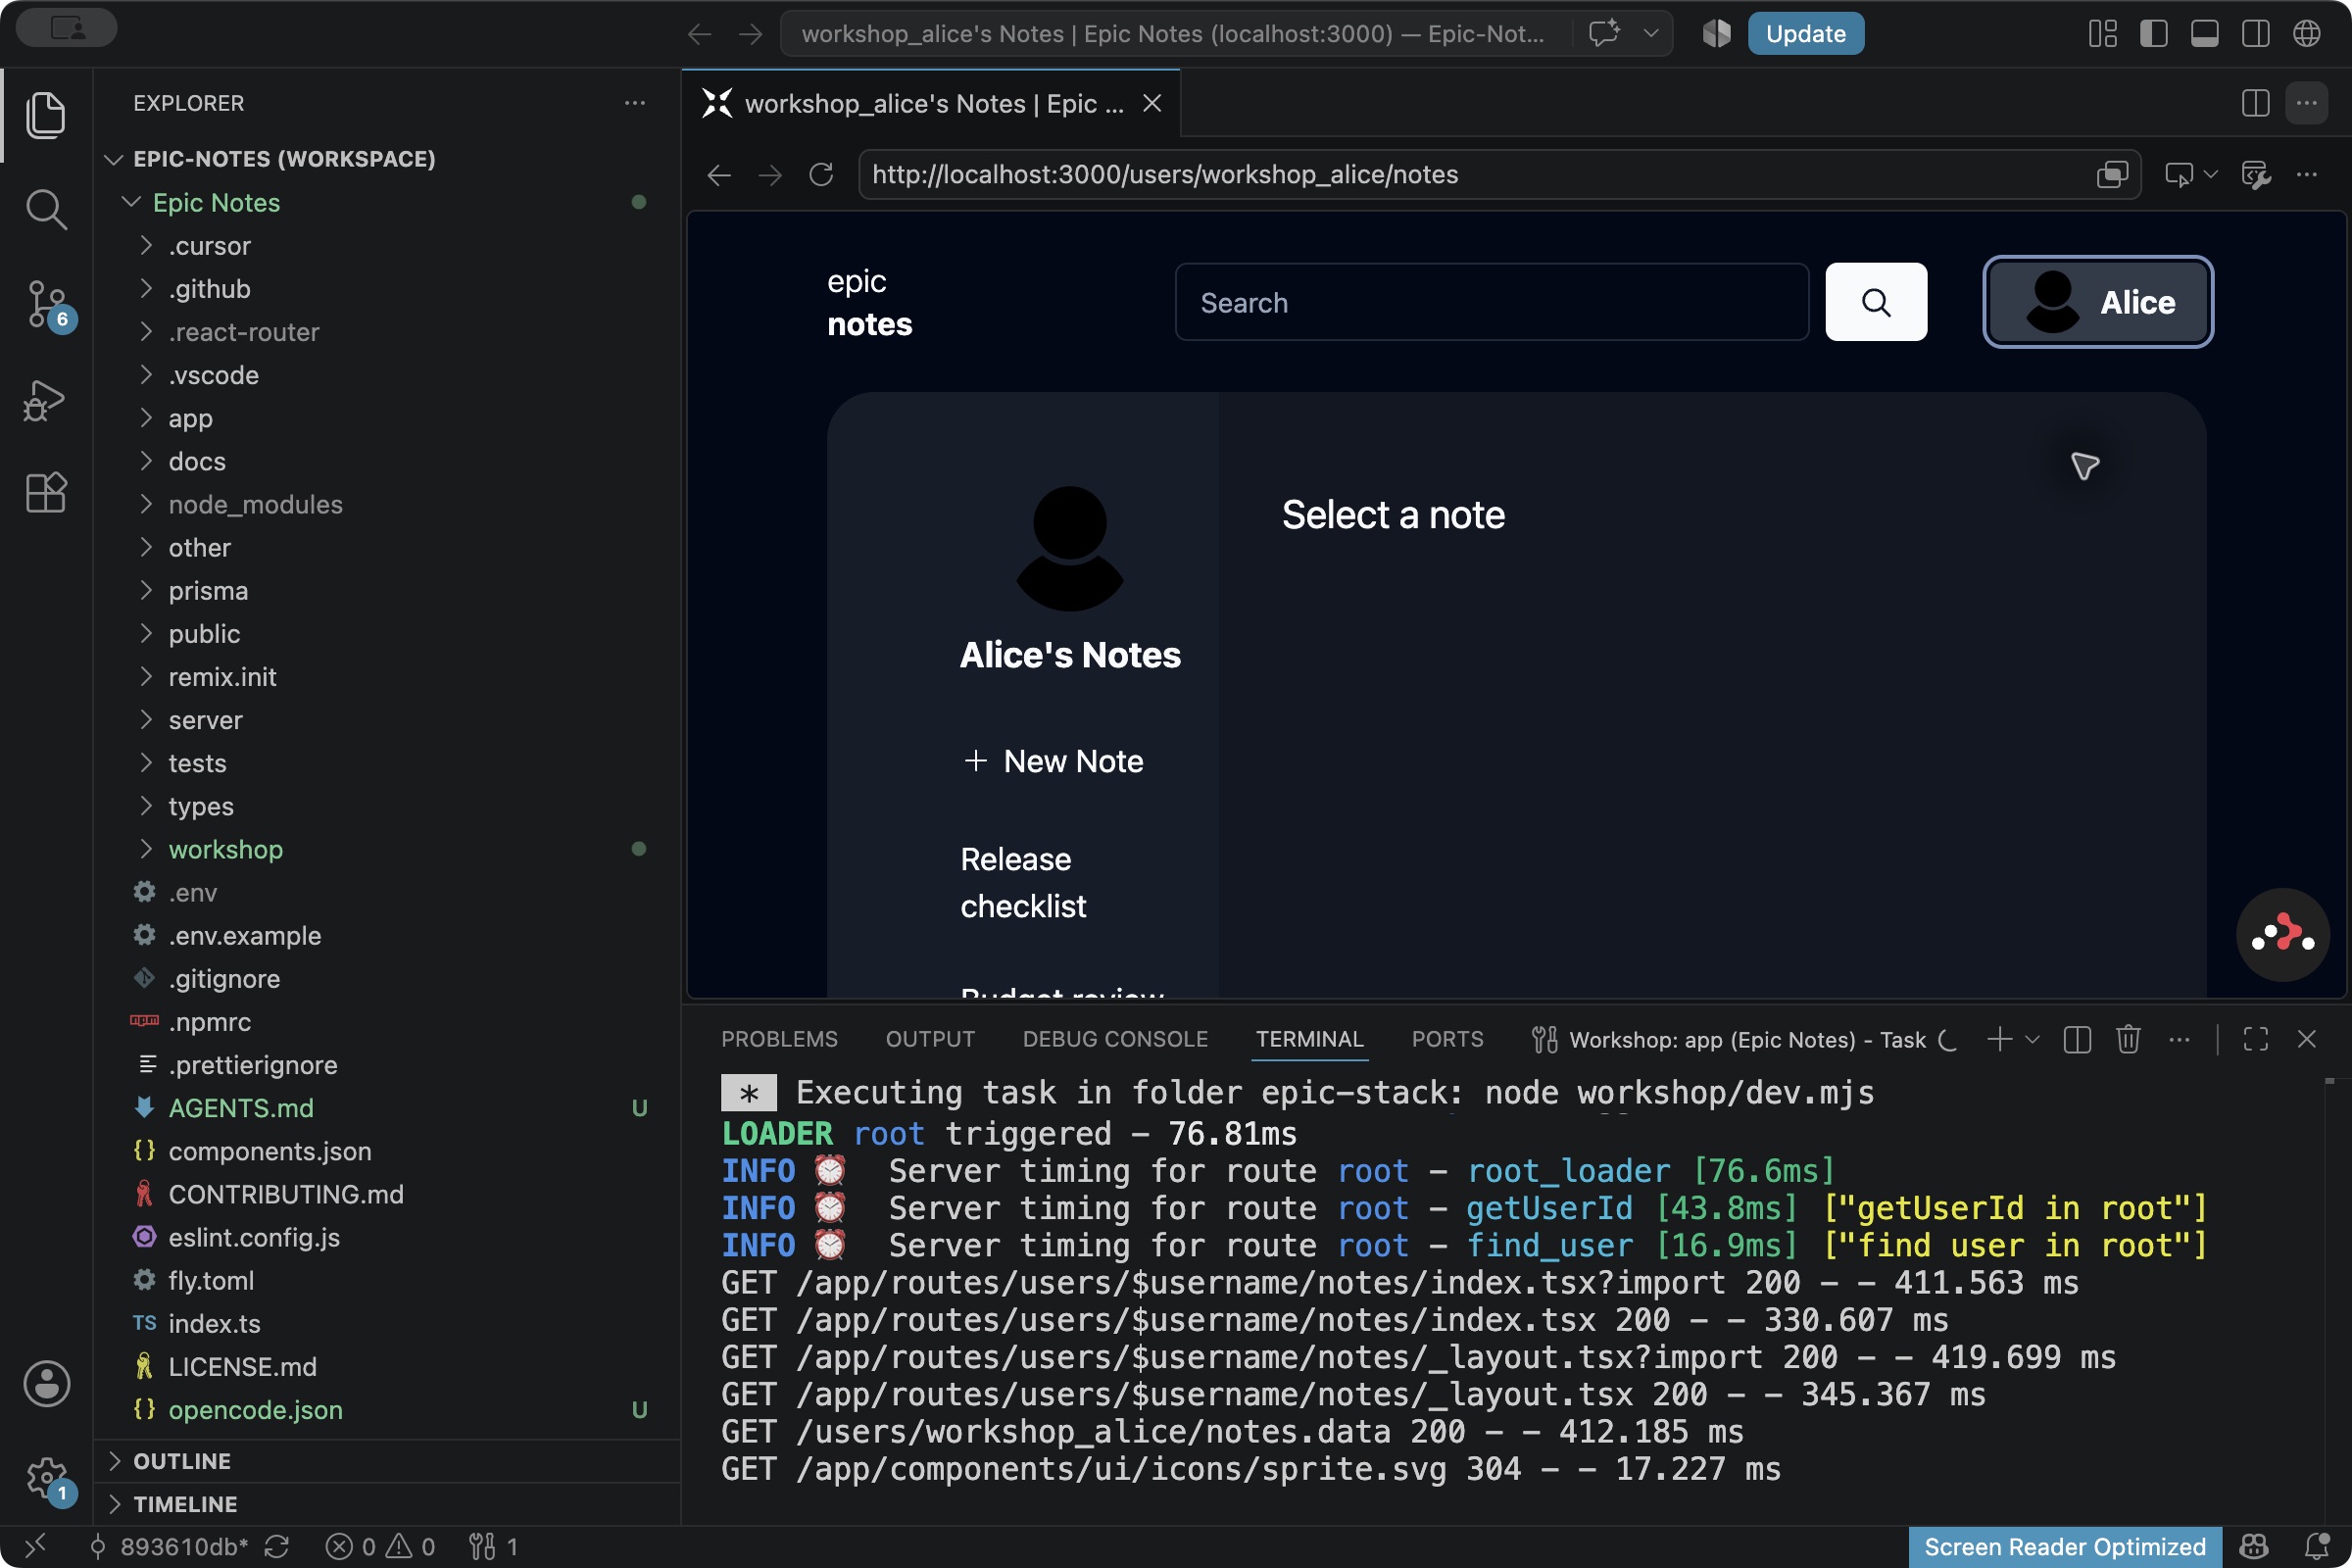
Click Title and type Release plan. Click Content and type Review the diff, run the tests, then try the app. Leave Images alone and click Submit. Refresh the preview and reopen Release plan from the list.
Using an existing Claude or ChatGPT account
We’ll demonstrate OpenCode. If you already have access to another local coding agent, you can use it for the same exercises. Keep the same files and acceptance cases, including the Git and browser checks. Let only one agent edit each checkout at a time.
Claude Code: open the same epic-stack folder in VS Code. Install the official Claude Code extension from Anthropic and sign in with an account that has access. Ask it to read AGENTS.md, then paste the lab prompts. Start with planning before allowing edits. If you already have the CLI, run claude from that folder. On Windows, Git for Windows provides its Bash tools; see Claude’s setup guide. Don’t buy a plan for this workshop.
ChatGPT with Codex access: install the official Codex VS Code extension from OpenAI, open the same folder and sign in with ChatGPT. Use a local session for these labs, ask it to read AGENTS.md, and reuse the prompts. Check your account/workspace access first; we don’t require a new subscription or API key.
Claude or ChatGPT in a browser: you can use chat to work through the requirement and question a result. Without connected local tools, it can’t execute the lab. Use OpenCode, Claude Code or the Codex extension inside VS Code to implement, test and review. Share only public workshop code and synthetic examples. Never paste .env or credentials. Start with this, then paste the lab prompt:
Objective: help me scope this Epic Notes change and prepare a clear
objective for my local coding agent in VS Code.

Constraints: this browser chat cannot inspect my laptop or execute
local tools. Use only the public source excerpts and output I provide.
Do not request .env or credentials or claim unobserved test results.
No new packages, authentication changes, commits or deployment.

Inspect the supplied evidence first. Ask for missing context, propose
an approach and explain which capabilities the local agent needs.
Let that agent inspect its actual tool inventory and choose its tools.
Help me evaluate the proposal and evidence before approving execution.
The Shift+Tab shortcut and opencode.json settings described here are for OpenCode. Other agents have their own planning and permission controls. Browser chat can help explain the requirement or question the evidence. Use the local agent for implementation, test runs and a fresh review, then evaluate the app in VS Code.
Optional OpenCode IDE extension
The OpenCode IDE extension can share selected code and file references. The integrated terminal is enough for this lab. VS Code’s separate Copilot chat is not OpenCode; paste these prompts into the terminal program shown above.
If OpenCode won’t install
If the global installation reports a permissions error, don’t use sudo. Open a shell in epic-stack and use:
npx --yes @opencode/cli@latest --standaloneWhat the approval settings protect
The kit asks before edits and commands, denies source edits in Plan and disables subagents. A shell command can still read or send data. Keep real credentials, customer information and employer code out of this exercise. Your provider receives the public code and context you send.
Adding a title filter
Ask the agent to follow note creation through the form, shared validation, server action and database write. Have it cite the files it finds. Notice that this app allows public reading of notes while restricting who can edit them.
Create a normal note in the coordinator, refresh and reopen it. Before we change the app, we’ll put the filter and title jobs in separate folders.
11. Let the agent prepare separate worktrees
If two agents edit the same checkout, they can overwrite each other. A Git worktree gives each branch its own folder. They share Git history, but each has separate working files.
Keep epic-stack on lab/notes as the coordinator. Start from the clean preparation checkpoint, before applying solutions. If both worktrees and the workshop-start tag already exist, inspect and reuse them. If none exist, review and approve the helper once. If setup only partly finished, preserve the folders and investigate before trying again. Give this prompt to OpenCode in the coordinator:
Where: OpenCode · epic-stack / lab/notes · Plan. Read the proposal, approve it, then switch to Build only for the agreed setup.
Objective: prepare this clean Epic Notes checkpoint for two independent
jobs: a note-title filter and a blank-title fix. Keep the coordinator
checkout unchanged so we can integrate the results later.

Constraints: use the supplied workshop/add-worktrees.mjs helper from
this repository root. It creates lab/filter in ../epic-filter and
lab/title in ../epic-title, with separate dependencies and synthetic
SQLite databases. This setup is explicitly allowed to install the
pinned dependencies and seed those two new local databases. Do not
read or copy .env, touch another project, push, deploy, or overwrite
an existing branch/folder. Keep normal command approvals on.

Inspect Git status, the helper, current branch, existing worktrees and
workshop-start tag first. If the two prepared worktrees and tag already
exist, verify their paths, branches and expected starting commit; use
them without rerunning setup. If all are absent and the preparation
checkpoint is clean, explain the setup and resource requirements,
stop for approval, then run the helper once. Report actual worktree
paths and branch/commit IDs, and stop. If only part exists, stop and
diagnose rather than rerunning or overwriting anything.
If setup fails partway, preserve both folders and diagnose the first
error. Do not rerun blindly or remove a worktree containing work.
What the setup helper does
node workshop/add-worktrees.mjsThe helper creates epic-filter on lab/filter and epic-title on lab/title, beside epic-stack. It also creates the local workshop-start tag for our final review. It runs npm ci and the local setup/seed helpers in each folder. Each gets its own dependencies, environment file and SQLite databases. Don’t share a database or copy a real .env. The helper refuses existing folders or branches. If it partly fails, keep the folders and inspect the first error before running anything again.
12. Open the filter and title windows
You’ll use all three folders yourself. Work through the filter first, then the title job; running them at the same time is optional.
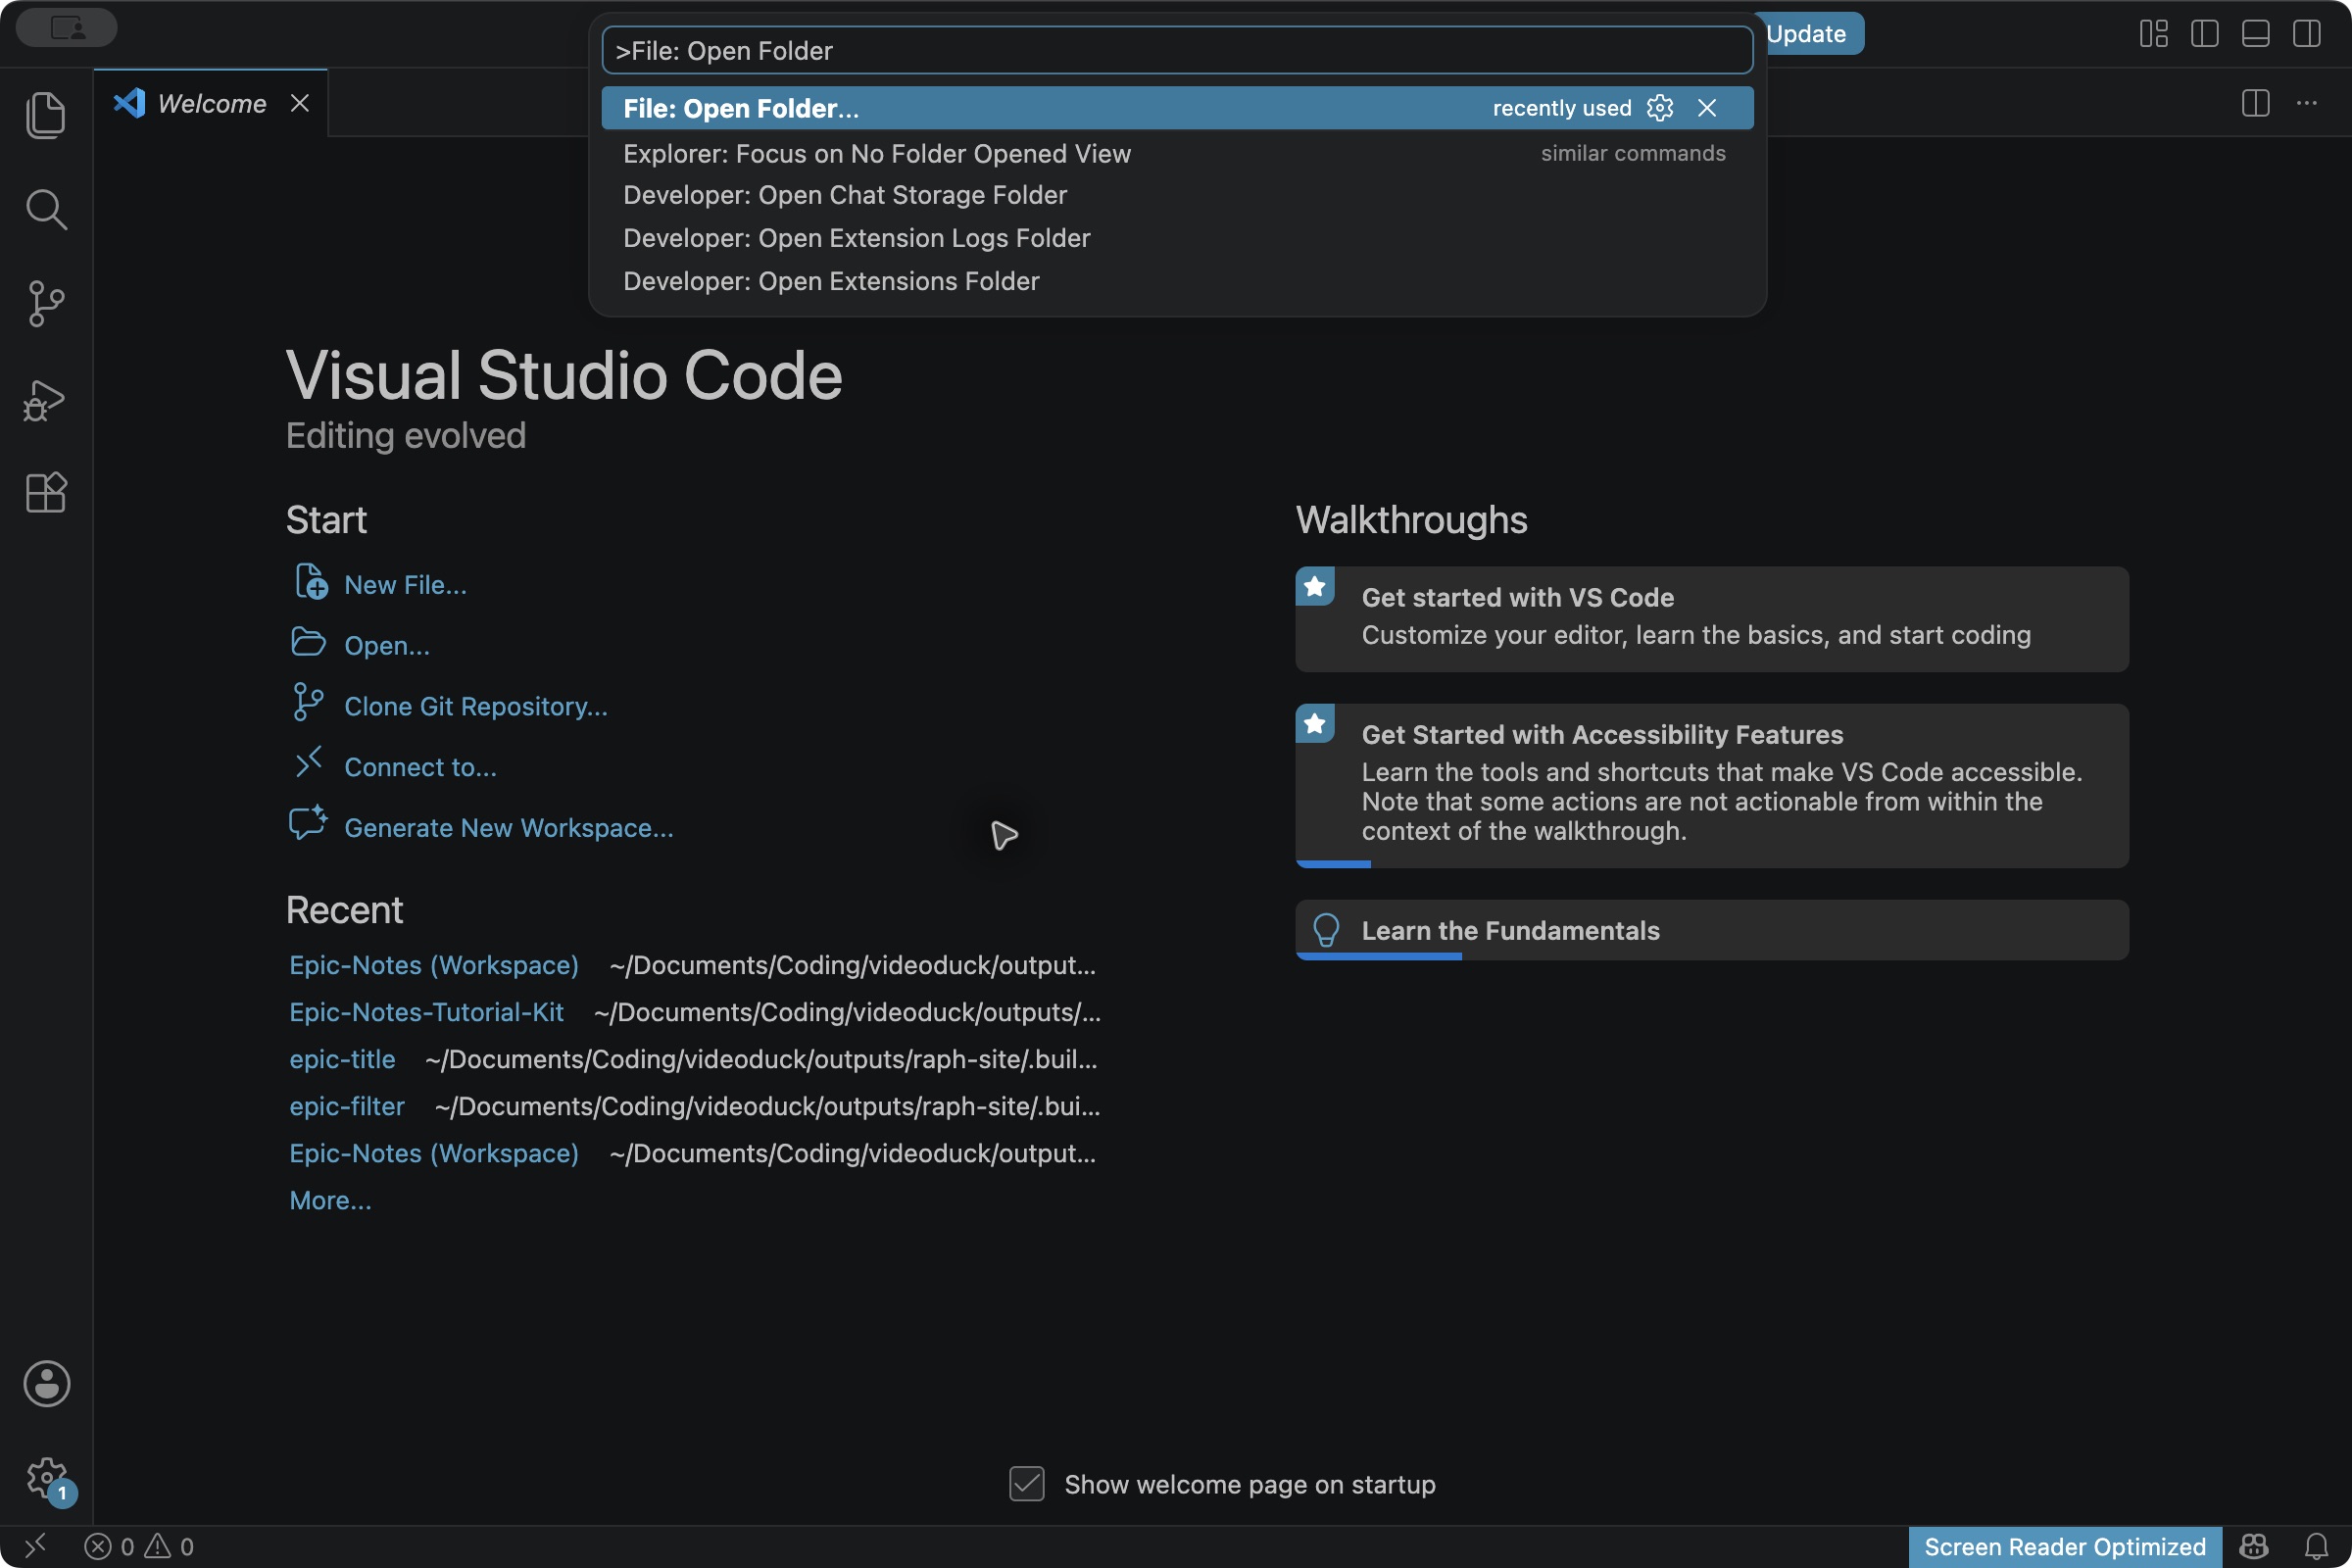
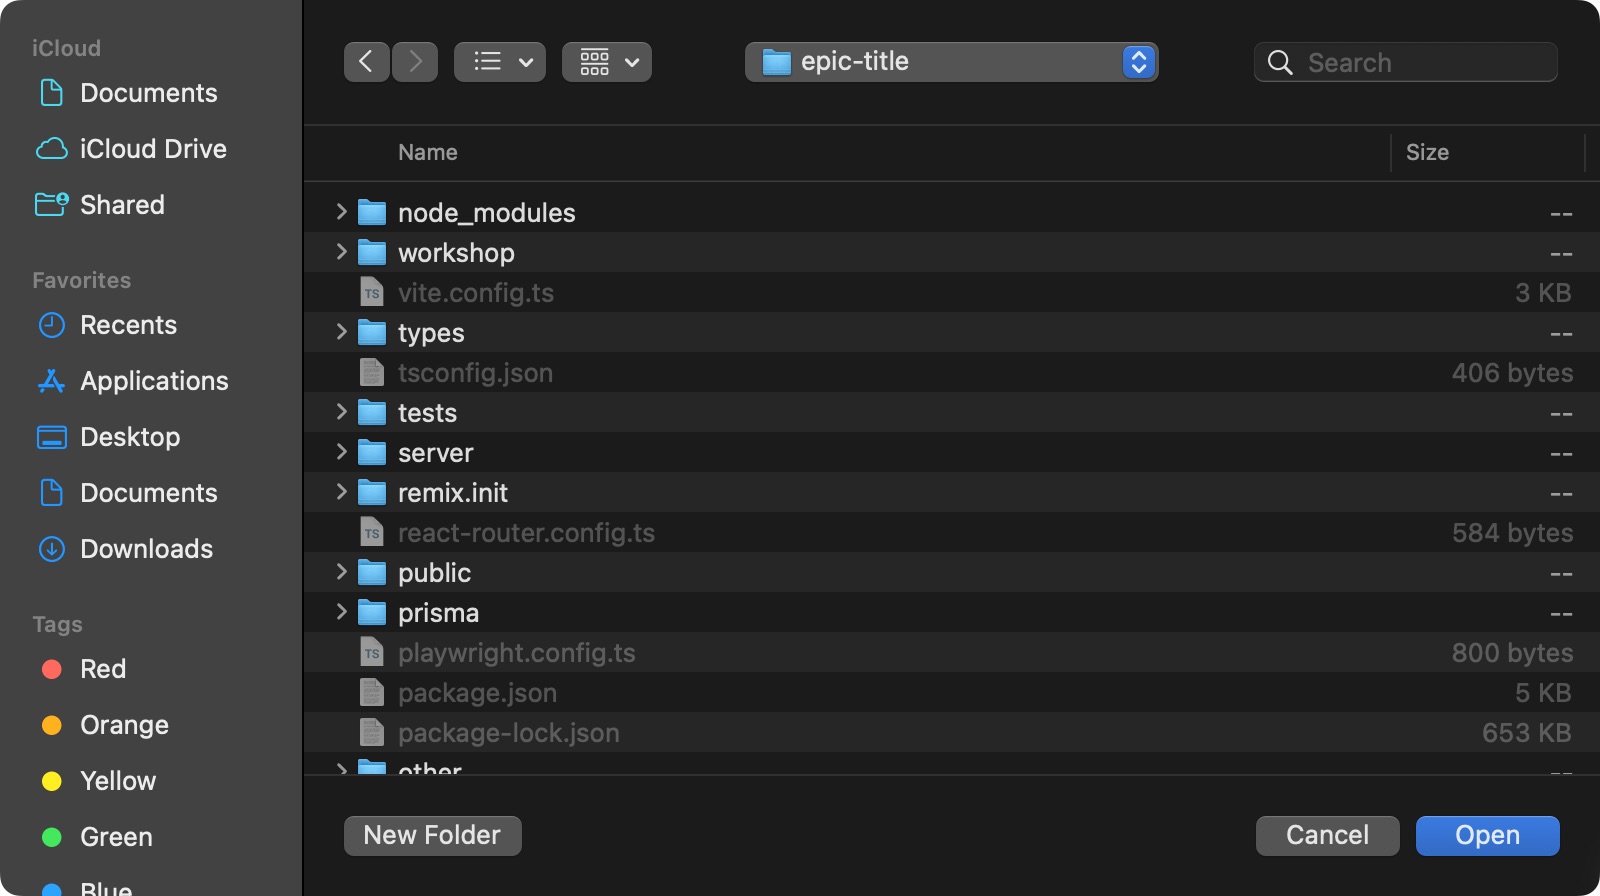
- Press Ctrl+Shift+N (Mac: Cmd+Shift+N) for a new VS Code window. Press F1 → File: Open Folder…. Open
epic-filter. Its status bar should saylab/filter. Press F1 → Terminal: Create New Terminal. Paste the OpenCode launch command below into that shell and press Enter. - Open another VS Code window on
epic-title. Confirmlab/title, then start a separate OpenCode session there. - Give the filter prompt to the filter window and the title prompts to the title window. Keep one writing session per folder. You’re running separate sessions yourself; these aren’t autonomous subagents.
opencode --standaloneIn every new worktree window, check the model before sending a job. Open /models and choose DeepSeek V4.1 Flash through Raph Workshop. If the class-key connection is missing, repeat the connection steps. Check Plan, the worktree path and branch too. A new window can pick a different model from the previous session.
In each new window, use F1 → Terminal: Create New Terminal again when you need a shell for the app. Leave OpenCode in its own terminal. Use the terminal list on the right to switch between them. Check the folder every time.
Both worktrees should start from the same 42-test code, without feature edits. Setup may take several minutes and extra disk space. On a smaller laptop, do the jobs one after the other. Keep only one test suite and one app server running at a time. Stop the coordinator server before starting a worktree’s node workshop/dev.mjs on port 3000.
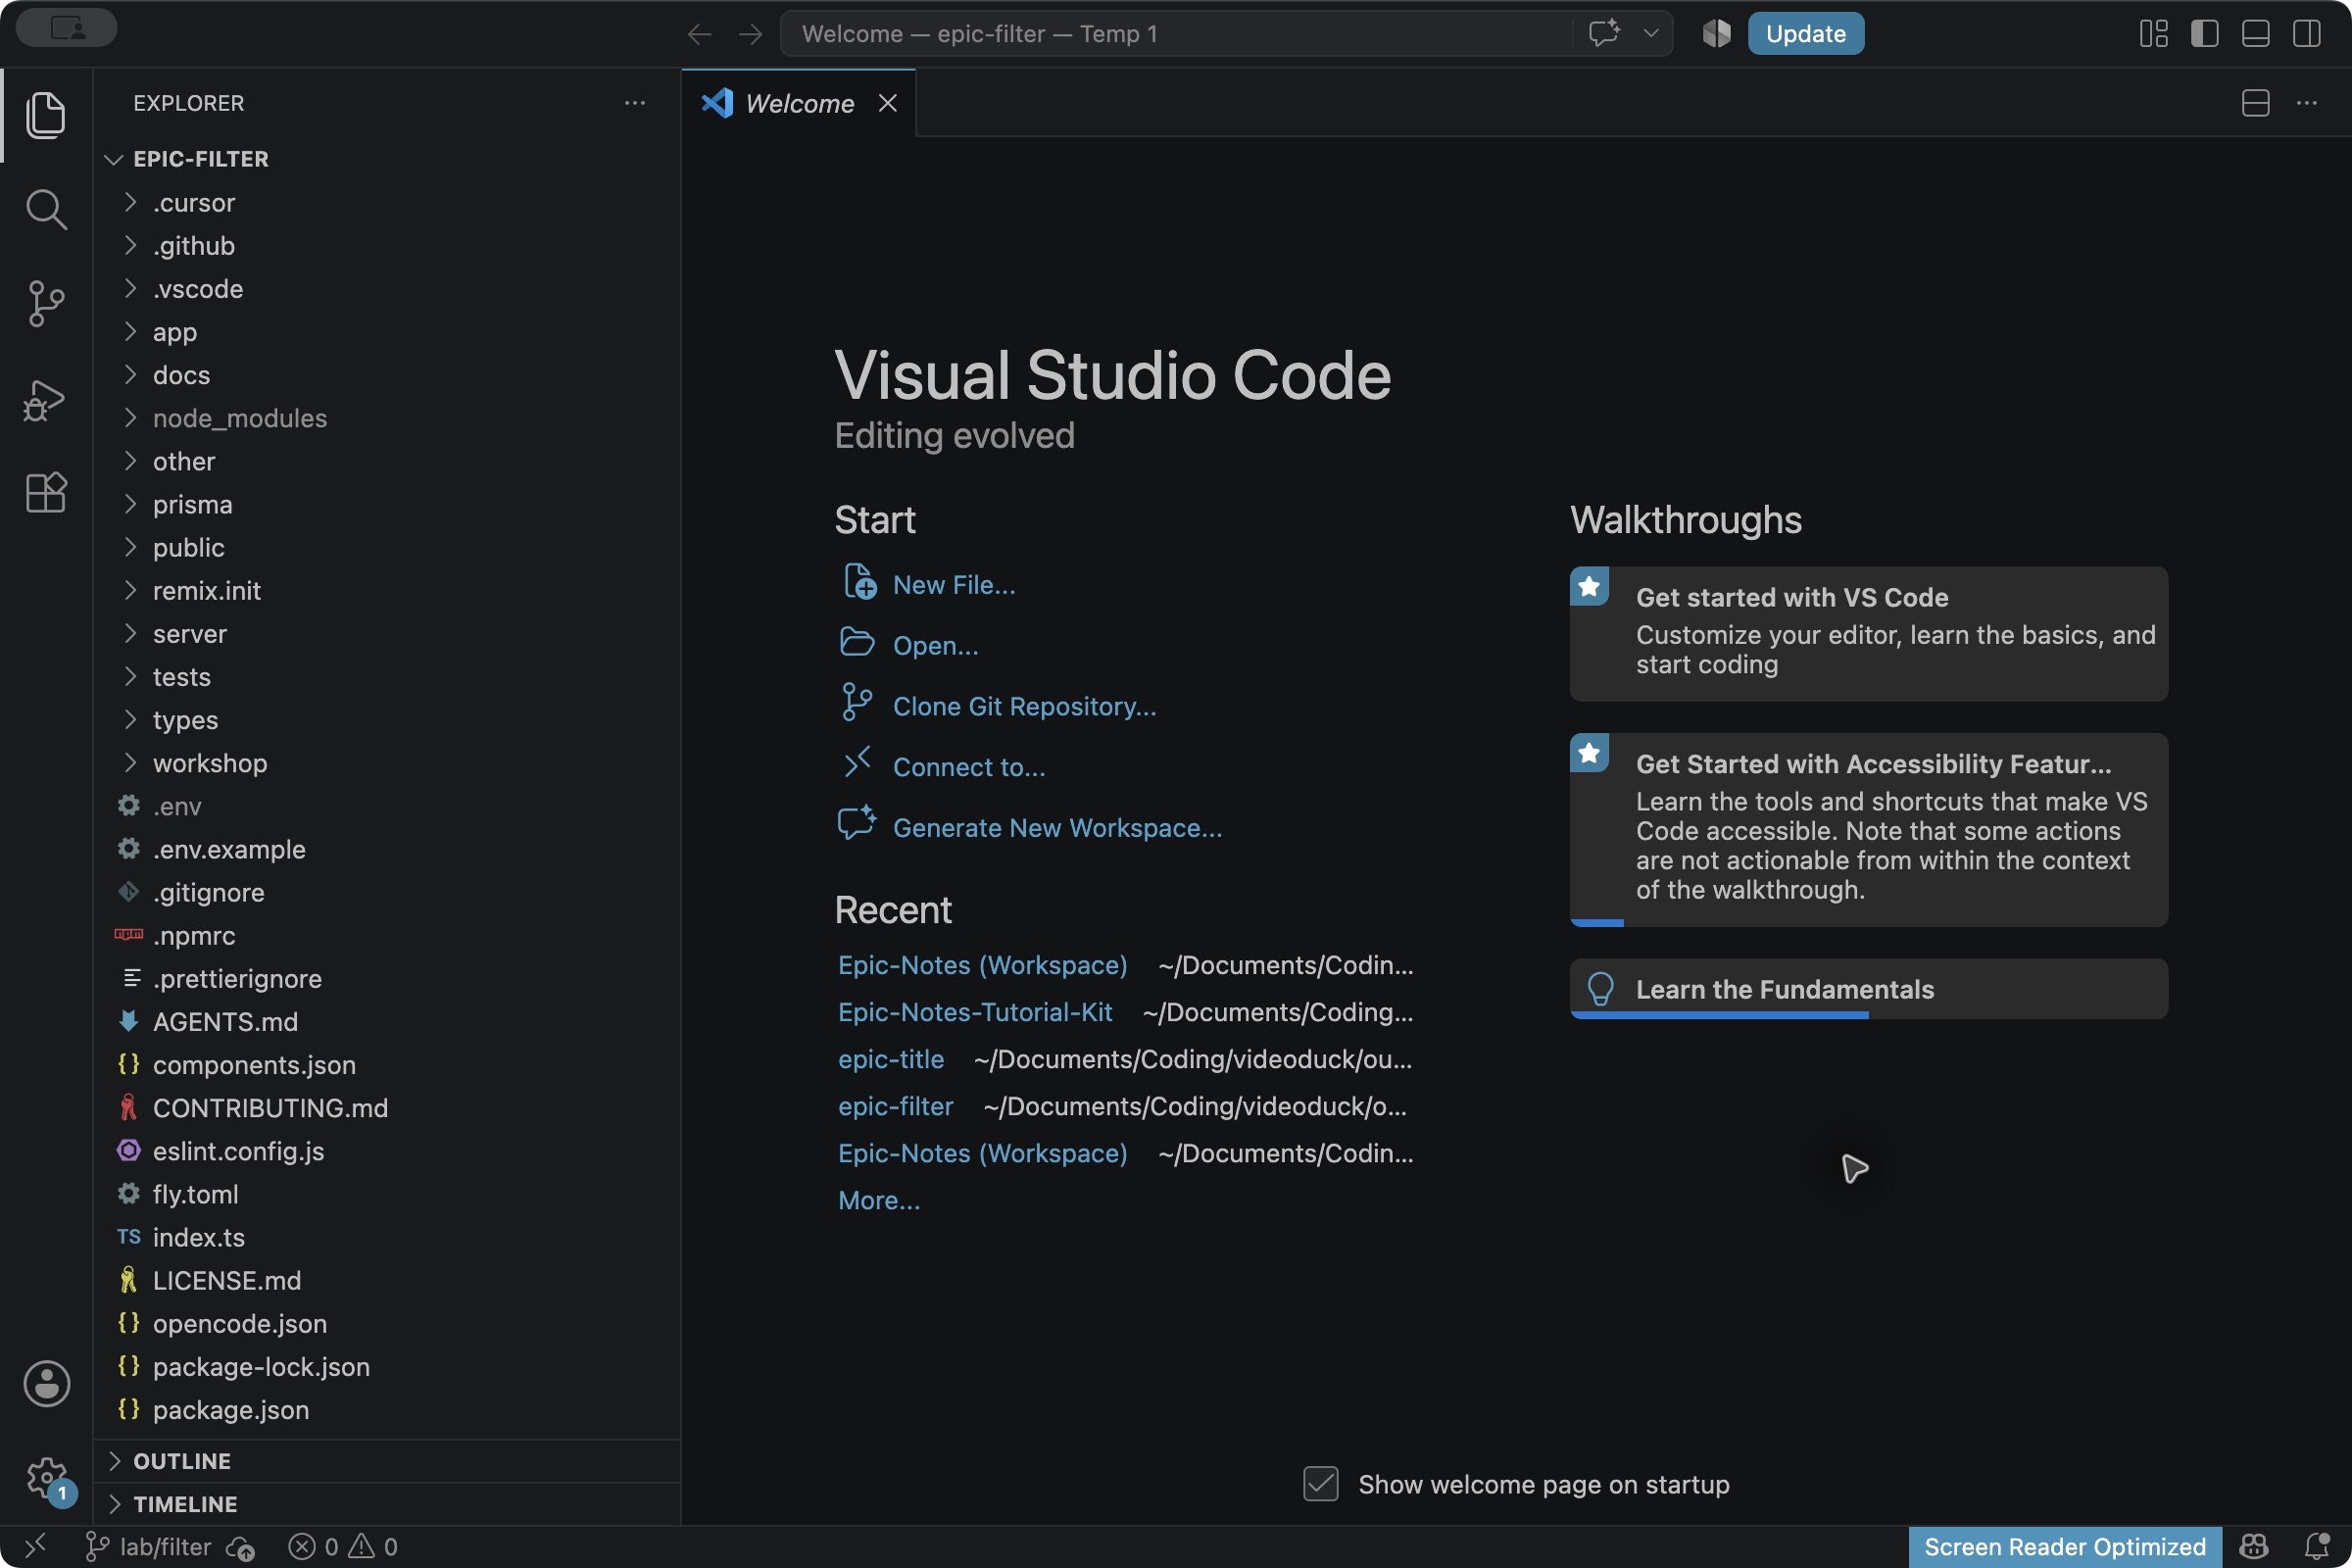
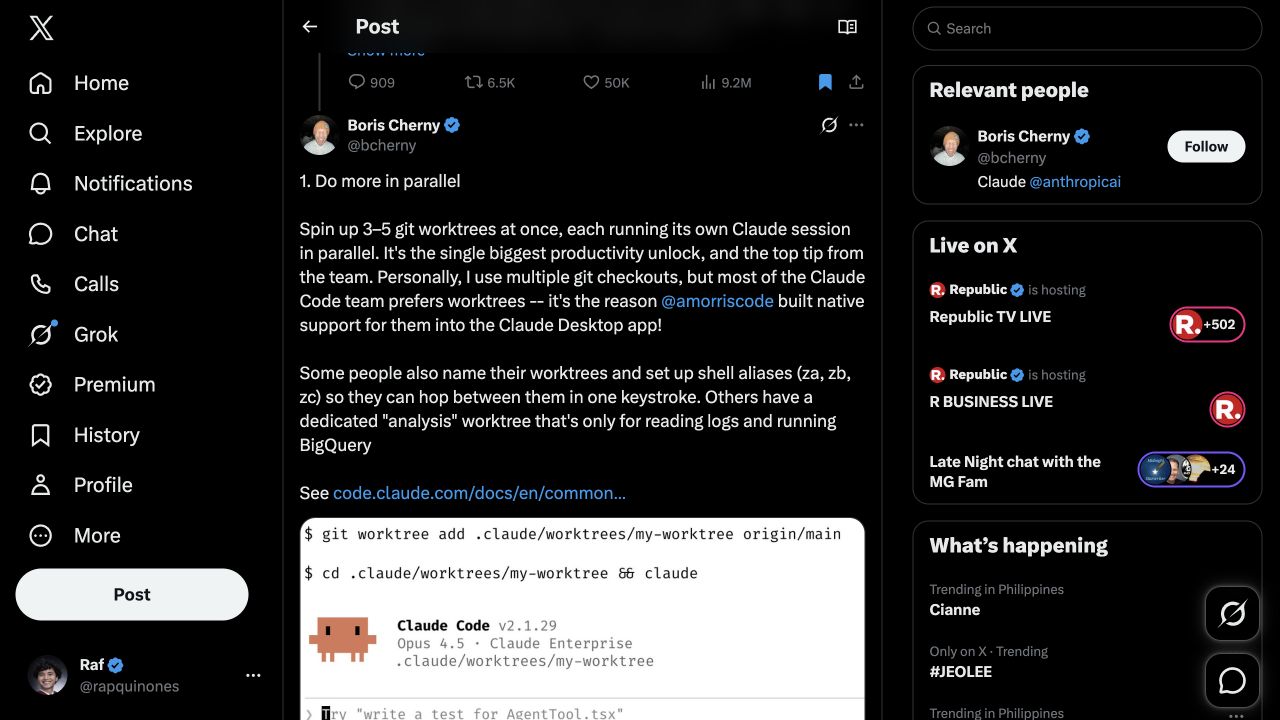
VS Code also has worktree controls. We use the helper so Mac and Windows Git Bash users can follow the same setup. Boris Cherny’s team uses worktrees for parallel sessions. For this exercise, two jobs are enough to practise bringing the changes together.
13. Plan the filter in epic-filter
Use the epic-filter / lab/filter window here. We’ll keep title changes in the other branch.
The app already has a search for users, so “add search” could send the agent in the wrong direction. We want to filter one person’s note titles. Give it that requirement:
Where: OpenCode · epic-filter / lab/filter · Plan. Paste into the message box and press Enter. Wait for its proposal.
Objective: help people find note titles within the selected person's
notes list. Keep the existing global user search unchanged.

Success: English title substrings match without case sensitivity;
surrounding search spaces are ignored; blank input shows all of that
person's notes. Show a useful no-match state. Clear restores the list
and empties the input. Other people's notes must not enter this list.

Constraints: stay in the prepared VS Code project and existing stack.
Preserve public reading and restricted editing. No new dependencies,
schema or lockfile changes, paid services, installs or deployment.
Read AGENTS.md. Keep the existing permission controls.

Inspect the code and your available tools before recommending an
approach. Choose the implementation and verification tools, explain
why they fit, and identify the smallest scope of files. Ground your
choices in this repo; do not assume a tool is connected or available.
If a capability is missing, explain the need and pause. Ask about
decisions that affect the outcome. Stop after the plan for review.
Read its plan. Is it filtering this person’s note titles, or changing the global user search? Ask about anything unclear. Once the approach fits the request, switch to Build in the same message box:
14. Let it build and test the filter
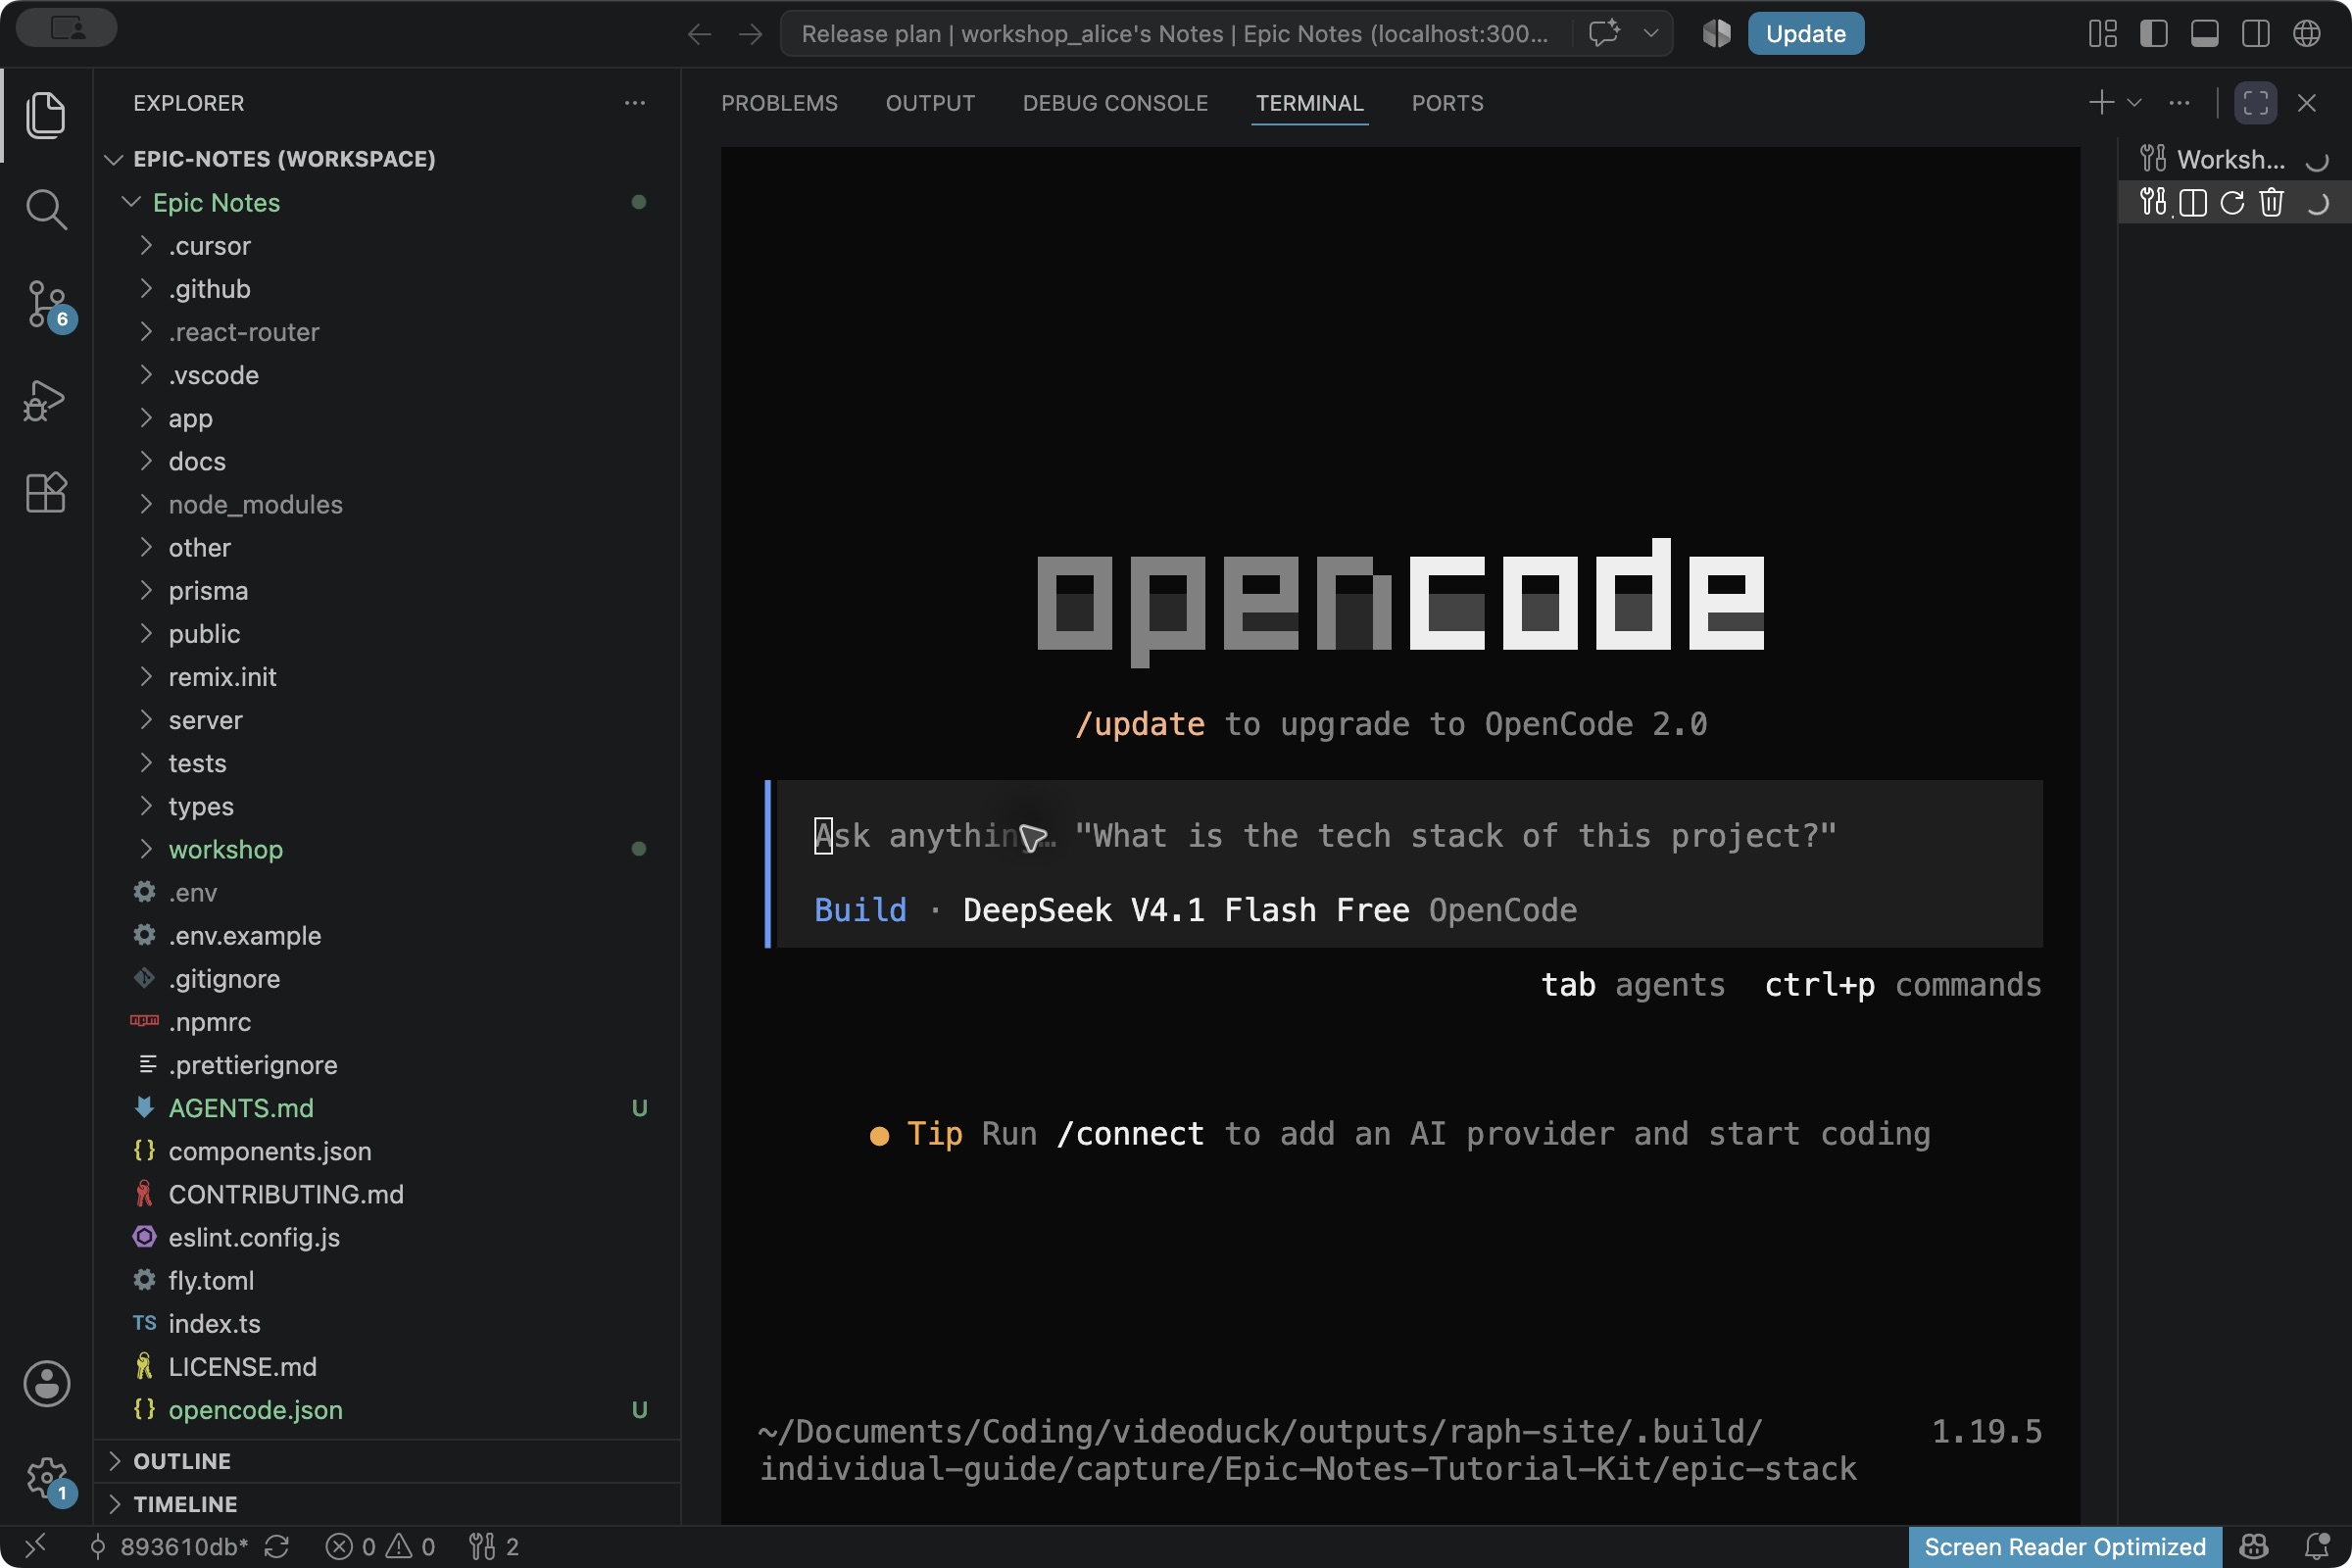
Where: OpenCode · epic-filter / lab/filter · Build. Send after approving the plan.
Objective: deliver the title-filter behavior in our approved plan
with evidence that it works.

Constraints: stay within the approved scope and tool choices in this
VS Code checkout. Preserve reading/editing rules and existing behavior.
No dependencies, schema or lockfile changes, installs, commits or
publishing. Keep normal edit and command approvals enabled.

Implement the approved plan. Choose meaningful checks for matching,
no match, blank input, Clear resetting the input, and owner exclusion.
Use the repo's documented verification gates as well as your focused
checks. Repair failures caused by your work without weakening checks.
If the evidence calls for a different tool or wider scope, explain
why and wait for approval. Report changed paths, actual command/exit-code
results, coverage and gaps. Leave a handoff for a fresh reviewer.
Do not claim browser work you did not perform.
Choose Allow once when an edit or command fits the agreed task. If a check fails because of its change, let it investigate and repair the cause. Then ask it to report what it did:
Where: Same OpenCode filter session. Ask for the command output and the local actions to try.
Objective: give me enough evidence to decide whether the change
meets our approved requirement.

Constraints: preserve the agreed scope, tools and permission controls
in VS Code. Do not edit unrelated files, read .env, install, commit
or publish. Do not weaken any check or claim unperformed work.

State the requirement, changed paths and reason for each file.
Use actual verification output; if it is missing or stale, propose
the checks you need and run them after approval. Include the project's
documented gates, command exit codes, totals, pre-existing warnings
and coverage gaps. Give the local route and actions I can evaluate
in VS Code's preview. Mark unexercised UI behavior unverified.
15. Open the changes in Source Control
Click the branch-shaped Source Control icon in the left activity bar. Under Changes, click each filename. M means modified; U is a new, untracked file. Don’t click Discard or Publish Branch.
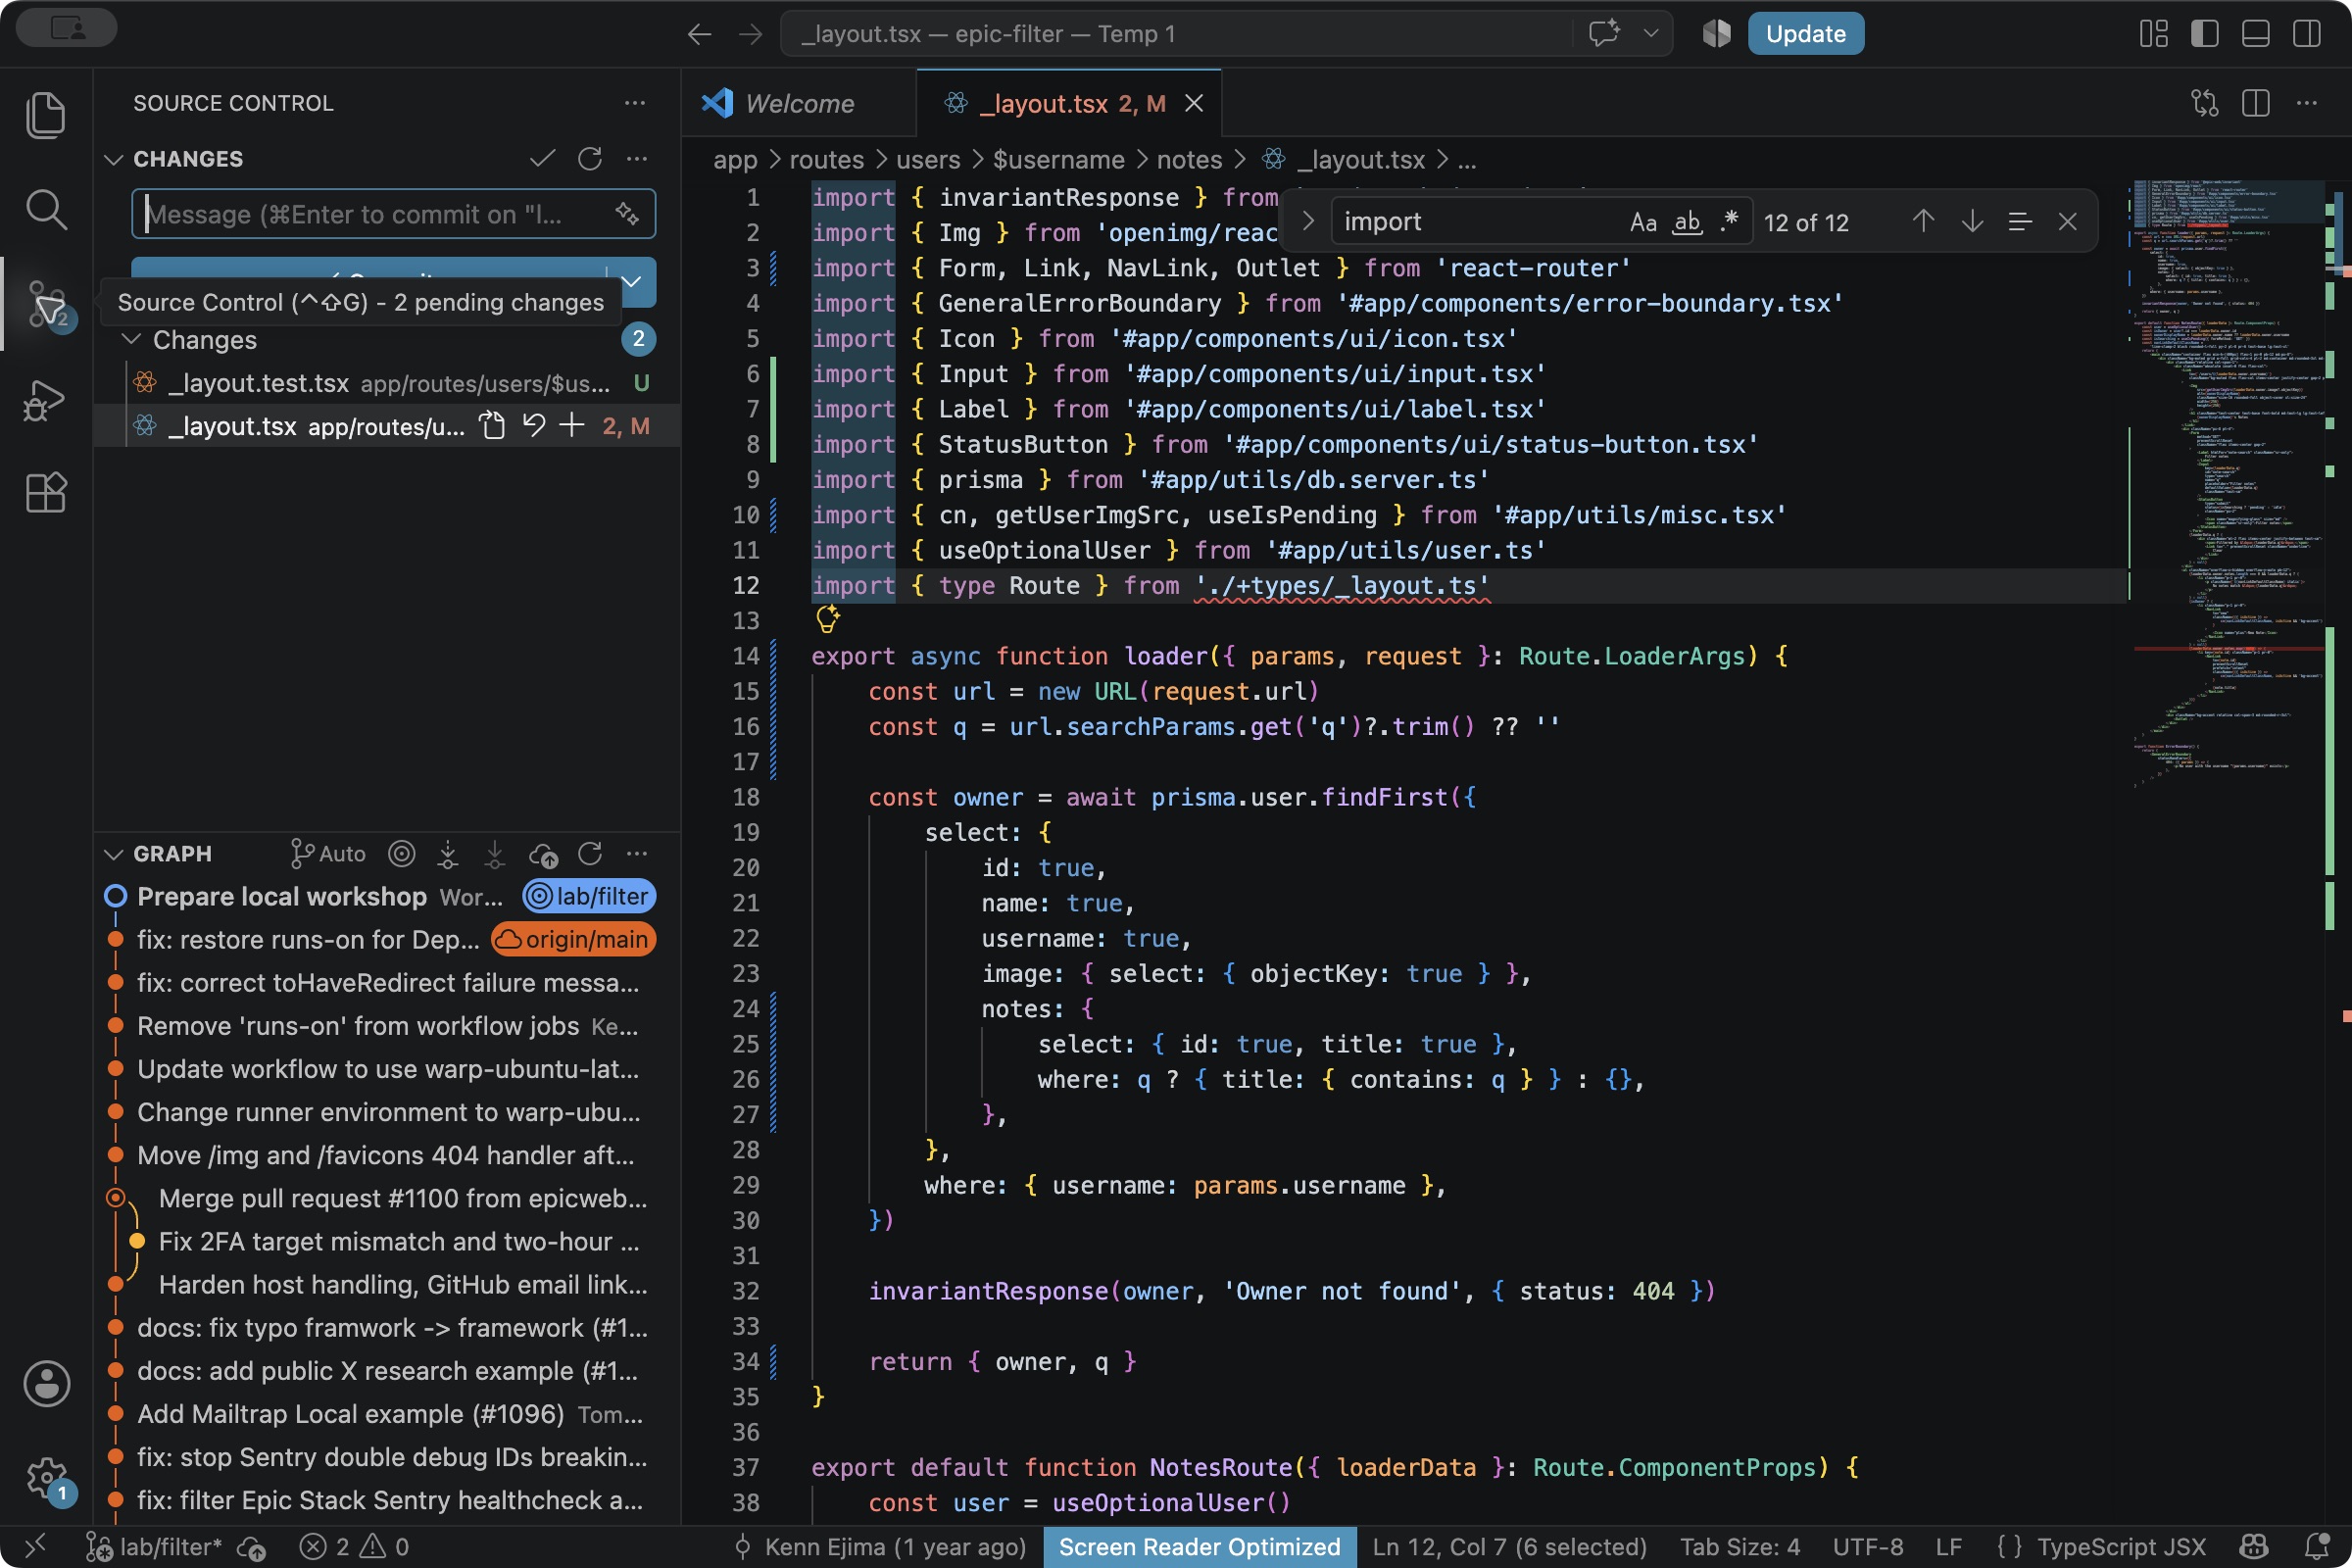
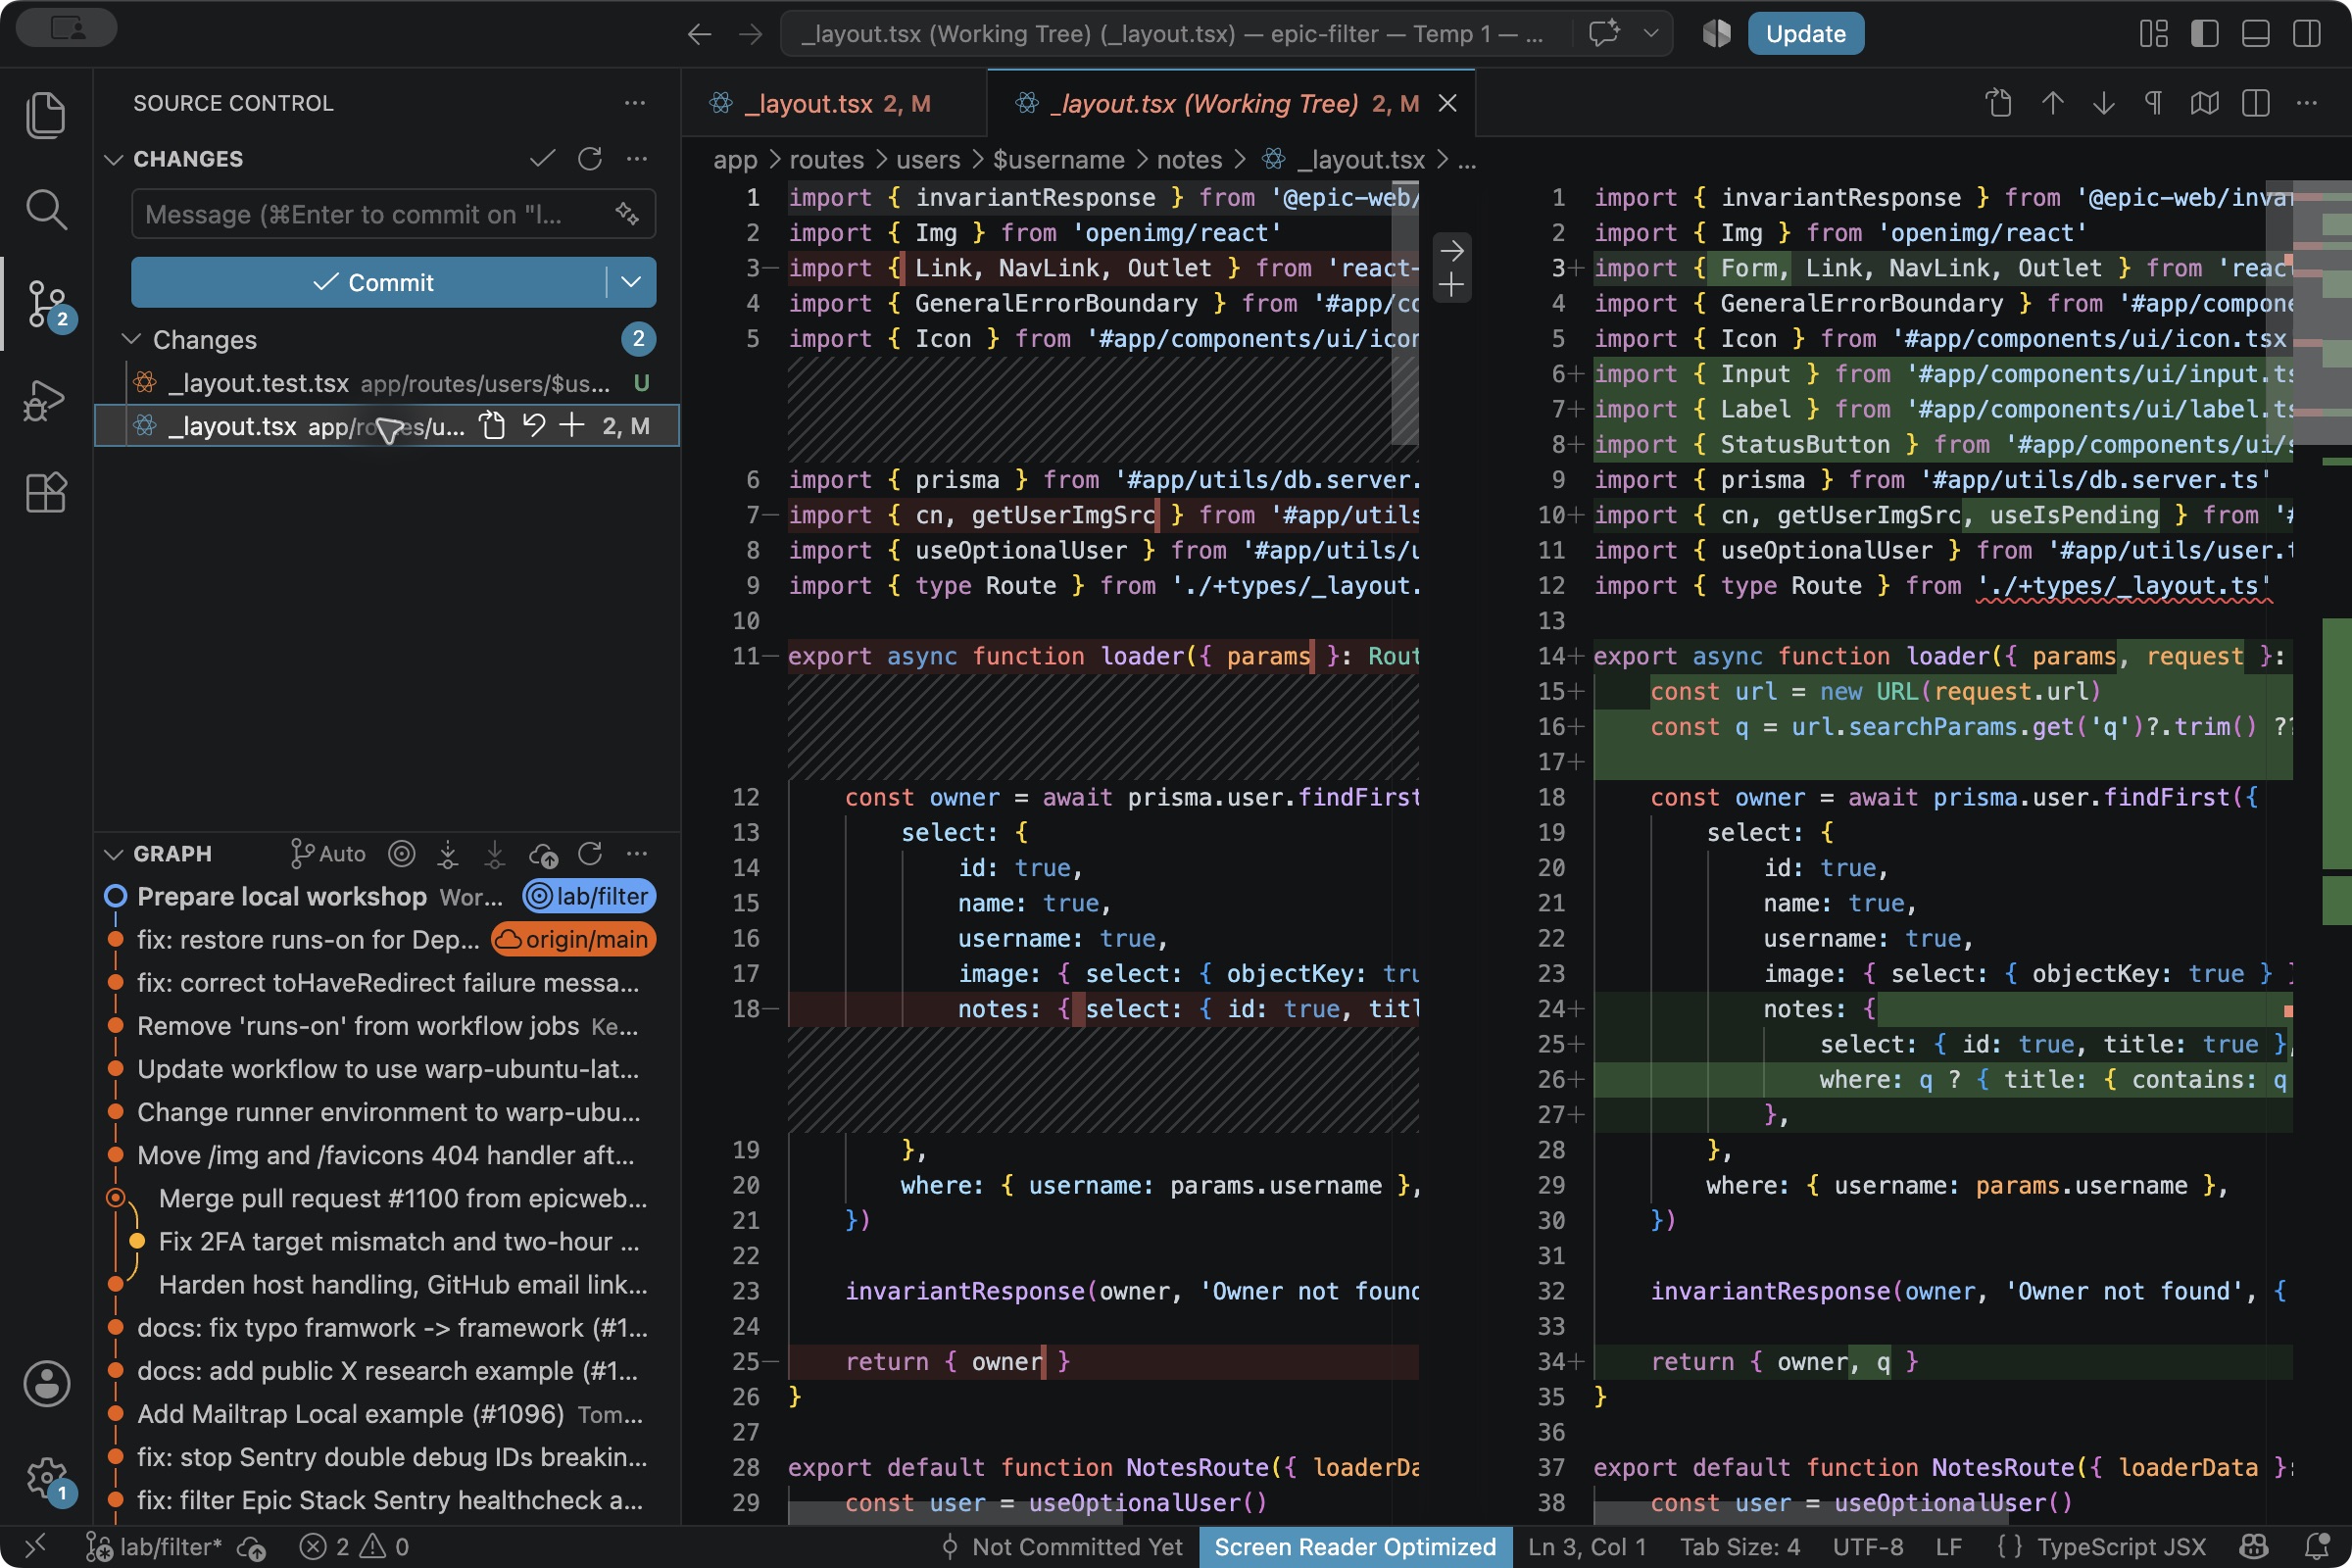
Look through the changed files. If a file seems unrelated to the filter, ask why it changed. We’ll use a fresh reviewer after bringing the two jobs together. Let the agent do the implementation and test runs.
Compare with the reference after planning
This reference uses a GET parameter called q and filters within the displayed owner’s notes relation. It’s one way to do the job. Leave this closed until the agent has proposed its own approach:
const q = new URL(request.url).searchParams.get('q')?.trim() ?? ''

// Inside the selected owner's notes relation:
notes: {
  select: { id: true, title: true },
  where: q ? { title: { contains: q } } : {},
},
The GET form uses name="q". Clear removes the query and empties the input. The existing owner lookup and edit rules stay in place.
Using the reference filter if model access runs out
Use this only if you haven’t made this step’s changes yet. If you’ve already tried it, keep your work and compare using a freshly extracted kit. Don’t apply the patch over your edits.
Read the exact patch. The kit contains the same file. From the epic-filter terminal:
git apply --check ../solutions/01-filter.patch
git apply ../solutions/01-filter.patch
If the patch check reports a conflict, stop and compare the files. Don’t force it through.
16. Try the filter in the app
Return to the coordinator window, click its Workshop: app terminal, then press Ctrl+C to stop that server. Return to epic-filter. Open a new shell there and run:
node workshop/dev.mjsPress F1 → Browser: Open Integrated Browser. Use the Local address from this server. Sign in as Alice, click Alice → Notes, then New Note using the same buttons as steps 7 and 10.
Create a normal Release plan note in the filter worktree before trying the filter. The note you made in the coordinator lives in a different local database, so it won’t appear here. You may need to sign in again when switching worktrees; their databases have separate users and sessions.
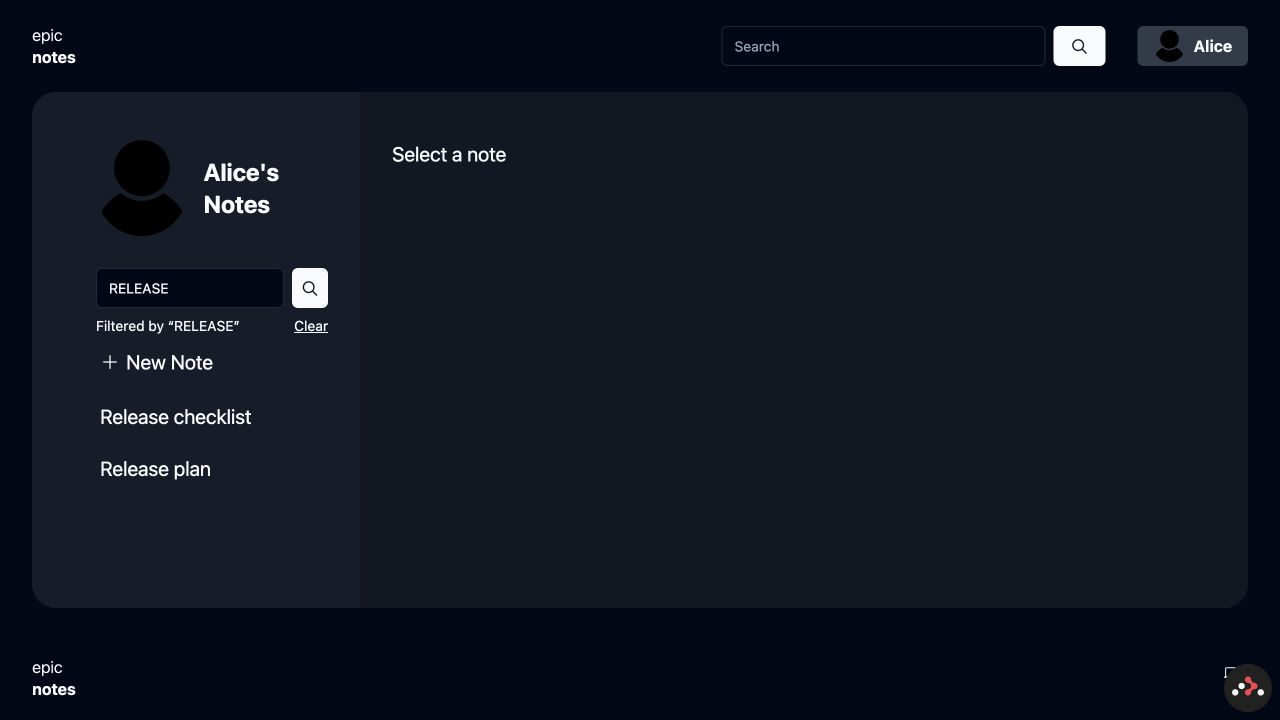
Try it in VS Code’s preview. Open /users/workshop_alice/notes. Click the smaller Filter notes box under Alice’s Notes, type RELEASE and press Enter, or click the magnifying-glass button beside that box. You should see Release checklist and your Release plan. Try no-such-note; there should be a useful no-results state. Click Clear and check that Alice’s full list returns and the input is empty. Bob’s notes shouldn’t appear.
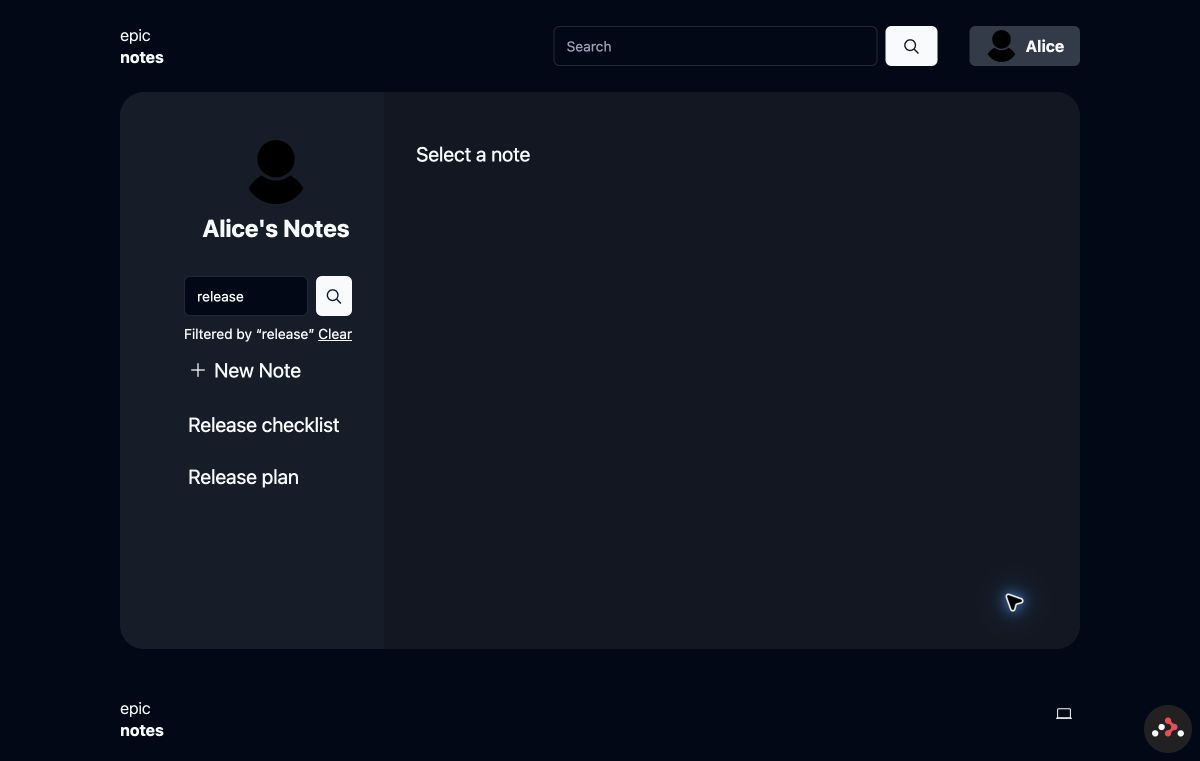
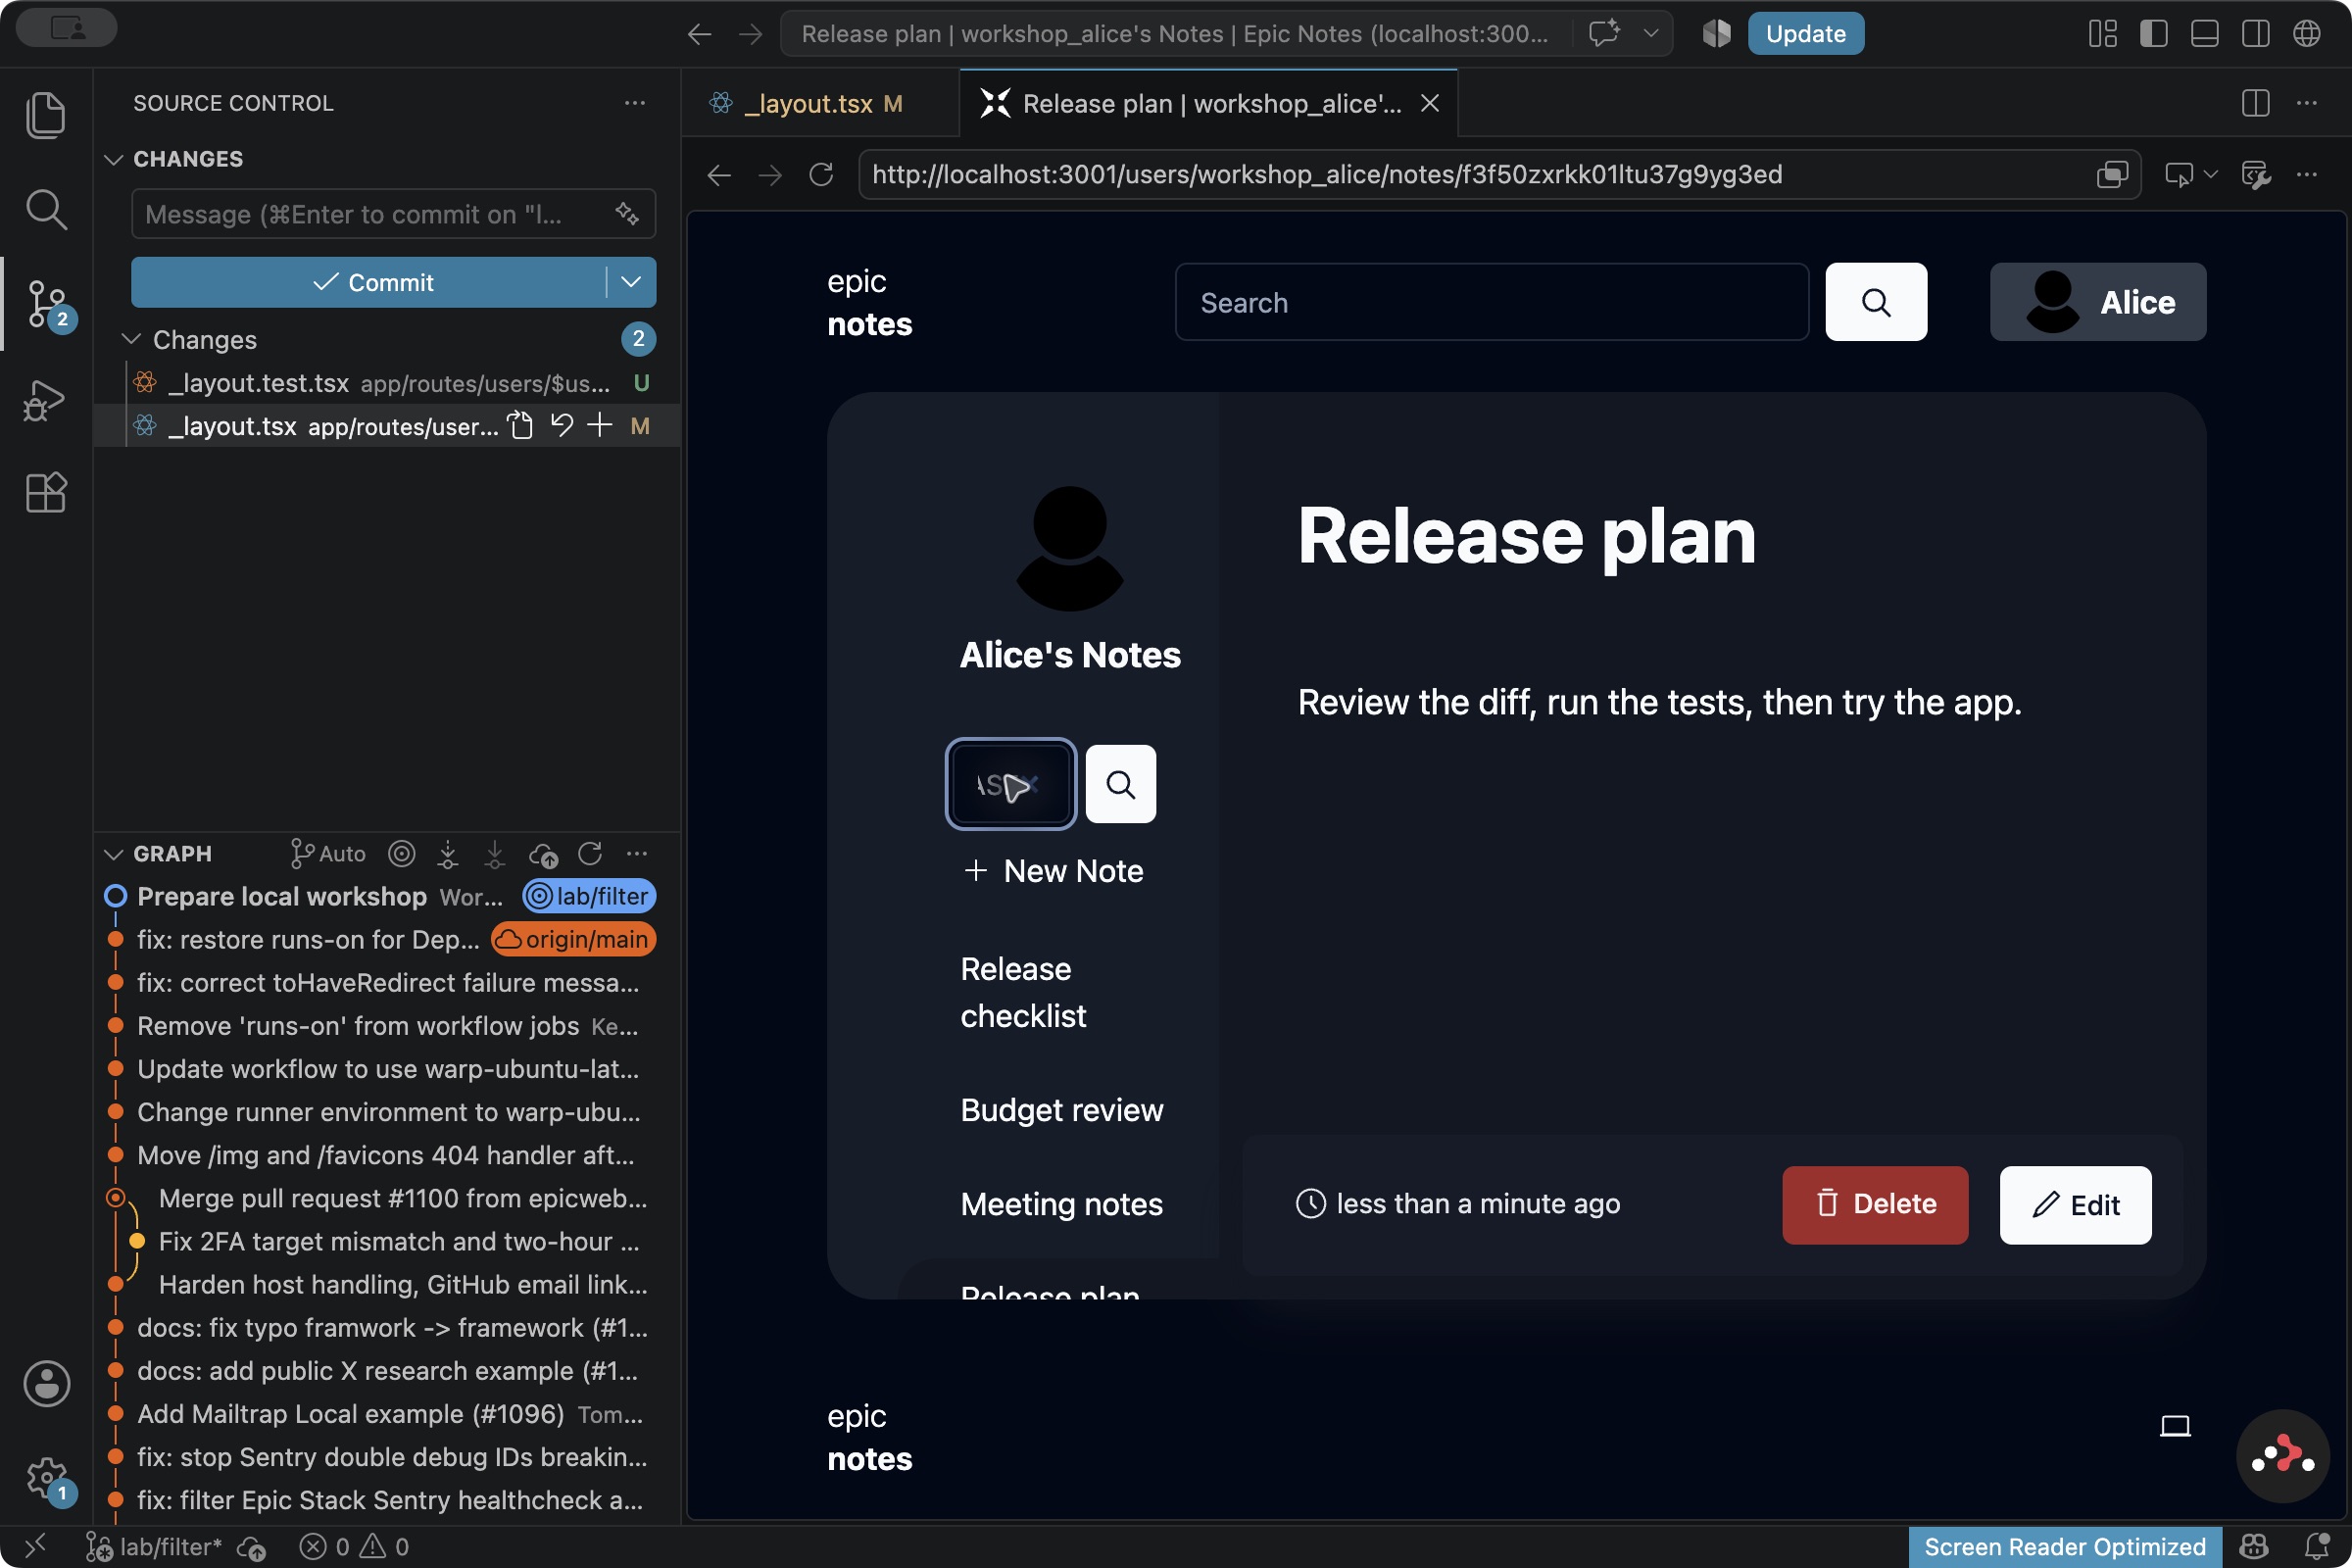
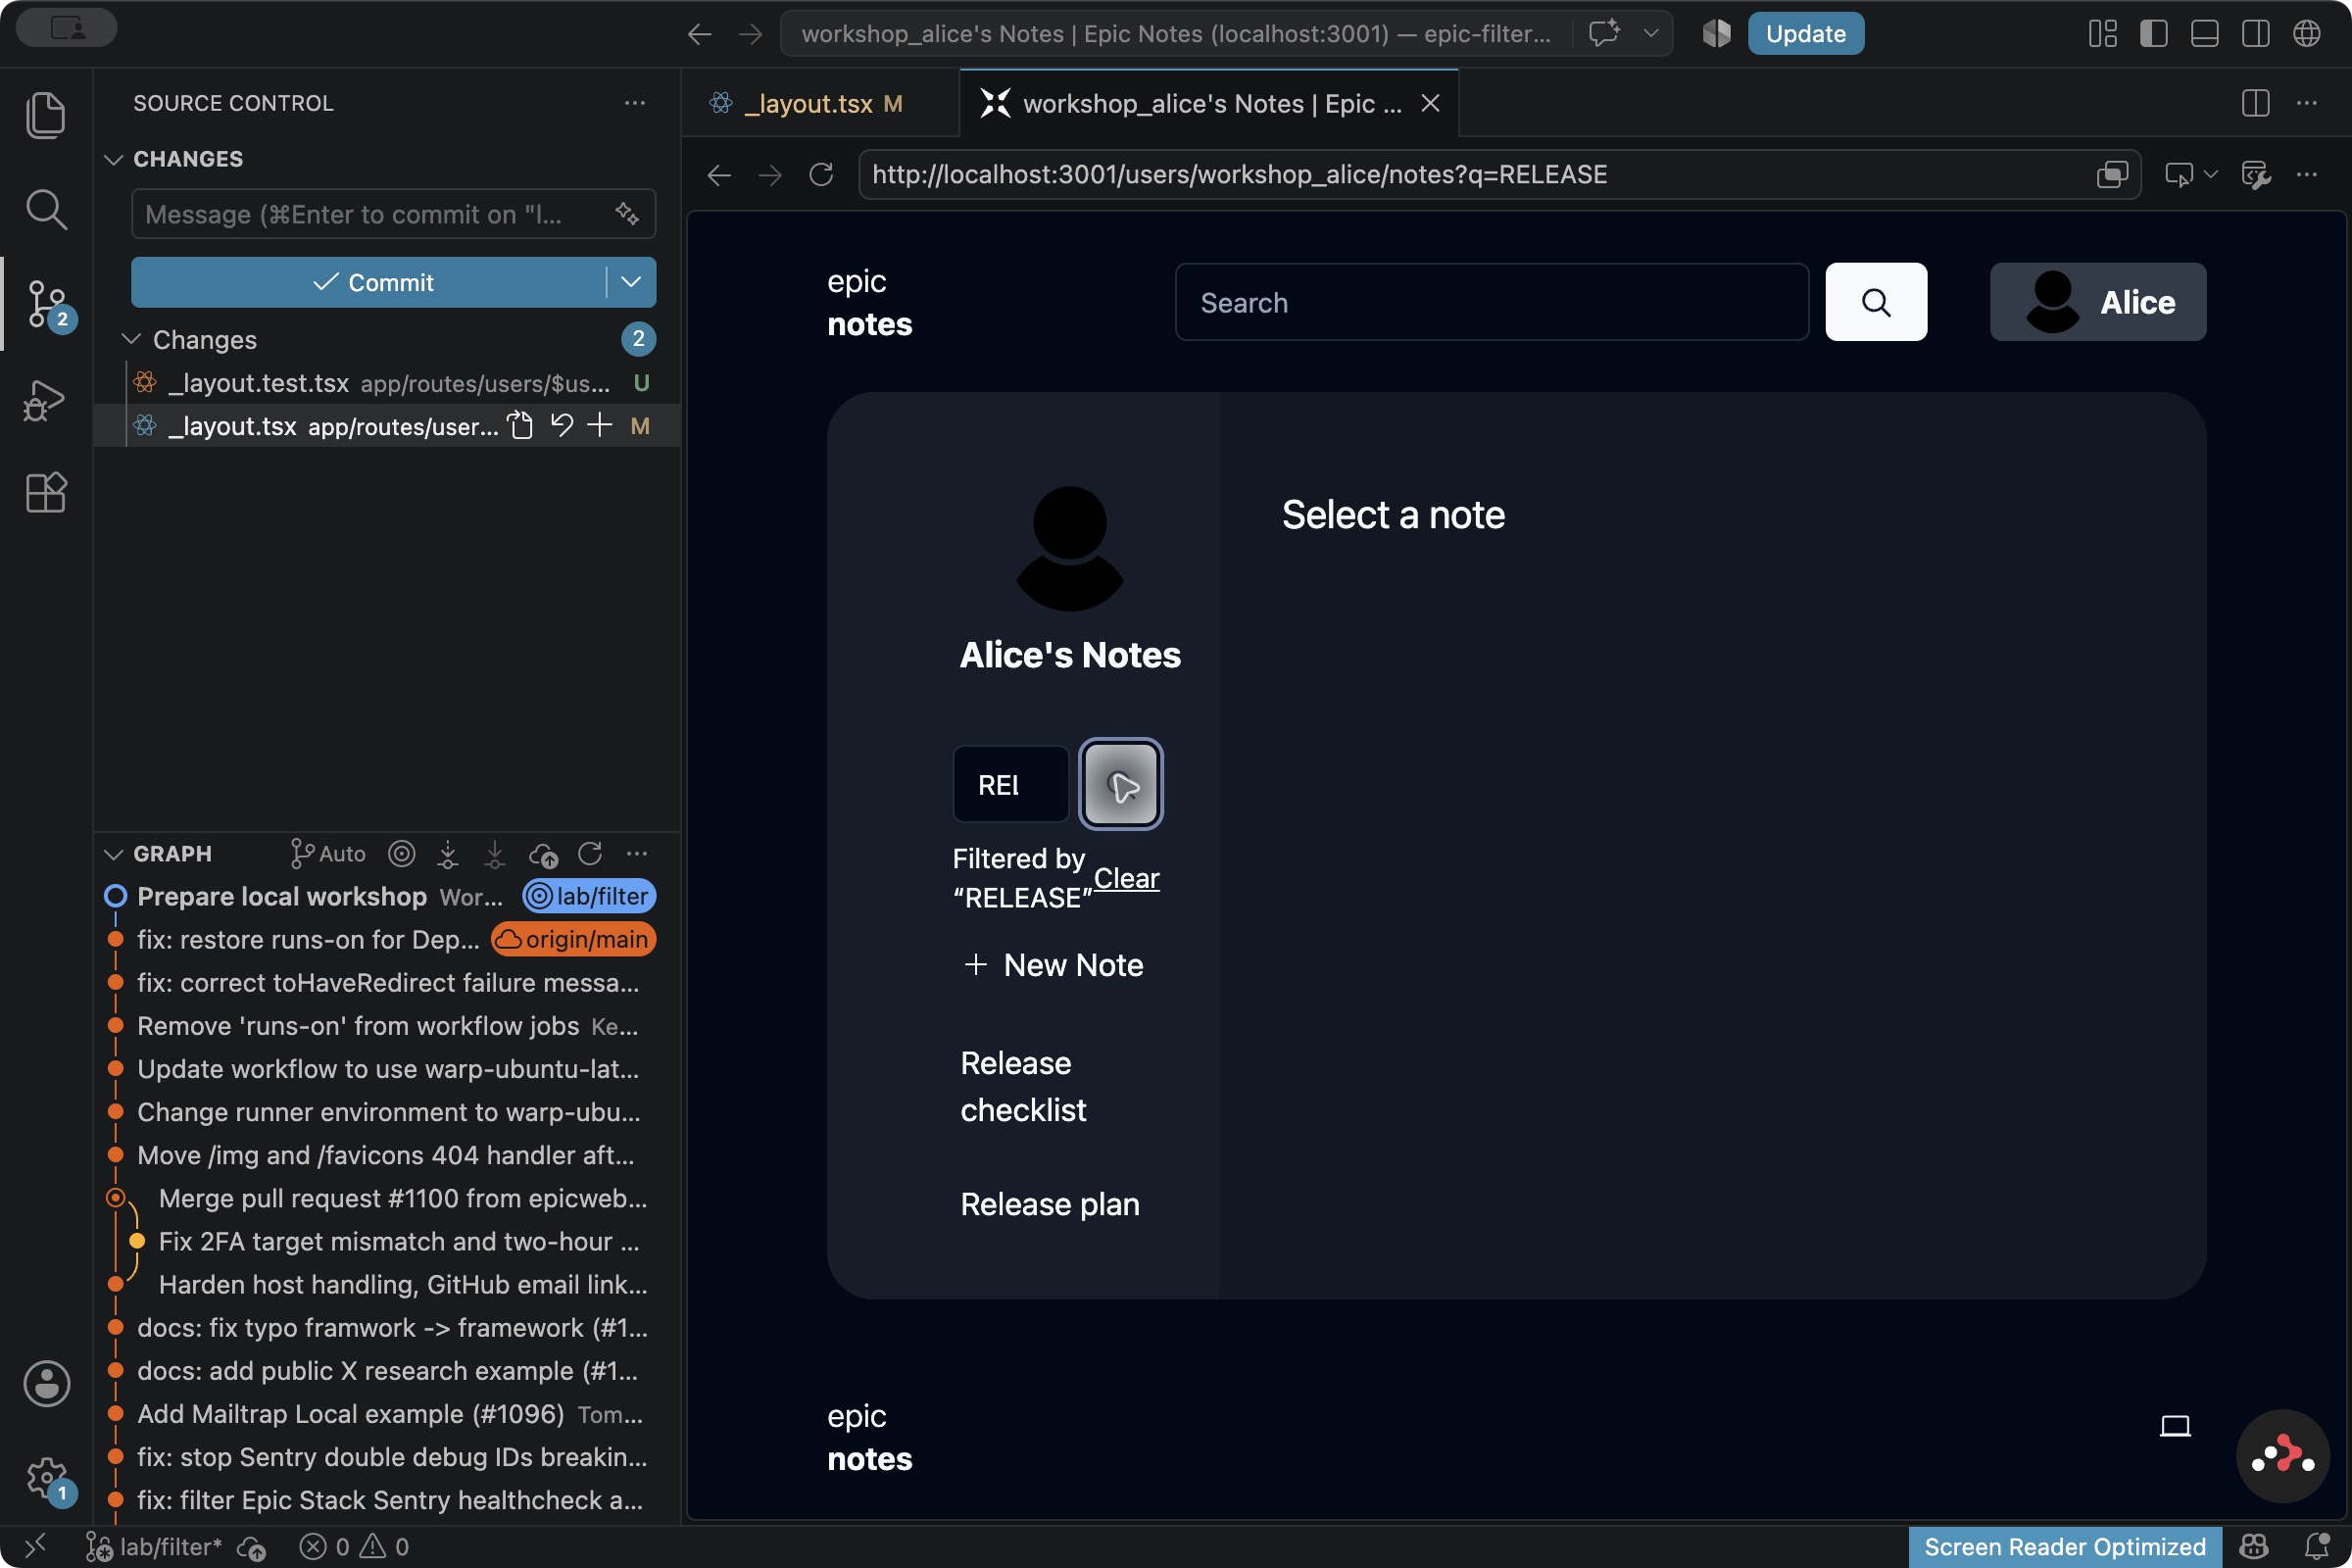
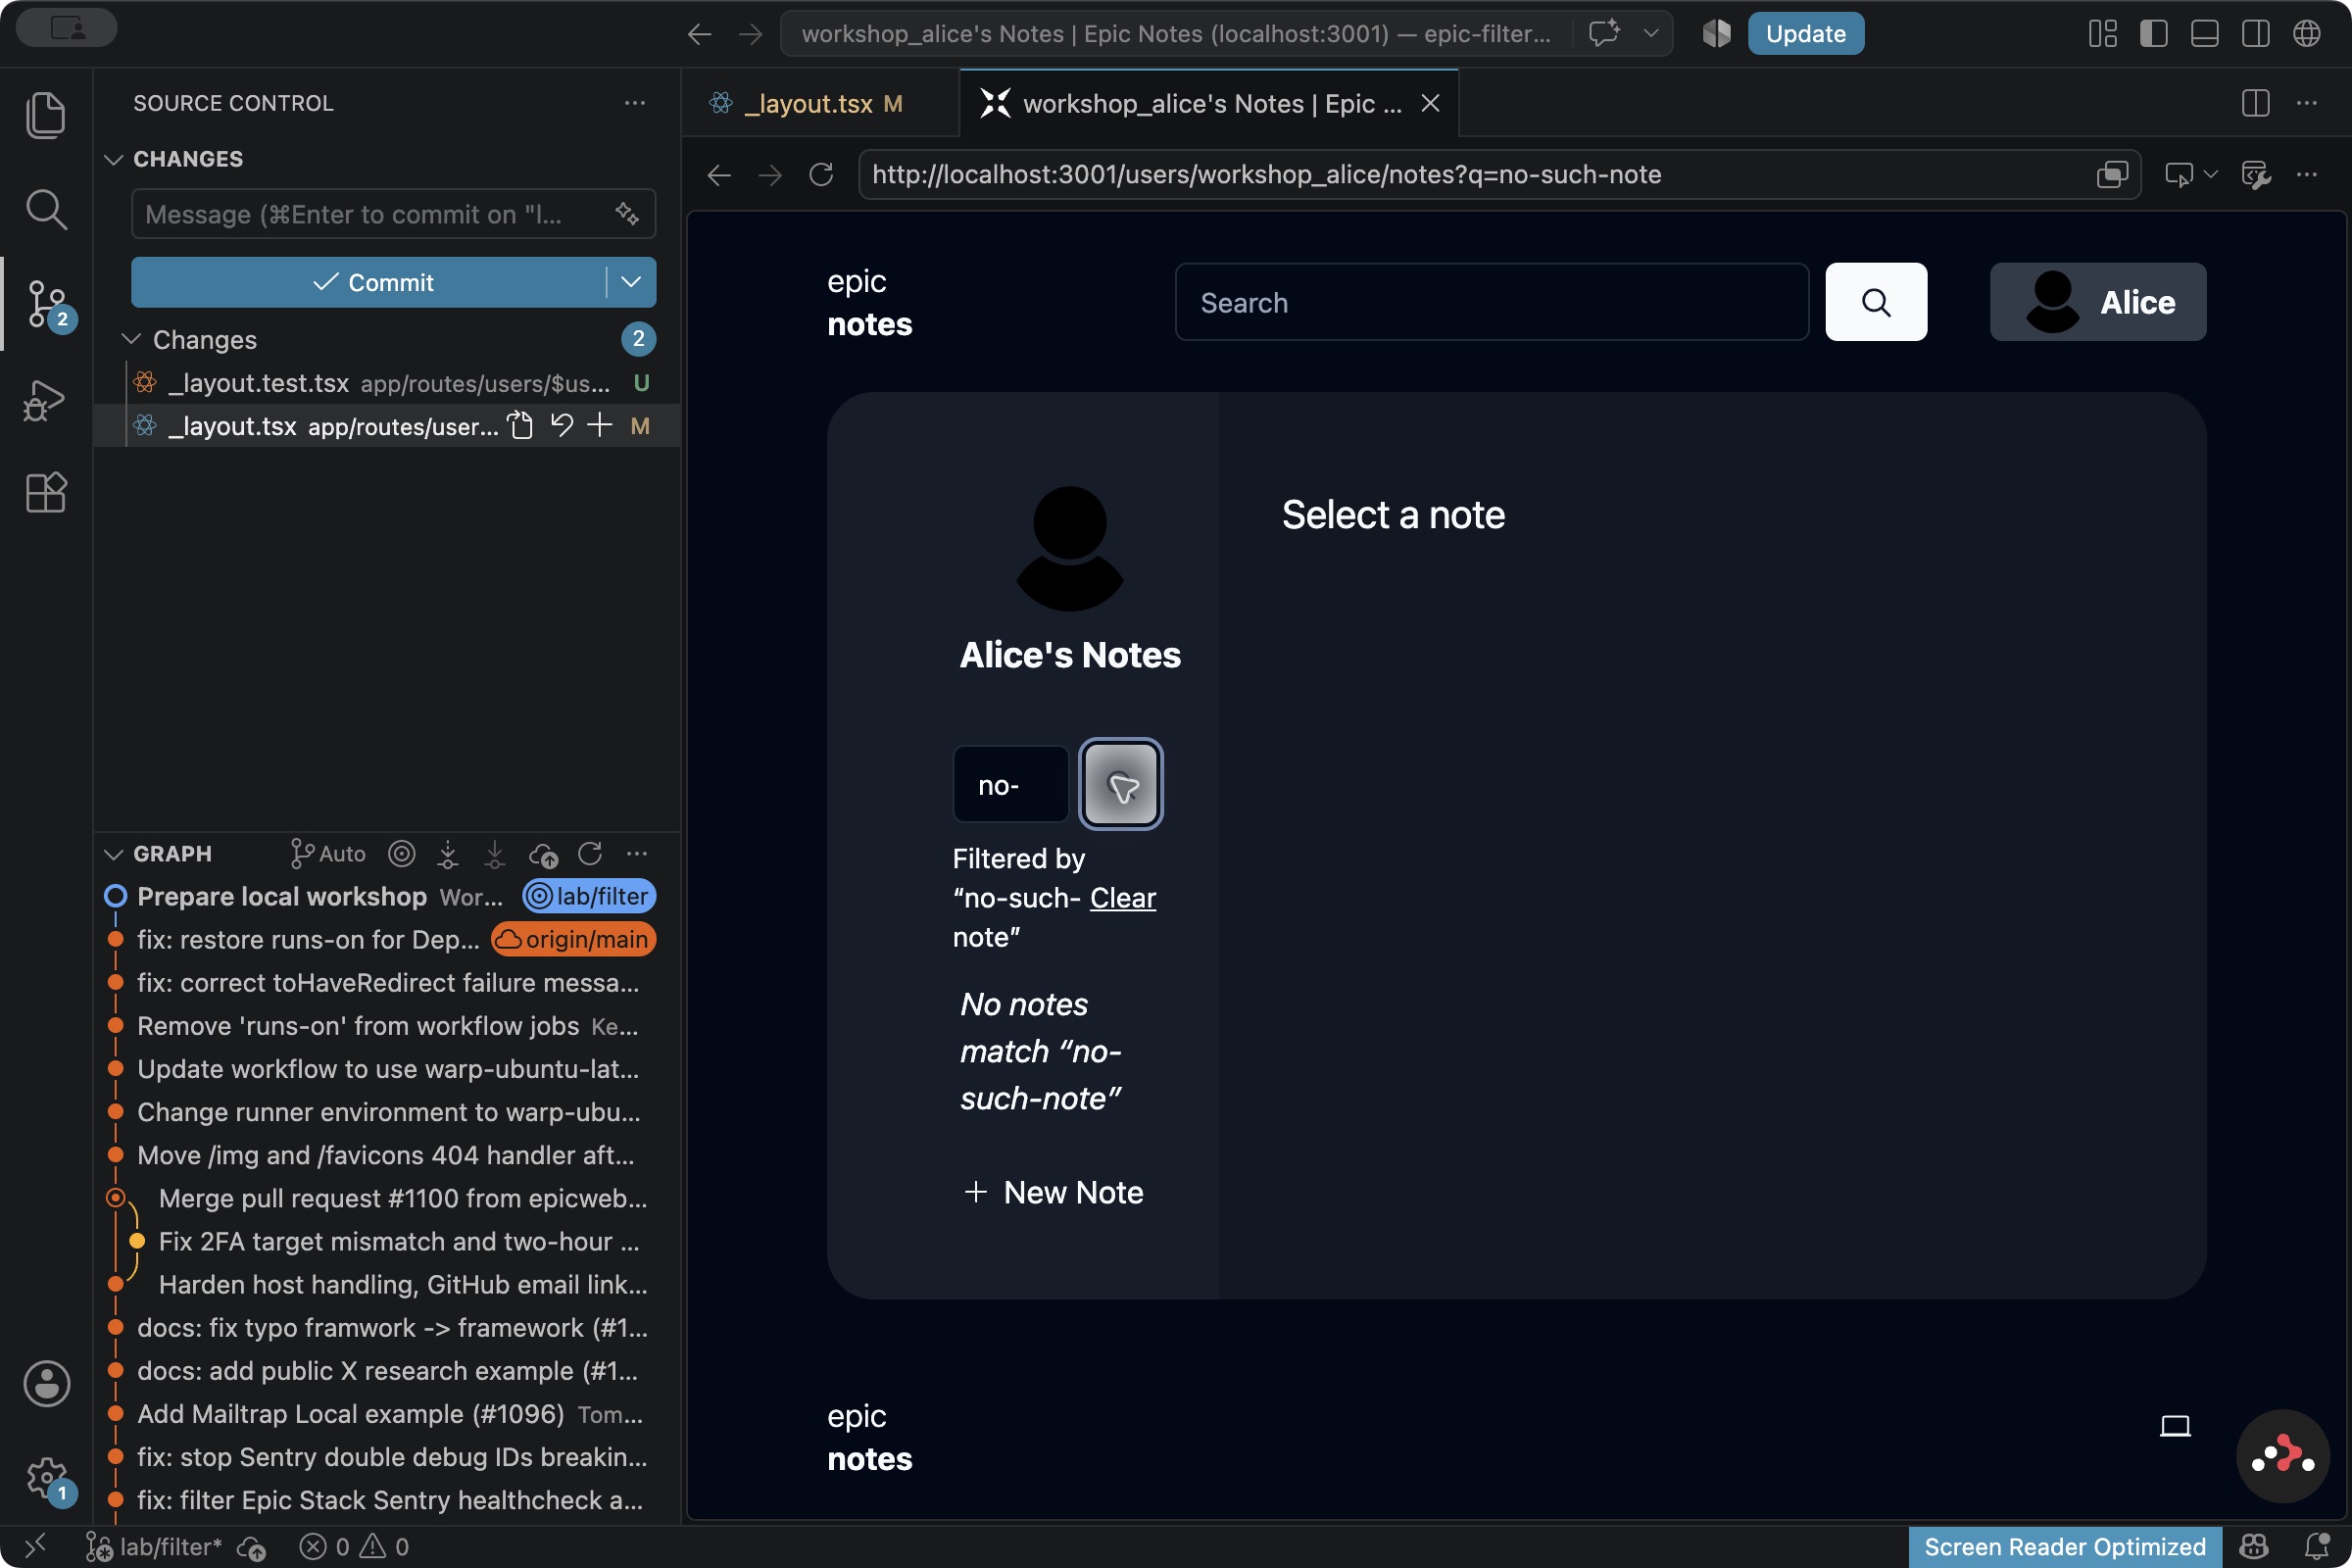
The reference has 47 passing tests at this point. Your agent may write more or fewer useful tests. Check which behavior they cover before comparing the counts.
If the agent changes something outside the job
If you get an unrelated change such as a duplicate import or a lint suppression, give the agent a specific correction and let it repair the patch:
Objective: bring the current change back within our agreed task.

Constraints: preserve the required behavior and existing checks.
No lint suppressions, weaker tests or unrelated changes.

Inspect the actual difference from the approved plan. Propose the
smallest correction and choose how to verify it using the available
tools. Explain why it fits, then wait before making the correction.
If it keeps making unrelated changes, stop and check the task’s scope before continuing.
Testing the empty-title bug
Keep the filter work in its branch. In the title worktree, we still have the original app. Let’s try an input it accepts that doesn’t make a useful title.
17. Try a blank title in epic-title
Switch to epic-title / lab/title. Stop the filter app with Ctrl+C, then run node workshop/dev.mjs in the title window. Open the Local address printed by this server in that window’s integrated browser and sign in as Alice. This branch still has the original title behavior; we haven’t brought the filter into it.
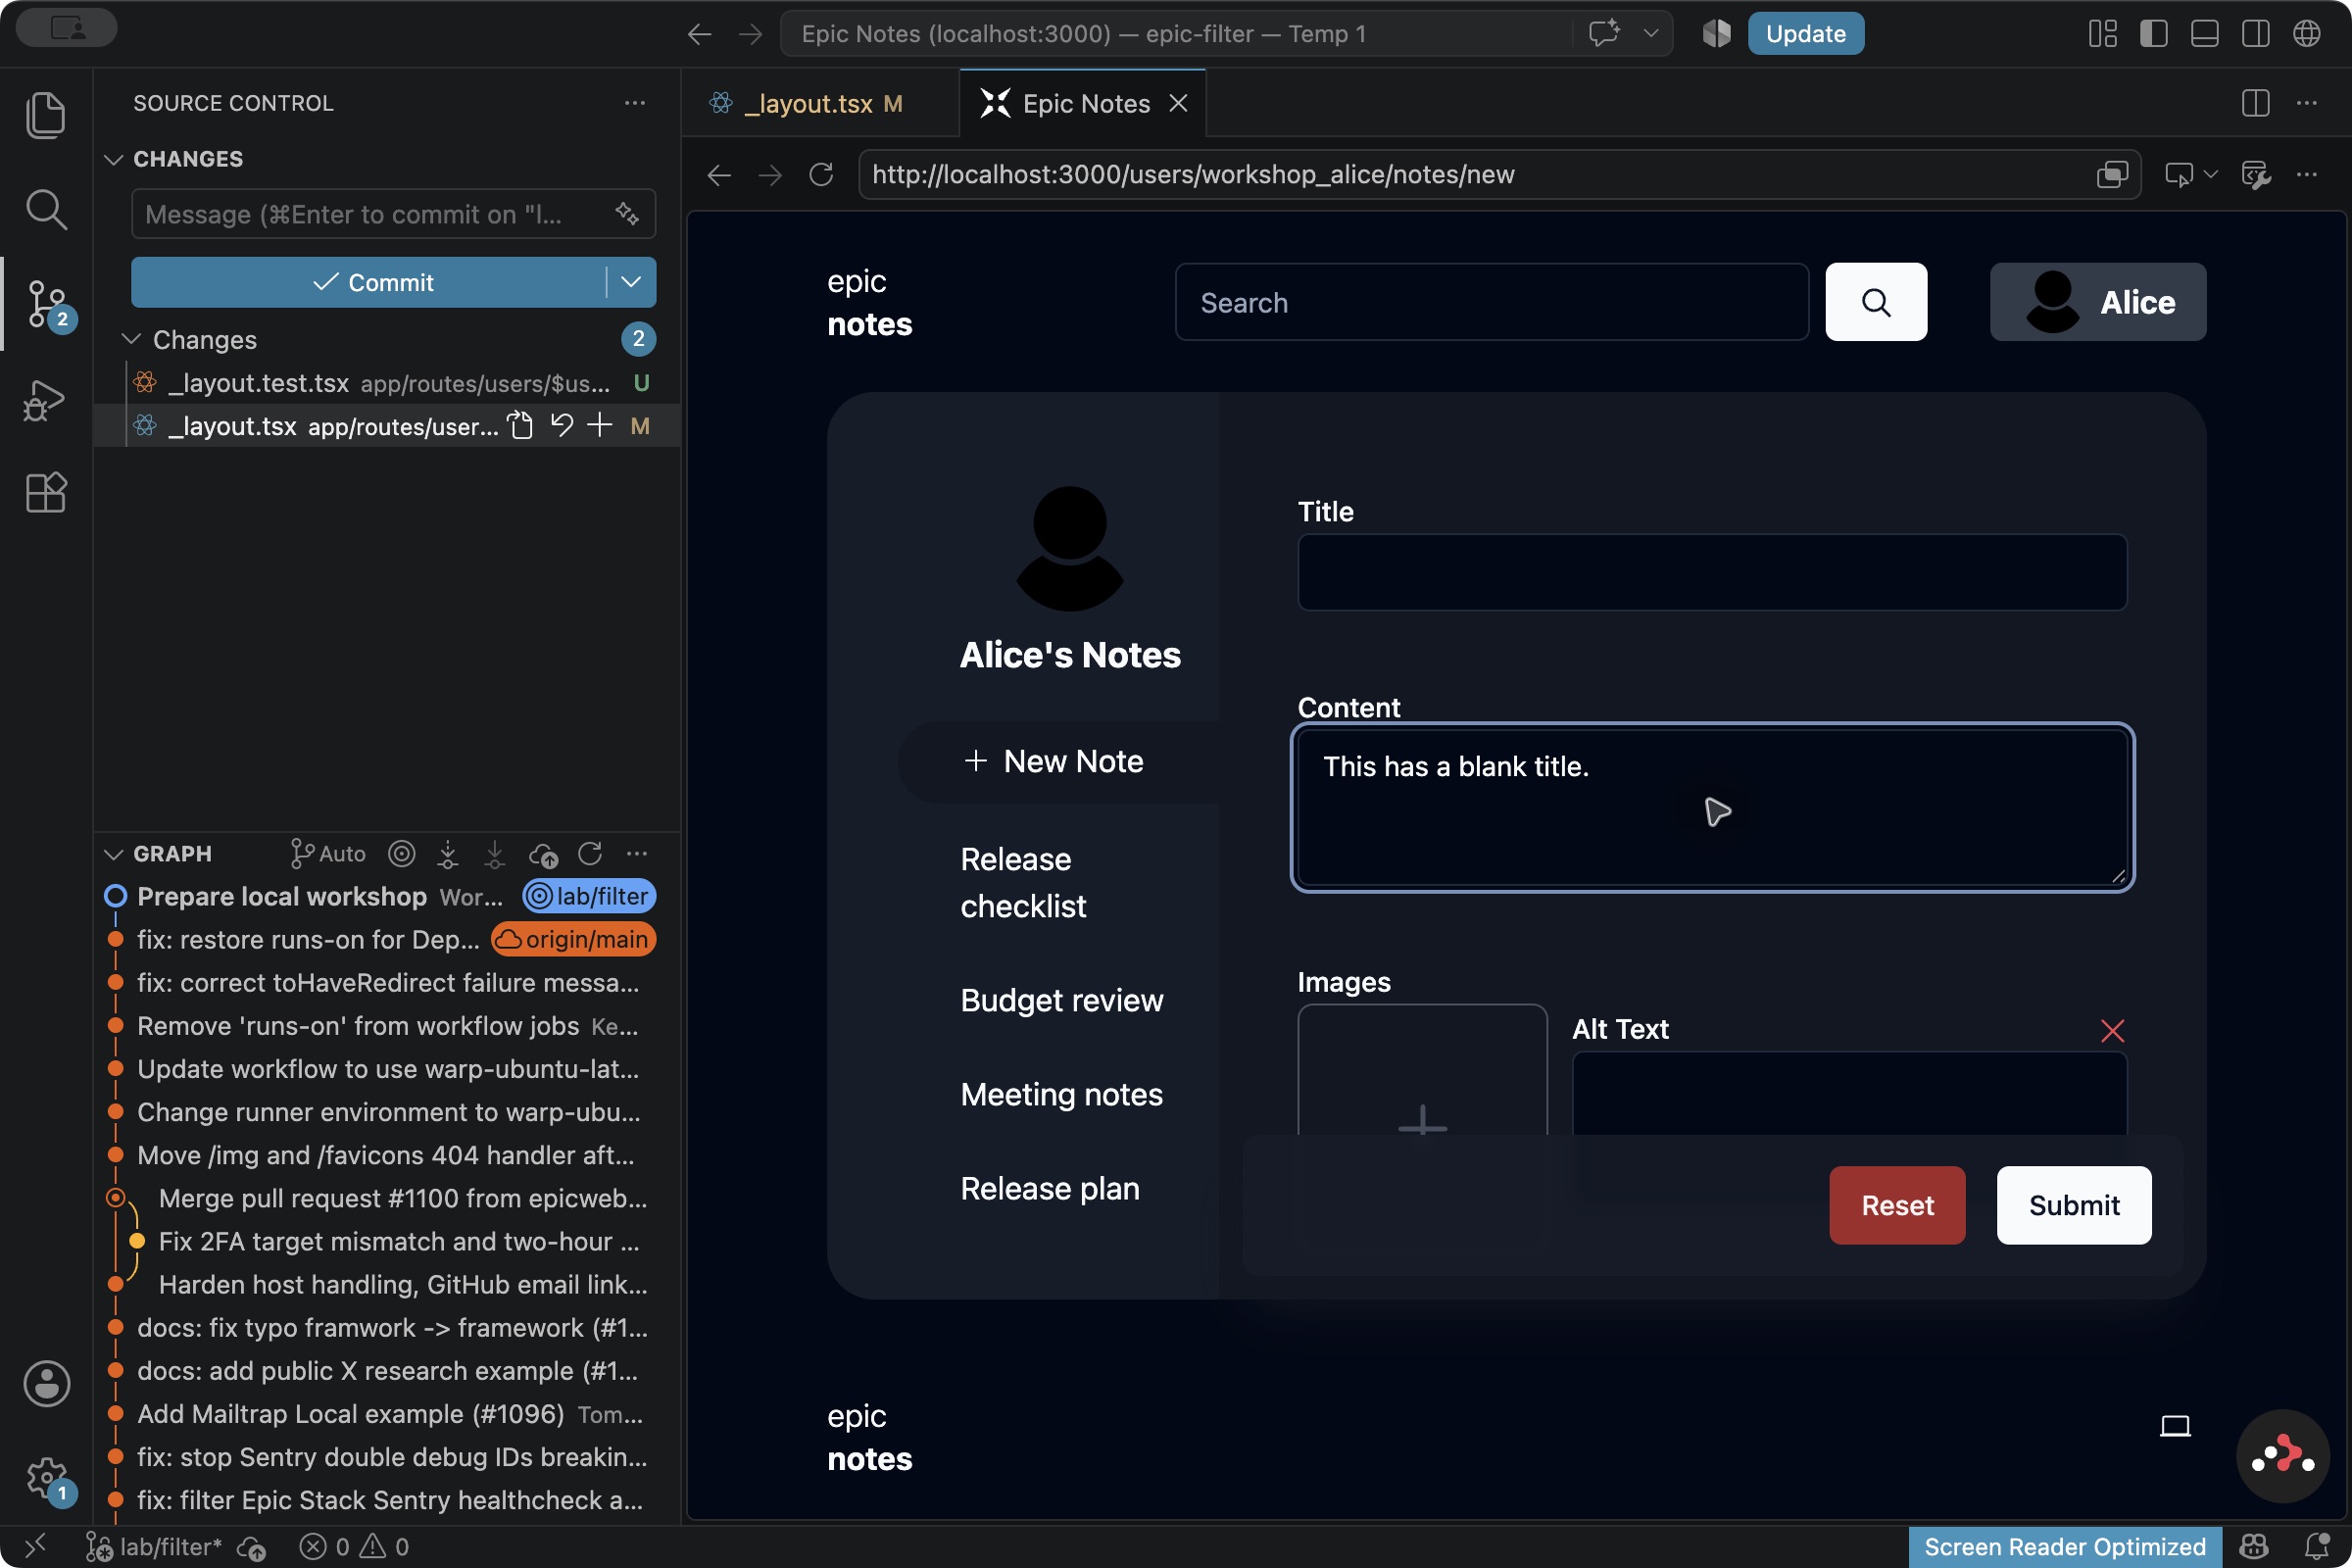
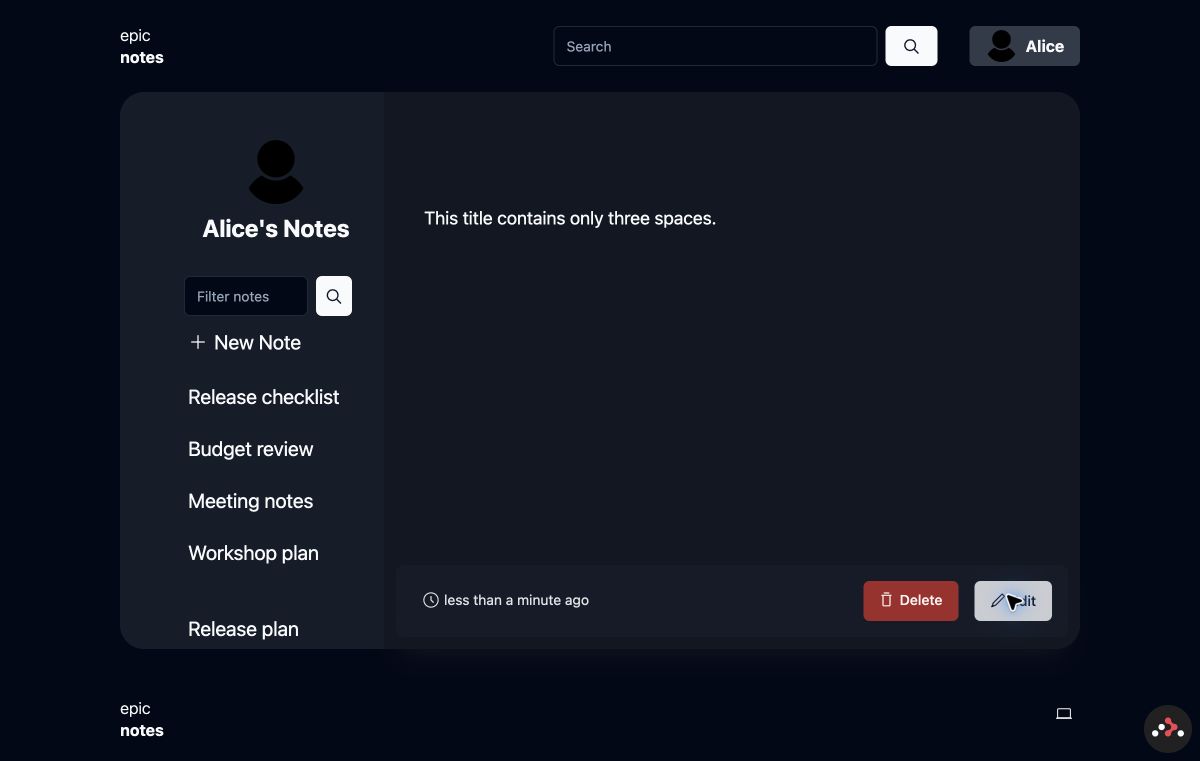
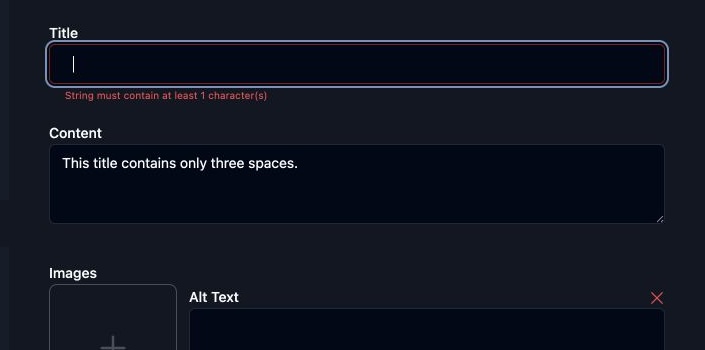
Create a note, put three spaces in the title and This has a blank title. in the content. Save it. The app accepts it. There’s a title as far as the program is concerned, but you can’t see one.
18. Get a failing test before the fix
Give the agent what you observed and what should happen instead. Let it inspect and propose how to reproduce the bug and test it. Check that plan, reply Approved. Proceed within that scope., press Shift+Tab to switch to Build and let it write and run the tests. Keep the app code unchanged for now:
Where: OpenCode · epic-title / lab/title · Plan first; approve the test plan, then Build for test-file changes only.
Objective: produce evidence that detects this reported defect before
fixing it: a note with three spaces as its title is saved when its
content is non-empty.

Expected behavior: reject blank/whitespace-only titles, remove outer
spaces from valid titles, and retain the 100-character limit after
normalization. Valid content and owner edits still work; forged edits
to another owner's note are denied without changing persisted data.

Constraints: keep application code unchanged in this stage. Use the
existing test setup and synthetic local test data. No dependencies,
schema, authentication changes, .env reads, commits or publishing.
Read AGENTS.md and keep normal approvals enabled.

Inspect the relevant code and available tools. Propose how to reproduce
the defect and which tests would detect it. Explain the choice and
stop for approval. Then write and execute the approved checks, show
the relevant failing assertion, and stop before fixing the app.
A setup or syntax error is not the defect failure we need.
Check why the test failed. If a package is missing or there’s a syntax error, we haven’t caught this bug yet. The failure should show the app accepting spaces or keeping unwanted outer spaces. The supplied tests produce 3 failures and 5 passes.
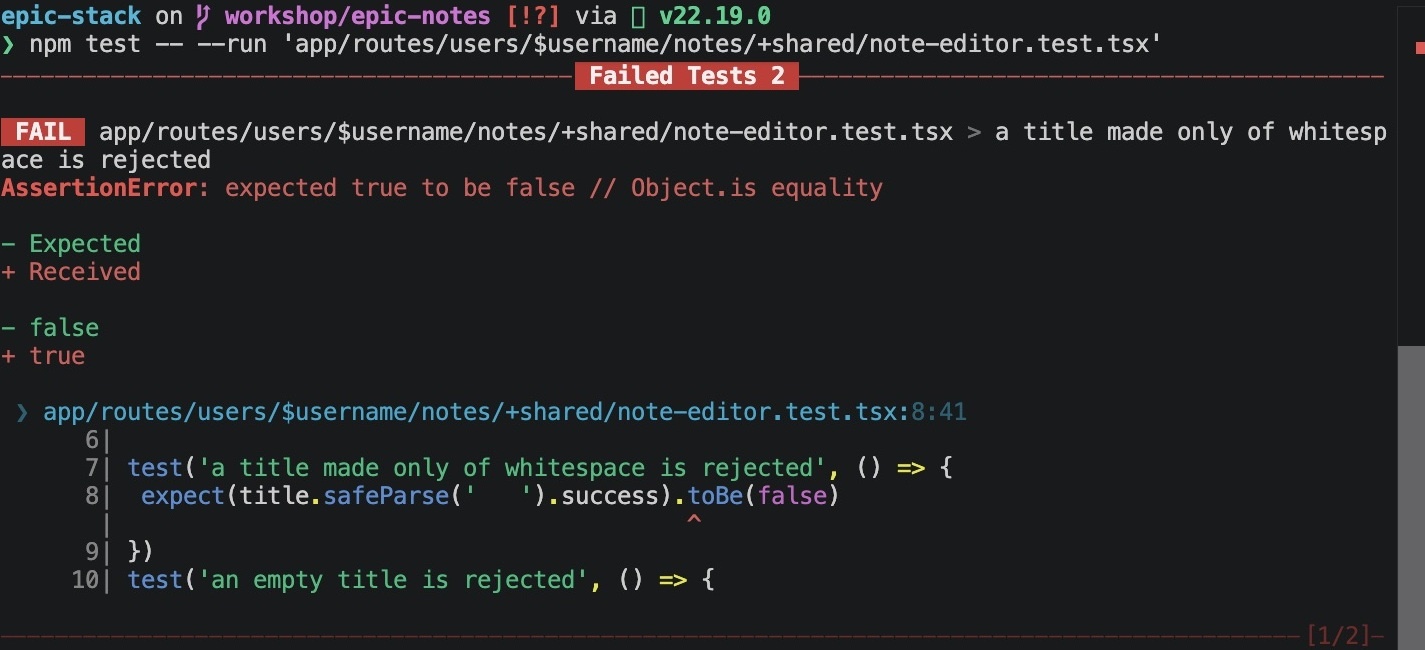
Running the reference tests
Applying the reference regression tests
Use this only if you haven’t made this step’s changes yet. If you’ve already tried it, keep your work and compare using a freshly extracted kit. Don’t apply the patch over your edits.
Read the exact patch. The kit contains the same file. From the epic-title terminal:
git apply --check ../solutions/02-regression-tests.patch
git apply ../solutions/02-regression-tests.patch
If the patch check reports a conflict, stop and compare the files. Don’t force it through.
npm test -- --run --maxWorkers=2 'app/routes/users/$username/notes/+shared/note-editor.test.tsx' 'app/routes/users/$username/notes/+shared/note-editor.server.test.tsx'Keep the $username path in quotes on Windows Git Bash and macOS so the shell leaves the folder name unchanged.
Running the tests before the fix lets us check that they catch the bug. A large generated test suite won’t help if it never detects the behavior we want to change.
Checking the test if you already fixed the bug
Keep your current work. Ask the agent to propose one temporary change to the title rule that would bring the bug back, then restore only that change. Review the proposal before allowing it. Leave authentication alone and don’t create a security hole for the exercise.
Objective: show that our title regression tests can detect the actual
blank-title defect, rather than just producing a green test count.

Constraints: work only in lab/title in this VS Code window. Preserve
the approved tests. Do not alter authentication, dependencies, schema,
lockfiles or real data. No installs, .env reads, commits or deployment.
Use the original implementation first. If it is already repaired,
propose one exact temporary change to the title rule and its exact
restoration; wait for approval before making that change. Keep normal
command approvals. Never use a blanket reset or restore.

Inspect the implementation and tests. Choose the focused check that
would detect this defect and explain why. After approval, run it
against the original/broken rule: show the failing behavioral assertion
and exit code. A syntax error is not a successful demonstration.
If you temporarily changed the rule, restore only that exact change,
rerun the same checks, and show the source diff is back to its prior
state. Report what the tests prove and what they do not cover.
Stop before the repair. Agree on the expected behavior and keep the tests that caught the bug. A setup error isn’t the failure we’re looking for.
Fixing the title and combining the changes
Now the agent can try a repair against the tests we’ve agreed on. After that, we’ll bring the title and filter changes together and check them in the same app.
19. Repair it against the same tests
Before asking for the fix, keep the approved tests fixed. Use the same inputs, expected results and command. Otherwise the agent might get a passing result by changing the test instead of fixing the bug. Ask it to report a hash of each test file. Comparing those hashes lets us check whether the files changed.
Give it ten minutes and at most two repair attempts. It should propose a small change, run the checks and explain what happened. If the first repair passes, stop there.
Where: OpenCode · epic-title / lab/title · Plan first. Approve one candidate, then Build for the scoped repair.
Objective: repair the demonstrated Epic Notes title defect using the
same regression checks as a fixed evaluator.

Success: reject whitespace-only titles; trim outer spaces on valid
titles; apply the 100-character limit after trimming. Preserve valid
content, owner edits and other-user denial without data changes.

Constraints: work only in lab/title. Freeze the approved evaluator
tests before the first attempt: record their paths and hashes, then
do not edit them. Change only +shared/note-editor.tsx. No dependencies,
schema, lockfile, authentication or permission changes; no .env reads,
installs, commits, publishing or subagents. Keep normal approvals.
Budget: 10 minutes and at most two candidate repairs, one at a time.
Stop early when the focused checks pass. Never weaken the evaluator.

Inspect the failure and available tools. Propose your first hypothesis,
the smallest change and how you will measure it. Stop for approval.
Then implement one candidate and run the frozen focused tests.
Record the hypothesis, diff, command, exit code, pass/fail counts and
evaluator hashes. If it fails, explain the failure before proposing
one different candidate within the remaining budget. Stop if blocked.
After a pass, run the documented project gates and hand off for fresh
review. Say what remains unverified. Do not invent a second attempt
when the first already meets the requirement.
Have the agent report each result in chat. You can copy the rows into the kit’s experiment-log.csv; that doesn’t give it permission to edit another app file. Keep the failing starting result too. If a run times out or is blocked, record that separately from a repair that ran and failed.
Original rule: whitespace can pass the length check.
min → max → trim: trimming happens too late.
trim → min → max: validate the normalized title.
Keep the evaluator files unchanged between candidates.
Using the reference title repair without a model
Use this after the reference tests have caught the bug, while the title implementation is still unchanged. Keep the tests fixed. In epic-title / lab/title:
git apply --check ../solutions/03-title-fix.patch
git apply ../solutions/03-title-fix.patch
If the patch check fails, stop and keep your work. Read the patch to compare it with your files. Run the same focused tests again:
npm test -- --run --maxWorkers=2 'app/routes/users/$username/notes/+shared/note-editor.test.tsx' 'app/routes/users/$username/notes/+shared/note-editor.server.test.tsx'All eight reference checks should pass. Run the full suite too. You’ve tested the supplied repair here; an agent didn’t generate this change.
Comparing the title repair with the reference
title: z.string().trim().min(titleMinLength).max(titleMaxLength),The order matters here. If trim() comes after min(), three spaces pass the length check and then become an empty string. The reference line above puts trim first. Let the agent explain its own repair before opening this hint.
The reference title branch has 50 passing tests: the original 42 plus 8 title/server checks. Bringing in the filter’s 5 checks gives 55 in the combined reference. An agent may write different useful tests, so its count can differ.
Once the repair passes, let the agent run the project checks. In the preview, try spaces, a padded title, a normal title and edits as the owner and another user. Keep one extra case for your final check, such as a 100-character title with padding. It checks another boundary; it doesn’t establish that every possible case works.
To check the repair, click New Note in the title window’s app. Enter three spaces in Title and the same non-empty Content, then click Submit. You should stay in the editor with a title error. Try Workshop plan next; it should save as Workshop plan.
This is how we’ll use the idea of evaluation and hillclimbing: try a change, check it against fixed criteria and keep it if it improves the result. We’re doing that in OpenCode. You don’t need the Claude-specific commands from the article.
20. Bring the changes back to epic-stack
Stop the title server with Ctrl+C. Go back to epic-stack / lab/notes, start node workshop/dev.mjs there and open that server’s printed Local address in that window’s VS Code browser. Sign in again if needed. Check both branches before combining them. The local commits save their accepted changes in Git; nothing is published.
Where: OpenCode · epic-stack / lab/notes · Plan first. Approve the exact named-file commits and merge sequence, then Build.
Objective: bring our accepted filter and title-fix work together in
the coordinator checkout, then demonstrate that both still work.

Constraints: coordinator is lab/notes in epic-stack. Inspect branch and
worktree status first. Do not edit another session's uncommitted work.
No pushes, installs, new dependencies, .env reads or deployment.
Normal approvals remain on. You may propose named-file local commits
on lab/filter and lab/title and a local merge after I approve the
exact file lists and messages. Use the disposable repository-only
author identity from the workshop, not global Git configuration.
Do not commit database, environment or generated files. If a merge
conflicts, stop and explain the conflict before changing files.

Inspect the two branch diffs and acceptance evidence. Propose the
smallest integration sequence, get approval, then integrate the
accepted commits. Run the full tests, types, lint and diff checks.
Show the actual resulting branch/commit, changed paths and output.
Stop for a fresh read-only review. Give me the filter, title and
ownership cases to evaluate in VS Code's integrated browser.
Committing the supplied reference changes
Use these file lists only if you used the supplied patches. First confirm the filter tests passed and the title tests failed before the fix and passed afterward. In the epic-filter / lab/filter window:
git add 'app/routes/users/$username/notes/_layout.tsx' 'app/routes/users/$username/notes/_layout.test.tsx'
git -c user.name="Workshop Learner" -c user.email="learner@example.test" commit -m "Filter note titles within the selected owner"
git status --short
In the epic-title / lab/title window:
git add 'app/routes/users/$username/notes/+shared/note-editor.tsx' 'app/routes/users/$username/notes/+shared/note-editor.test.tsx' 'app/routes/users/$username/notes/+shared/note-editor.server.test.tsx'
git -c user.name="Workshop Learner" -c user.email="learner@example.test" commit -m "Reject blank note titles and normalize valid titles"
git status --short
Git status should be empty in both worktrees. Return to the coordinator and follow the integration commands below. Stop if there’s a conflict. If your agent changed different files, inspect those files before choosing what to commit; don’t copy these lists blindly.
Reference commands for combining the branches
Commit only the accepted feature and test files in each worktree, using the disposable author identity. In the reference, the filter branch changes _layout.tsx and its test. The title branch changes the schema and adds the two title/server test files. Check the actual files if your agent used different names.
git status --short
git worktree list
git -c user.name="Workshop Learner" -c user.email="learner@example.test" merge --ff-only lab/filter
git -c user.name="Workshop Learner" -c user.email="learner@example.test" merge --no-ff --no-edit lab/title
If Git reports a conflict, stop and ask the agent to explain it. Check what each side does before resolving it. Run the checks again after integration, even if both branches passed on their own.
21. Start a fresh review
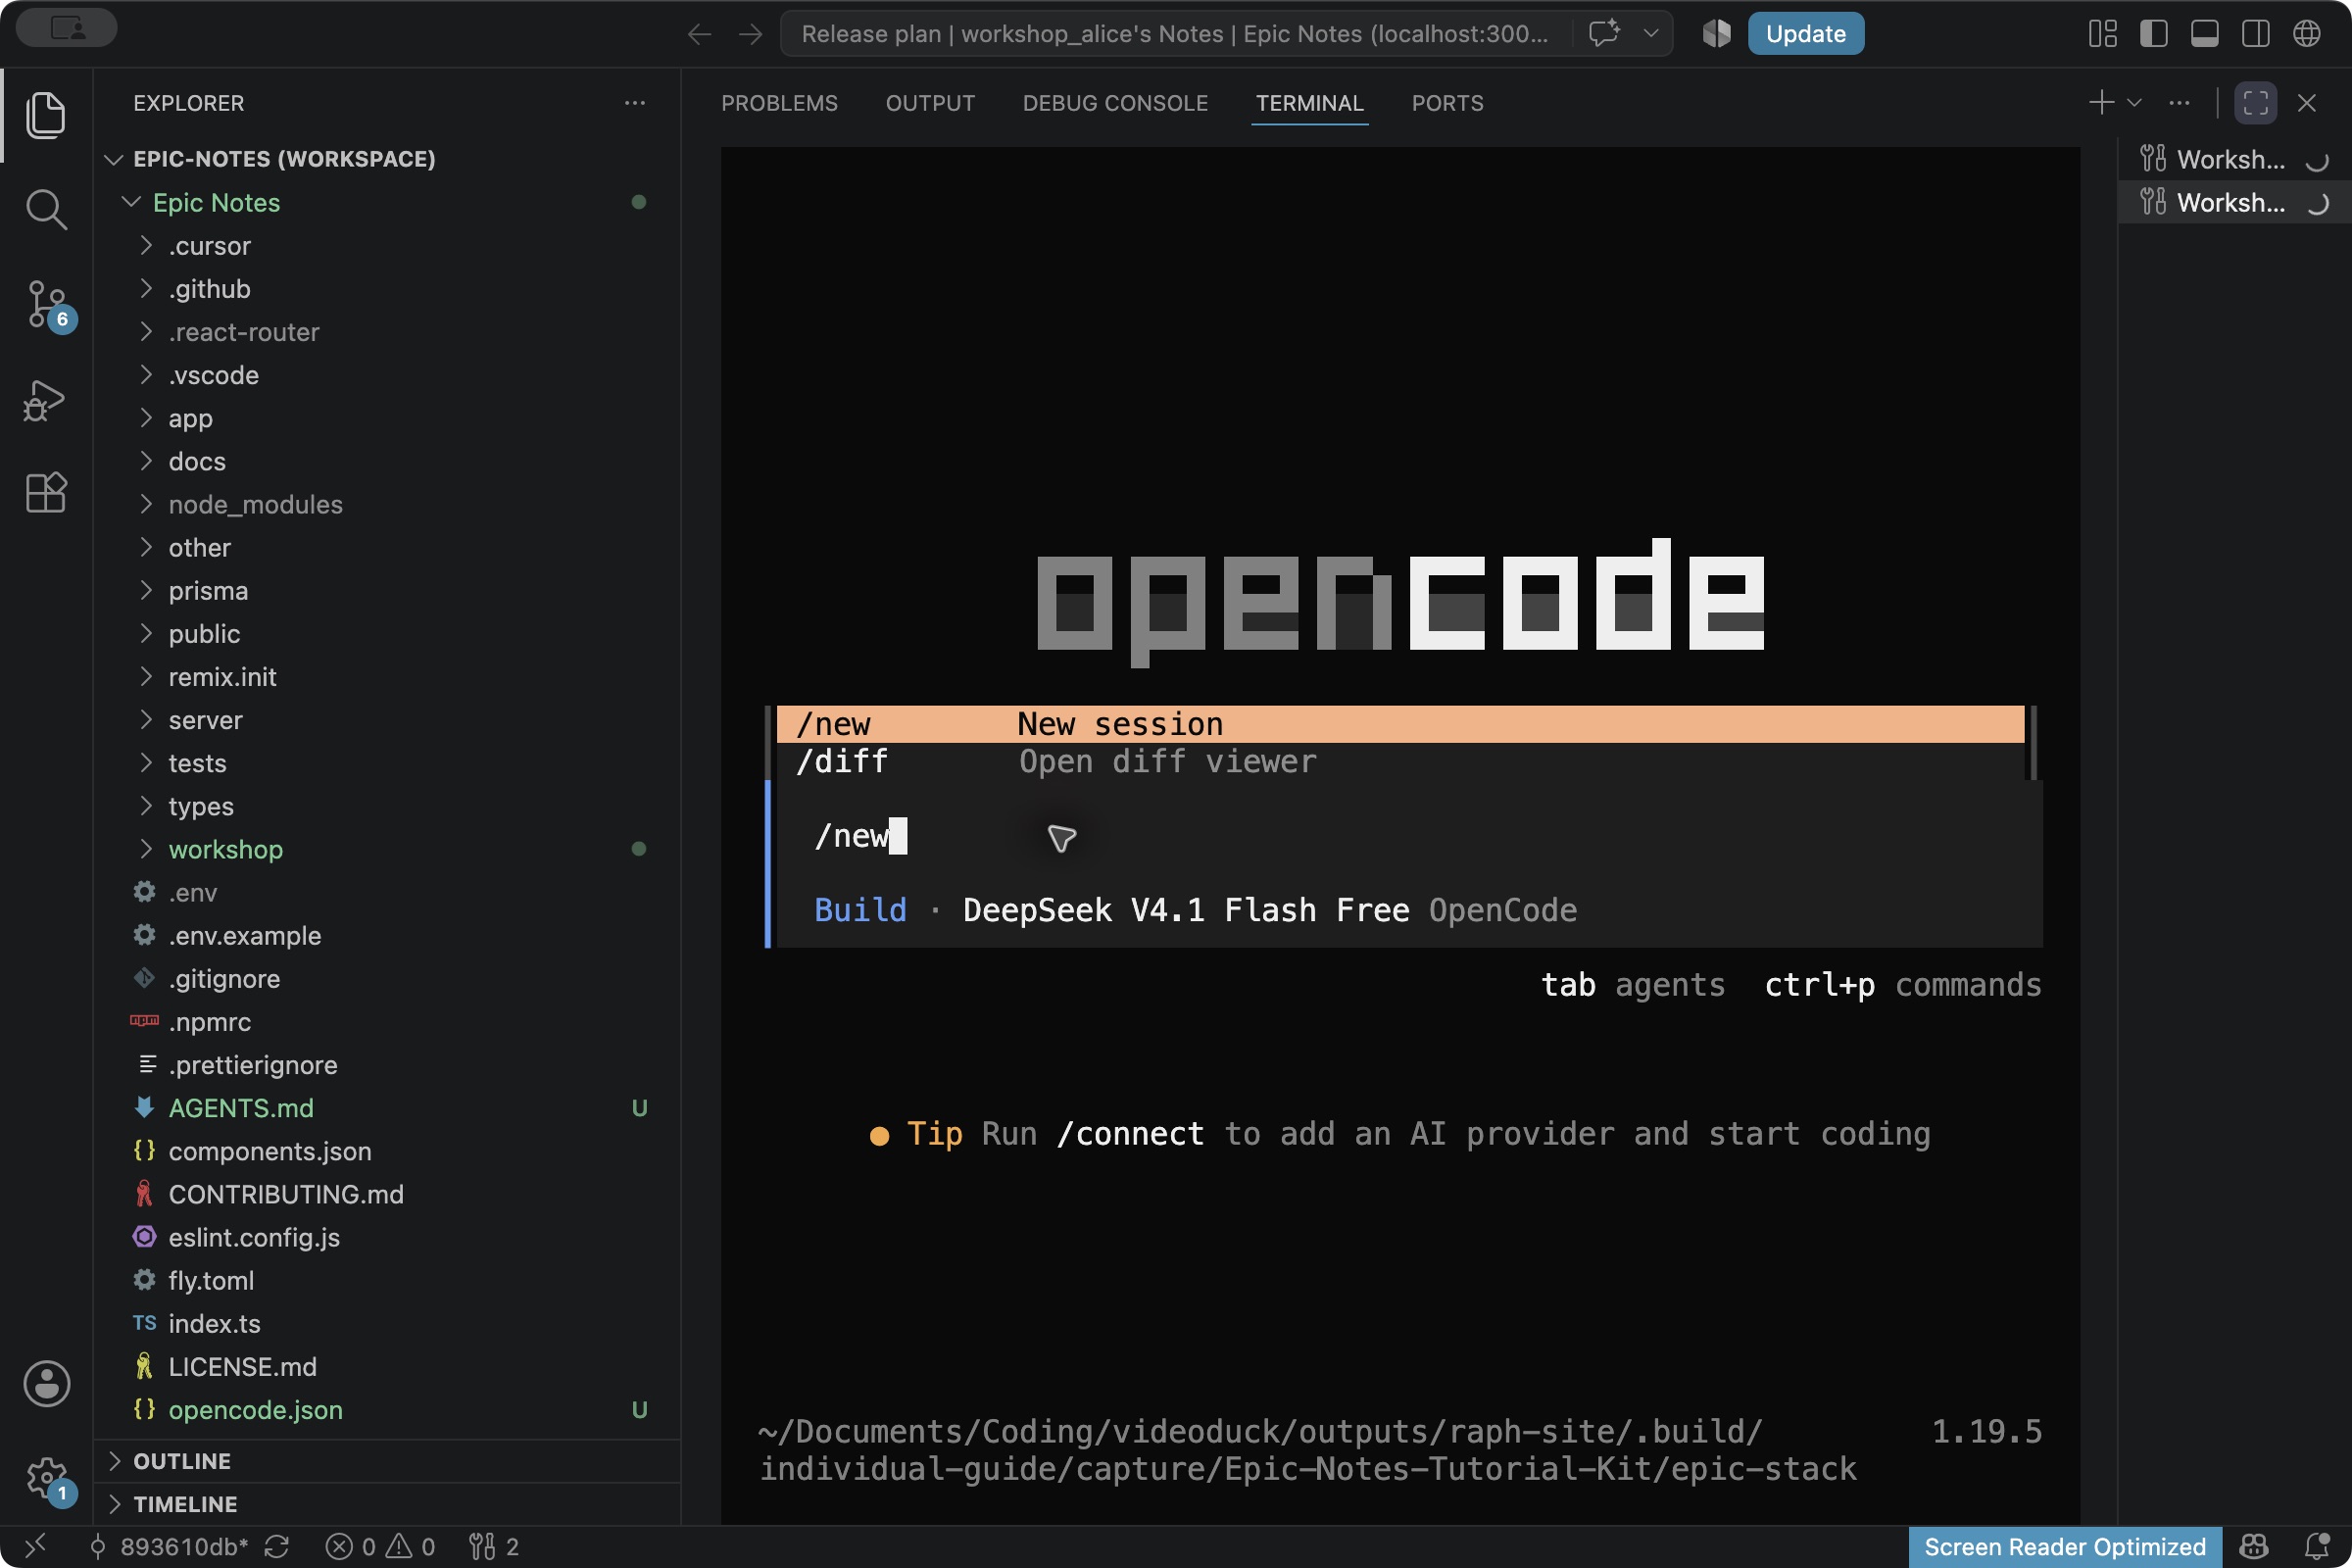
Click the OpenCode message box in epic-stack, type /new and press Enter. Select Plan with Shift+Tab. This gives the reviewer a fresh conversation. It can inspect the files without inheriting the implementation chat’s explanation. Include git diff workshop-start...HEAD along with uncommitted changes: Git status can be clean after the features have been committed. Keep only one writing session active in the folder.
Give the reviewer this prompt. Let it propose how to inspect the changes and check the acceptance cases, then review the plan before approving the checks. Plan mode denies source edits:
Where: Fresh OpenCode conversation · epic-stack / lab/notes · Plan. Keep source changes disabled during review.
Objective: independently assess whether the current Epic Notes change
satisfies the acceptance cases and is ready for the learner to evaluate.

Constraints: this is a fresh, read-only review in VS Code. Read AGENTS.md.
Do not edit source, tests, config or instructions, read .env, install,
commit or deploy. Tests may use synthetic test data; do not seed,
reset or migrate the application database. Keep normal approvals on.

Inspect the actual working-tree state, uncommitted changes and new
untracked tests. If workshop-start exists, also review
git diff workshop-start...HEAD: the integrated features are committed.
If it is absent in a fresh optional comparison, say so and review the
actual candidate diff instead. Do not create or invent the marker.
Do not rely on the writer's summary. Check the filter behavior,
Clear resetting the input, title validation and existing edit denial.
Look for weakened checks, unrelated changes and coverage gaps.

Choose inspection and verification tools from those actually available.
Explain the approach and stop for approval before executing checks.
Include the repo's documented test, type, lint and diff-cleanliness
gates. Then report actual commands, exit codes and totals. Give each
concrete finding a severity, file/line evidence and proposed fix.
Say if there are no concrete findings. Do not invent a defect or
claim a browser check you could not perform.
Open the files and test output behind the review. If it says everything looks good, ask which cases it checked. It should run the project’s required checks and can add focused checks where they help.
The project’s verification commands
npm test -- --run --maxWorkers=2
npm run typecheck
npm run lint
git diff --check
git diff
git status --short
These are the commands for the repository we prepared. Giving the agent the real project commands helps it plan; it can still choose how to investigate the task.
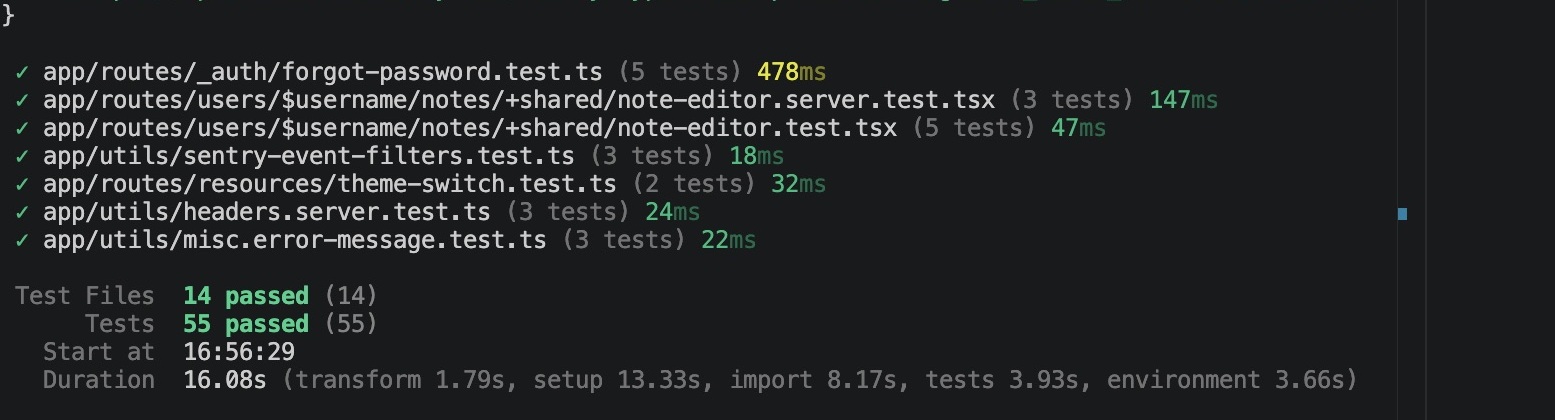
The full reference path gives 55 passing tests, a successful typecheck and no lint errors. There are four import-order warnings in the current kit: three in upstream remix.init/index.mjs and one in the workshop helper workshop/add-worktrees.mjs. They’re outside the note feature changes.
If the reviewer finds a specific problem, give that finding to the implementation agent in Plan. Check its proposed repair, approve the scope, then switch to Build for the correction and tests. Request another fresh review afterward:
Where: OpenCode · epic-stack / lab/notes · Plan first. Replace the bracketed placeholder with the actual finding, then send.
Objective: resolve this concrete review finding:
[paste the finding and its file/line evidence]

Constraints: preserve the other accepted behavior, tests and scope.
No lint suppressions, weaker tests, new dependencies, installs, .env
reads, commits or publishing. Work in VS Code with normal approvals.

Inspect the finding and actual code. Choose the smallest correction
and tools to demonstrate it is resolved. Explain your plan and wait.
After approval, implement and execute the relevant checks and project
gates. Report actual results and remaining uncertainty.
22. Check the result yourself
Now try the app in VS Code’s preview. As Alice, open one of your notes, click Edit, change Content and click Submit. Refresh to check it saved. In the preview’s address box, keep this server’s host and replace the path with /users/workshop_bob/notes. Open Bob’s Release checklist. Click the address box, append /edit to that actual note URL and press Enter. Reading is public, but the edit should be denied and Bob’s content should stay unchanged. The agent’s server regression should also test a forged update directly.
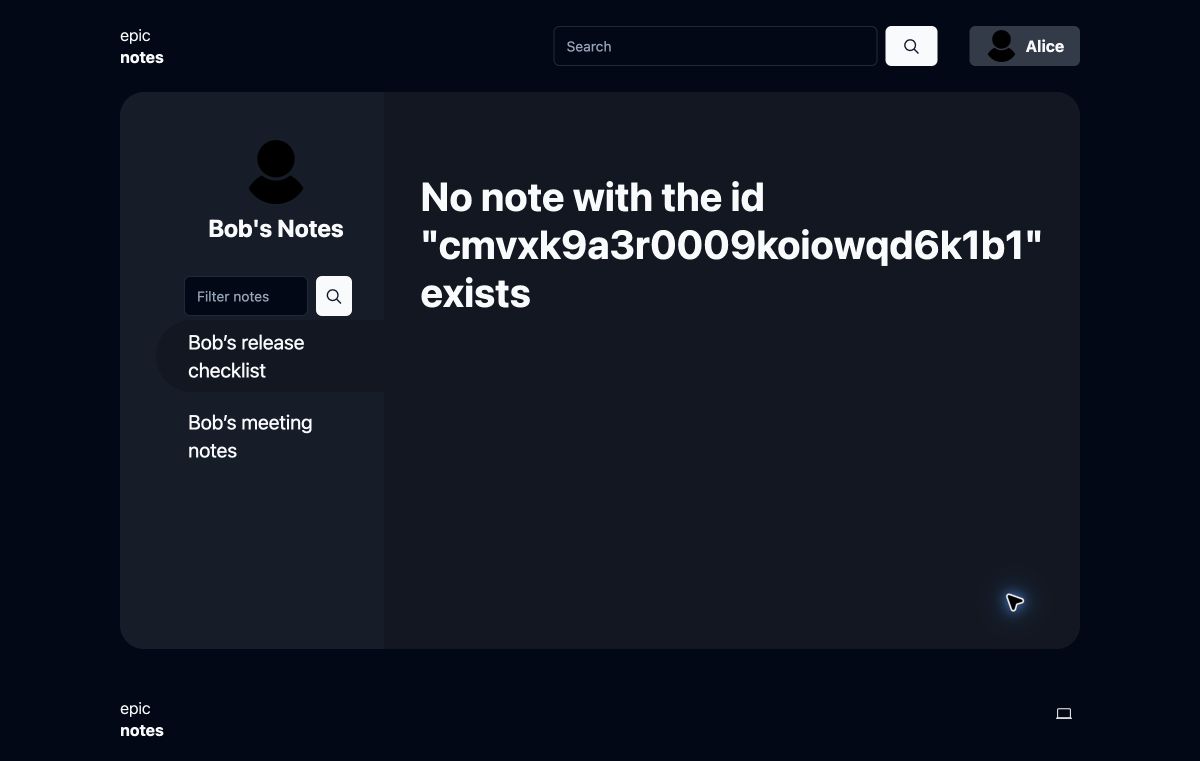
Finish when the cases you tried work and the review has no unresolved blocking finding. If something still surprises you, ask the agent to show the relevant code and investigate it. Keep any unchecked behavior in your final notes.
Saving your work or recovering from a mistake
Ask the agent to propose a commit with specific files, or a recovery plan if needed. Check the scope in Source Control before approving it. Include new tests; ordinary git diff can miss untracked files. Avoid broad reset or clean commands. Keep your work and extract a fresh kit if you need to compare with the reference patches.
Showing the result
Try the combined app yourself. In a few sentences, write what you asked for, what the failing test caught and what changed after the repair. If something surprised you or remains unchecked, include it.
Take the same ten-question post-test before comparing answers. If you’re reading alone, look at your starting notes. What would you ask an agent to do now? How would you check the result?
Trying this on your own codebase
If an explanation isn’t helping, ask the agent to show the actual route, test or documentation. Open it, then try the behavior it describes.
Choose one small bug or feature in a repository you’re allowed to share with the tool. Start a branch, check the unchanged tests and give it this:
Objective: help me scope this small change in an existing codebase:
[describe the user outcome and observable success cases]

Constraints: [approved environment, data access, budget and boundaries].
Stay in VS Code. Read the project instructions. Do not edit, install,
migrate data or deploy while planning. Do not access credentials.

Inspect the current behavior and available capabilities first.
Choose an approach and the tools needed, based on the repository.
Explain why they fit, the smallest file scope and how to demonstrate
success. Identify assumptions, missing access and external services.
Ask about decisions that affect the outcome. Stop for plan review.
Keep the project commands and limits in a short AGENTS.md. Give the agent the job, let it inspect and propose an approach, then check the plan. Once approved, it can implement and test. Ask for a fresh review and try the behavior yourself. If you want to know whether it saved time, count the review and rework too.
Using more agents or running an open-weight model
We used two separate sessions in different worktrees. Run them together only when the jobs are independent and your laptop and model limits allow it. Otherwise, do one after the other. Subagents stay disabled in this kit, and you decide how to integrate the changes.
Open weights means you can access the weights under a license. Check what that license allows and how you’ll host the model. Running it locally may keep code on your computer, but you still need to inspect the tools and telemetry. Local inference isn’t required for these labs.
Keeping up with changes
Use X to follow maintainers and researchers, then open the release notes, papers or repositories behind their posts. Creating the account helps you find updates; you still need to check the claims and try a small task.
On YouTube, look for a recent uncut demo on a real repository. Pause it and try the steps. You should be able to check what it demonstrates.
Go back to the small task you wrote down earlier. You now have a way to start: explain the problem, let the agent inspect it, then try what it makes. Keep the first attempt small enough that you can check the result.
Optional: comparing two models on the lab
Set aside about 25–40 minutes after setup. Run both candidates yourself, one at a time. We’ll give both the same starting files, tests, tools and budget. Each agent can propose its own approach within those limits. This tells us about a small local task; it won’t replace a published benchmark.
- Keep your finished lab. Extract the kit into two new parent folders,
model-aandmodel-b. Runnode prepare.mjsin each kit, thencd epic-stack. Check that both start with 42 passing tests. Don’t copy the completed solution or reuse a conversation that has seen it. - In each checkout, apply only solutions 01 and 02 below. Leave solution 03 closed. Run the focused tests and check for the same 3 failures and 5 passes. If the results differ, investigate setup before comparing models.
git apply --check ../solutions/01-filter.patch
git apply ../solutions/01-filter.patch
git apply --check ../solutions/02-regression-tests.patch
git apply ../solutions/02-regression-tests.patch
npm test -- --run --maxWorkers=2 'app/routes/users/$username/notes/+shared/note-editor.test.tsx' 'app/routes/users/$username/notes/+shared/note-editor.server.test.tsx'- Start a fresh OpenCode session in each checkout and choose the candidates through
/models. Keep the OpenCode version, permissions, prompts and reasoning settings the same where supported. Record differences. If you compare Claude Code with OpenCode, you’re also comparing their tool setups, so include that in the result. - Give each workflow 10 minutes and at most two corrective prompts. Count implementation, test runs, fresh review and your evaluation. Keep the fresh-review prompt and settings the same for both. If a quota or connection blocks a run, record it as blocked. Don’t let either model read the other’s answer.
- Paste the same task into both. Check the short plan before approving it and record any extra steering you give. Keep reference solution 03 closed during the scored attempt.
Objective: fix the reproduced whitespace-title defect in this Epic
Notes comparison checkout and demonstrate the accepted behavior.

Success: reject empty/whitespace-only titles; normalize outer spaces;
retain the 100-character limit after normalization; preserve valid
content, owner edits and other-user denial.

Constraints: this is a controlled comparison with supplied evaluator
tests. Do not edit them or inspect solution 03. Change only
+shared/note-editor.tsx. Keep the same VS Code/OpenCode setup,
available tools, permissions and budget for both candidates.
No dependencies, schema, lockfile or authentication changes,
.env reads, installs, commits, publishing or delegation.

Read AGENTS.md and inspect the failing evidence and available tools.
Choose your repair and verification approach, justify the choices
and stop after the plan. After approval, implement and execute your
checks and the documented project gates. Report actual commands,
exit codes, totals and gaps. Hand off for the same fresh-review prompt.- Ask each agent to rerun the focused command (8 checks), full suite (55 reference tests), typecheck, lint and
git diff --check. For each candidate, start a fresh Plan session with the integration chapter’s review prompt. It should inspect the actual files, confirm the evaluator tests are unchanged and report source edits outside the one allowed file. Check the results; the original tests passing alone won’t show that this bug was fixed. - Run one checkout’s
node workshop/dev.mjsat a time. Stop it with Ctrl+C before starting the other on port 3000. Use synthetic accounts. Try spaces, a padded title, a normal save, an owner edit and another user’s denied edit. Refresh to check what persisted. - Fill in the table from actual output. Start with whether each result is correct and reviewable within the budget. If both pass, compare review time, steering and cost. One attempt only tells you so much. Repeat on fresh copies two or three times if time and free access allow it.
Task: whitespace-title fix | Date:
Upstream: 893610d | OpenCode: 2.2.5
                         Model A       Model B
Exact provider/model ID:
Checkpoint (or unknown):
Reasoning setting:
Focused checks:          __ / 8        __ / 8
Full suite:              __ / 55       __ / 55
Types / lint:
Browser acceptance cases:
Unrelated changes:
Total minutes incl review:
Corrective prompts:
Reported cost or unknown:
Verdict and remaining gaps:
Never fill a result you did not observe.
Comparing them on another task
To compare explanations, use two fresh 42-test copies and the read-only orientation prompt. Check the file paths and ownership rules each model describes. Note invented paths and explanations that helped. Keep both copies unchanged.
To compare feature work, start with two fresh 42-test copies again. Use identical filter plan/build prompts and budgets. Try uppercase matches, no match, blank input and Clear. Check that another owner’s notes are excluded. Keep the acceptance cases fixed. Both models need the same starting app; don’t give one the completed filter.
Simon Willison describes running the starting tests and trying the running software. Use those checks in your comparison. Keep the model that helped on your work and try again when a new release gives you a reason.
More exercises if you finish early
Pick one and keep your completed lab as a checkpoint. Use a new branch for the exercise. The times are estimates; you don’t need to finish the whole list.
Write what you expect and how you’d catch a wrong result before asking the agent to implement it. Let it inspect and propose an approach before opening a hint. If you use a hint during a comparison, record the extra help.
1. Adding a result count
About 10–15 minutes
Show a result count beside the title filter.
With no query, show the count of this owner’s notes. With a matching query, count exactly the visible matches. With no match, show 0. Clear should restore the full count and empty the input. Other owners’ notes must never contribute.
A hint after you’ve made a plan
The loader already returns the filtered owner.notes array. Count the notes, leaving out the New Note link. Add a UI assertion and try all four states.
2. Sorting the filtered notes
About 20–30 minutes
Add an optional “Recently updated” sort while retaining the current default order.
Changing sort should keep the active title filter. Sort only the displayed owner’s matches by updatedAt descending, using id to break ties consistently. An unknown sort value should use the existing default. Clear should remove the filter and keep the chosen sort.
A hint after you’ve made a plan
The Note model already has updatedAt. For the new sort, put an explicit orderBy inside the owner’s notes relation. Test fixed timestamps, tied timestamps, another owner and an invalid sort value.
3. Showing the title’s character count
About 20–30 minutes
Add a live title-length counter to the existing editor.
Show the trimmed title’s length out of 100 on both create and edit, including the initial value. Update it while typing. Spaces alone should still fail. The server should accept 100 normalized characters and reject 101. Keep the existing error message and save flow.
A hint after you’ve made a plan
Check the existing Conform field metadata before adding duplicate state. Connect the counter to the input with aria-describedby, without announcing every keystroke. Include a component test, keyboard check and server boundary cases.
4. Checking who can delete a note
About 20–30 minutes
Add a regression test for the existing note-delete action. Investigate the current behavior before changing it.
Create synthetic Alice and Bob notes. While signed in as Alice, submit Bob’s actual note ID to the delete action. Check that it’s denied and Bob’s note still exists. In a separate case, confirm Alice can delete her own note. Keep public reading unchanged.
A hint after you’ve made a plan
Find the real action in $noteId.tsx and reuse the server-test authentication helpers. The test database starts unseeded. Give the fixture user a role with delete:note:own, without delete:note:any, so the owner case can succeed. Check the server action as well as the button. If the existing protection passes, report that; don’t invent a vulnerability.
5. Trying another model
Use the comparison above for one task. Bring back both diffs and the completed scorecard. Explain which model you’d use next time and what could change that choice.
6. Checking an access rule
Try the security preparation exercise after the core lab. Let the agent inspect and propose its tools, then choose one regression check. Explain what it demonstrated and what you haven’t checked.
A prompt you can reuse for these exercises
Objective: deliver this chosen Epic Notes improvement:
[paste the user outcome and acceptance cases]

Constraints: use this existing VS Code project and approved tools.
Preserve ownership and title validation. No dependencies, migrations,
lockfile changes, installs, .env reads, commits or publishing.
Read AGENTS.md and keep normal permissions enabled.

Inspect the code and available capabilities before choosing an
approach or tools. Explain your choices, the smallest scope and
how to detect a wrong result. Ask about product decisions and stop.
After I approve, write and run a meaningful test, show that it detects
the missing behavior, then implement and execute the project gates.
Report actual commands, exit codes and gaps. Hand off for a fresh
Plan review and give me cases to evaluate in VS Code's preview.
Let the agent implement and run the tests, then use the integration chapter’s fresh-review prompt. Try the app yourself and write down the results you checked. Explain one decision you made during the exercise.
Other exercises to try later
Once the combined lab works, pick one of these. Save the result on a new branch. Use this prompt with the outcome described below:
Objective: complete this optional Epic Notes exercise:
[paste one outcome and its acceptance cases]

Constraints: use the existing VS Code project and approved capabilities.
Preserve the finished core lab, ownership, validation and normal
permissions. Synthetic data only. No installs, new service accounts,
.env reads, paid services, commits or deployment without approval.

Inspect the repo and your available capabilities before choosing an
approach or tools. Explain the smallest scope and evidence needed;
stop for approval. If a capability is missing, explain the need first.
Then implement or investigate, run relevant checks, and hand off for
a fresh review. Give me a result I can evaluate in VS Code. Label
unperformed checks and uncertain conclusions honestly.
Dictating the requirement
Use an approved voice input tool already on your laptop to dictate a bug report. Ask the agent to explain the acceptance cases before planning, then check whether it captured the important details. Keep secrets out of the recording. FluidVoice is one option, but its Windows support is beta and needs a pilot first. This exercise doesn’t require a new installation or subscription.
Drawing the path through the code
Ask for a Mermaid diagram of note creation, from the route through validation and authentication to the database write. Have it cite a real file and function for each node. Preview the diagram in VS Code if that’s already supported, or read the Mermaid source. Check one claim against the code and question any invented path or service.
Writing a troubleshooting guide
Ask the agent to write a short guide for a classmate whose filter returns no notes. It should use this repository’s actual route, input and owner rules, with the expected response and a safe diagnostic at each step. Verify the paths and commands, then follow it yourself in a fresh session without filling in missing steps from memory.
Planning semantic search
Ask for a read-only plan to find related notes without an exact keyword match. Use synthetic examples and compare with the existing substring filter. Decide what relevant results would look like first. Let the agent explain its approach, cost and where the data goes. Stop before a model download, new service or dependency. If the needed tool isn’t available, a clear plan is enough for this exercise.
Checking a small dataset
Give the agent a synthetic CSV of note activity with some known missing values, duplicate events and unusual changes. Ask it to investigate and produce a reproducible summary in VS Code. Check whether it found the cases you planted and ask for the calculation behind each claim. Keep the source data unchanged.
Optional: checking a security rule in Epic Notes
Allow 15–25 minutes after the integrated lab. Keep your finished lab as a checkpoint and start a new branch. Use this optional exercise after the core lab, once the app and its checks are working.
- Stay in the same VS Code workspace. Keep the local app running. Start
/newin OpenCode and use Plan. - Give it the outcome and limits first. Let it inspect the code and propose tools:
Objective: identify the three most important security boundaries in
this local Epic Notes app and propose one useful regression check.
Success: each finding cites an actual file/function, the protected
operation, who should be allowed, and evidence that could prove it wrong.

Constraints: read-only planning inside this approved VS Code project.
Use synthetic data only. No .env/secrets, external directories, installs,
network scans, public targets, dependency upgrades, configuration edits,
commits or deployment. Public note reading is intended behavior.
Existing AGENTS.md rules, permissions and project gates still apply.

Inspect the repository and available capabilities before choosing tools.
Explain what is confirmed, what is only a hypothesis, and what you cannot
verify. Choose your approach, justify it and stop after the plan.
Do not invent a vulnerability because a security exercise asks for one.
Check that it names three specific boundaries, cites real files and functions, and proposes one check. Ask what it confirmed and what it’s assuming. Reading another user’s note is allowed in this app; editing it is restricted.
- Choose one useful check. In a fresh Plan session, paste the next prompt with its acceptance cases. Approve its proposed scope before switching to Build.
Objective: demonstrate the approved authorization boundary:
[paste the selected operation and expected owner/non-owner outcomes].
Success: a valid authorized action still works; a direct unauthorized
request is denied; the protected record stays unchanged.

Constraints: local Epic Notes and synthetic fixtures only. Preserve the
existing product behavior and permissions. No .env/secrets, installs,
network scans, external targets, global configuration, dependency or
lockfile changes, authentication redesign, commits or deployment.
Do not weaken or skip existing checks. No parallel writers.

Inspect the relevant code and tests. Choose the test tools and approach
already available in the project; explain the proposed scope and stop.
After I approve, write or reuse a meaningful regression, execute it and
the documented project gates, and report actual commands, exit codes and
gaps. Existing correct behavior may already pass: report that honestly.
If a defect appears, stop with a proposed fix for separate approval.
Then hand off to the tutorial's fresh Plan review. Give me acceptance
cases to evaluate in VS Code's integrated browser.- Let the agent write or reuse a test and run the checks. The existing rule may already pass. If it finds a bug, check the proposed fix before allowing source changes.
- Use the fresh Plan review in the integration chapter to inspect the actual changes and new tests. Then try both the allowed and denied actions in VS Code’s integrated browser.
- Explain what the results demonstrate and what remains untested. Write down who would handle a patch, where you’d look for logs and whom you’d contact if you suspected an incident.
Comparing with an existing server test
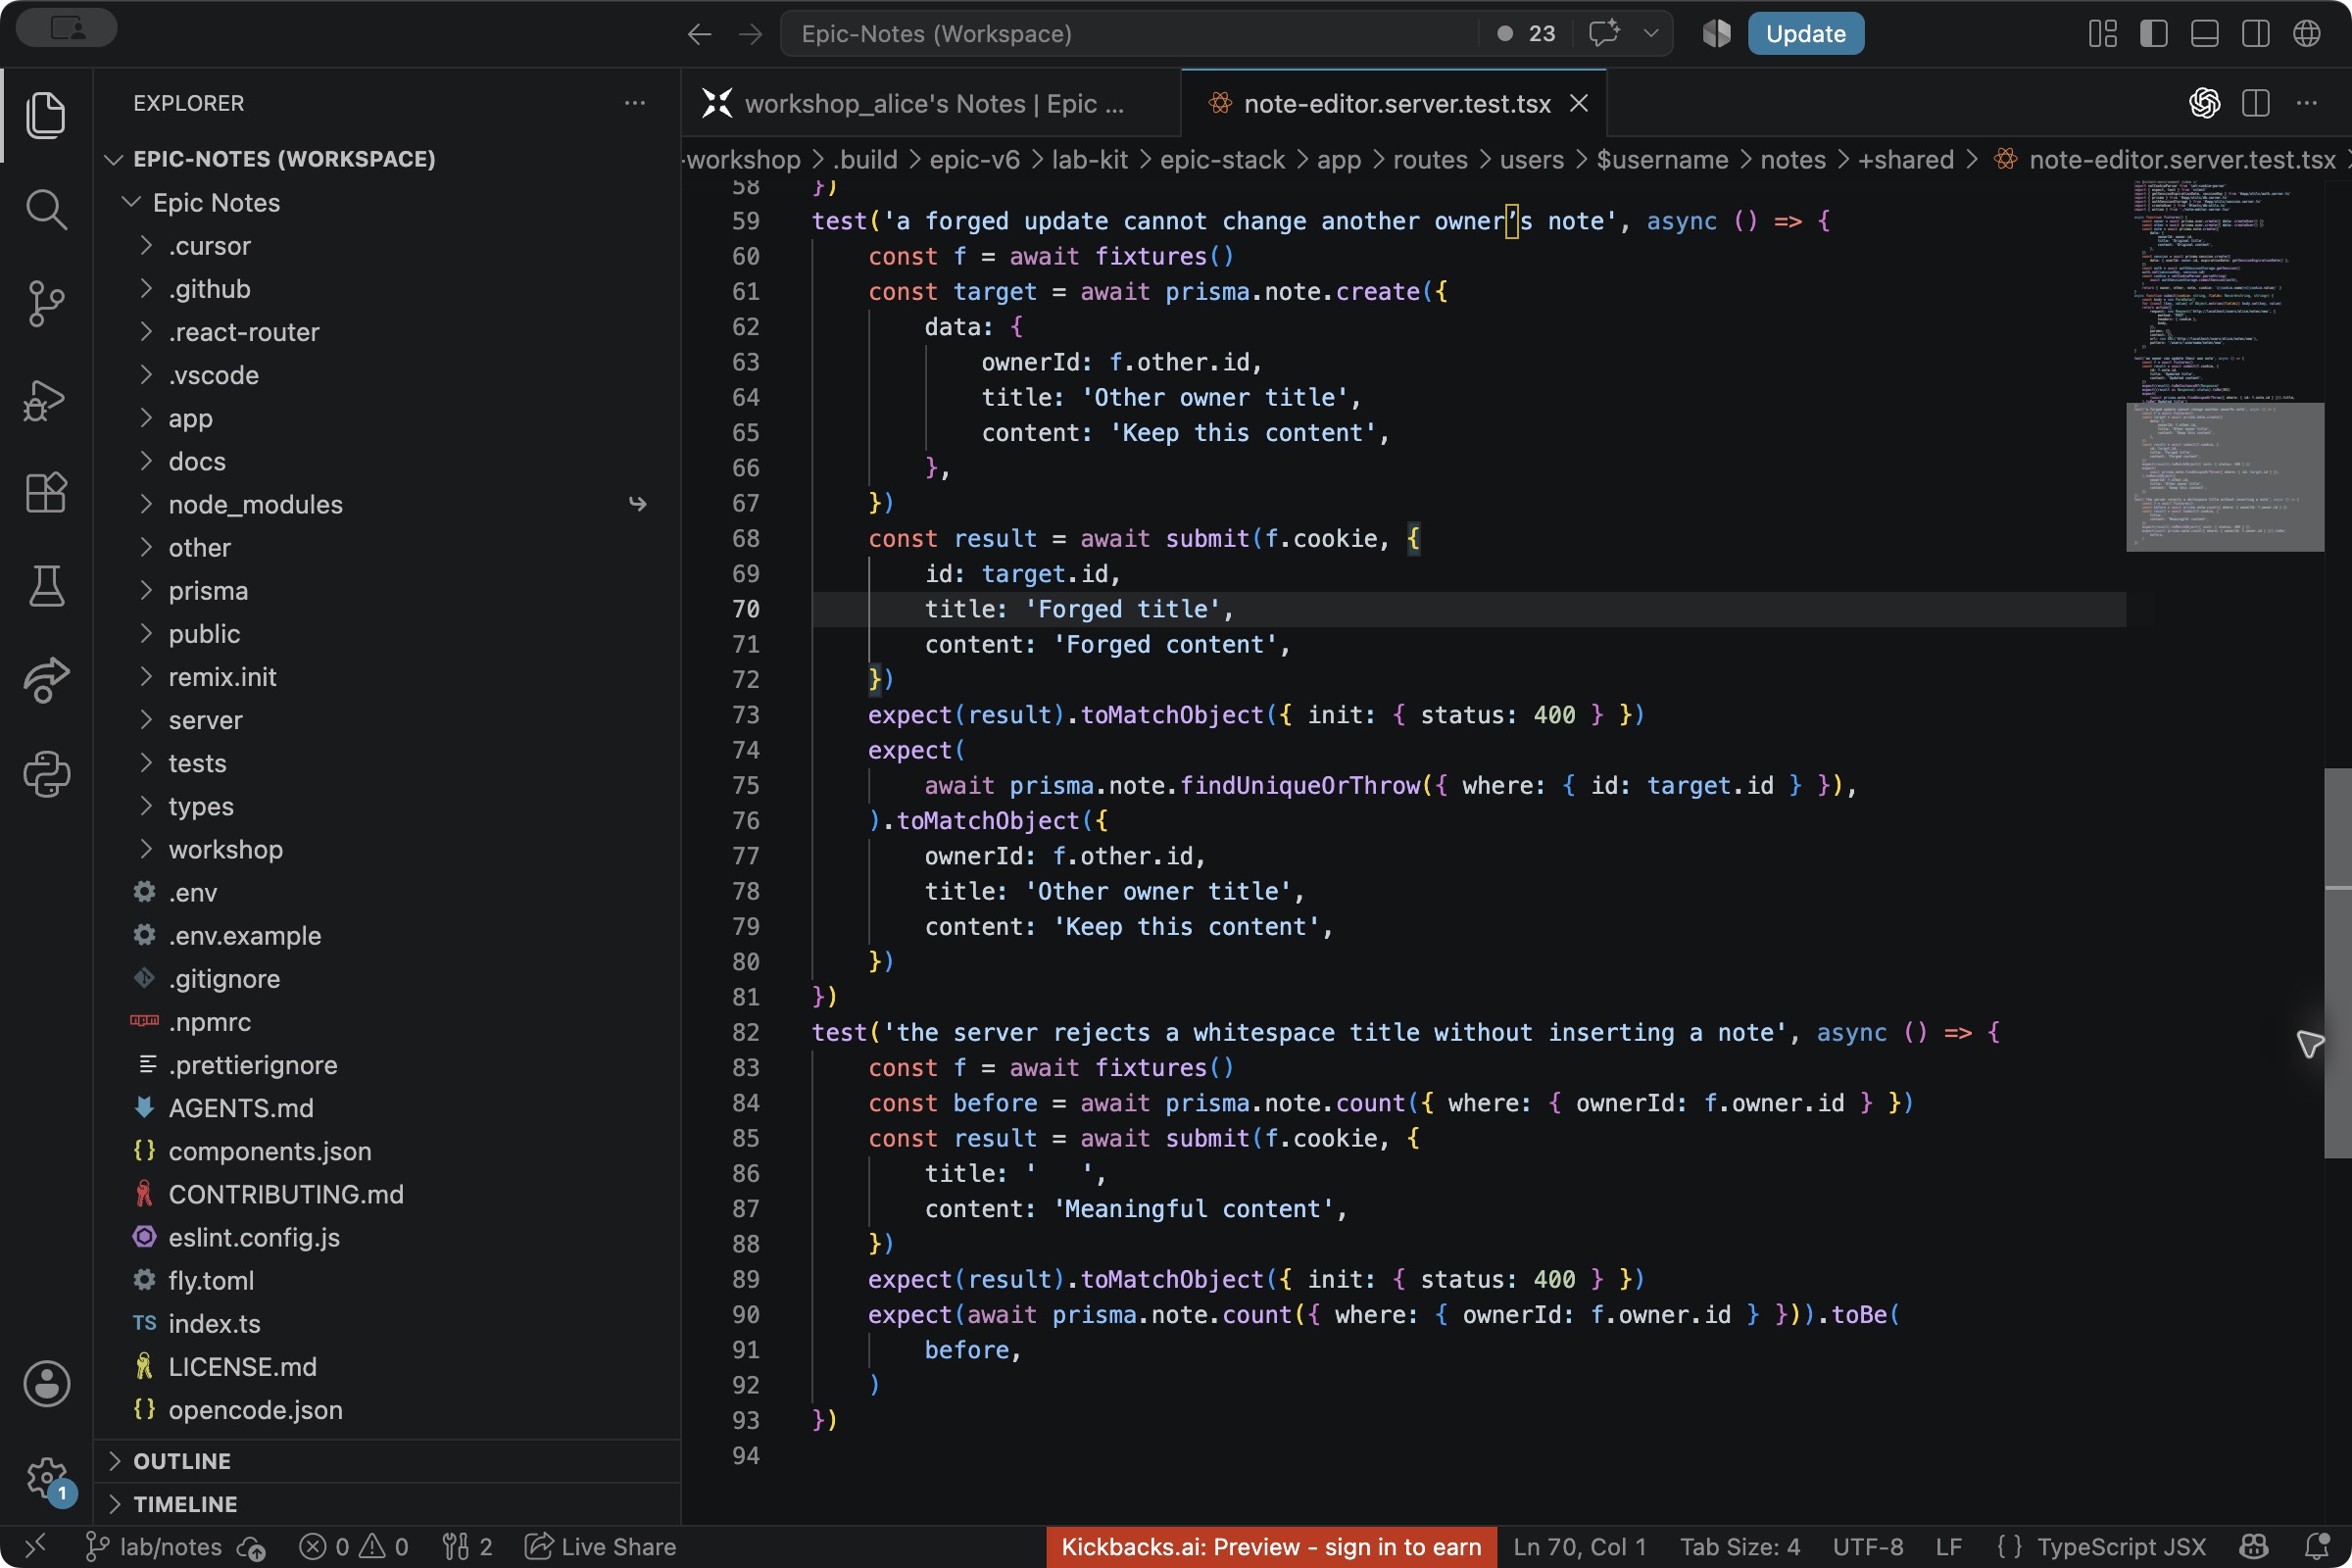
After the main lab, app/routes/users/$username/notes/+shared/note-editor.server.test.tsx contains this excerpt:
const result = await submit(f.cookie, {
  id: target.id,
  title: 'Forged title',
  content: 'Forged content',
})
expect(result).toMatchObject({ init: { status: 400 } })
expect(
  await prisma.note.findUniqueOrThrow({ where: { id: target.id } }),
).toMatchObject({
  ownerId: f.other.id,
  title: 'Other owner title',
  content: 'Keep this content',
})
The test creates a signed-in owner and another owner’s note, then submits a forged update. It checks that the update fails and the other owner’s data stays unchanged. The file also checks a legitimate owner update.
npm test -- --run --maxWorkers=2 'app/routes/users/$username/notes/+shared/note-editor.server.test.tsx'Sources and screenshots
The click-by-click guide uses actual shared VS Code, OpenCode and Epic Notes captures on macOS; Windows extraction images are from Inclusive Support, and the Git Bash menu is from VS Code’s terminal documentation. Windows extraction behavior is also described by Microsoft. Example paths in source images differ from your kit.
- VS Code terminal · Source Control
- OpenCode setup · Plan and Build · Permissions
- Upstream license. The kit prepares the existing Epic Stack application.
The sequence follows the original one-day program, with the tools and labs chosen later. The story structure draws on Matthew Dicks’s explanation of a moment of realization. The incidents are attributed to their sources. Examples introduced with “let’s say” are hypothetical, not things I’m claiming happened to me.